Chunky & Soft Crochet Baby Blanket

I loveee the Bernat Baby Blanet Yarn.

It makes a soft, lush and chunky baby blanket and is perfect as a car seat/stroller blanket.


Because of the thickness of the yarn, it works up super fast and in less time and effort you have a good size blanket that can be used in multiple ways 🙂

This blanket is special to me as I am making it for a new addition to our family. My sister is expecting a baby and she is due in December. They didn’t want to know the gender of the baby so made this neutral shade baby blanket.

This is my first pattern that I came up with and has Chain stitch, Front loop Single crochet (FLSC) & Front loop double crochet (FLDC) stitches.

Here is a tutorial to learn FLSC/FLDC stitch – click here.

Finished blanket is close to 30in*30in and you need a Size 10 crochet hook.

Step 1 : Foundation Stitch – Chain stitch 60 or equals 30 inches in length.

Step 2 :  Row 1- In 2nd chain from hook FLSC (Front loop single crochet) in every chain across and turn.

Row 2–  Chain 1 and  repeat FLSC (Front loop single crochet) in every stitch and turn.

Row 3 – Chain 2 and FLDC (Front loop double crochet) in every stitch and turn. Repeat this for next 4 stitches and turn.

With this the width of the blanket will total to 7 inches.

Step 3 – Repeat Step 2 for next 4 times – so it come to 28 inches ( 7 in *4 = 28)

Step 4 – End the blanket by adding one more FLSC (front loop single crochet) and continue to make a single crochet stitch all around the blanket. That will be the finishing stitch and will make the total size of the blanket approx 30 in * 30 in.

And that’s it you have a beautiful chunky and soft baby blanket ready. And I love the FLDC stitch because it creates a beautiful ridge pattern unlike DC (double crochet) stitch.

This blanket makes great baby shower gifts or new born and is super easy to work with. The total time took for me is 6-8 hours.

Cheers!!

Veggie Loaded Frittata

Last 2 years we have been eating healthy and made many changes to our food choices. Little change have made huge difference and I absolutely feel light, little leaner and have more energy. So, I thought I will share some of those recipes that are quick and healthy.Here is one such protein packed recipe that can be a great breakfast, brunch or dinner and incorporates lot of veggies and eggs 🙂

It can be customized with any vegetables and add-ins (soy chunks/cheese) that you and your family prefers.

Ingredients  (Serves 2-4)

6 eggs

1/2 cup milk

2-3 garlic cloves finely chopped 

Seasoning and spices of your choice

vegetables(frozen or fresh) and red onion, diced

How to make :

Heat the skillet over medium heat and add some oil/butter and saute garlic and onions until the raw smell is gone and season with some salt, pepper and oregano.Add veggies and cook until tender covered on medium heat. At this point I add some Indian spices like garam masala/kitchen king masala for extra flavor.Once vegetable are cooked whisk together eggs, milk, salt and pepper. Arrange veggies evenly and pour the egg mixture over the vegetables. 

Now its ur choice to either cook it on stove or preheat oven to 400 F. If you want to cook in oven – make sure to use a oven safe skillet and place it into the oven for 10-12 minutes or until set.

I find it easy to cook on stove. Sprinkle some fresh herbs of your choice and without stirring cover it and cook on medium flame for 12-15 minutes.

It is easy to check when set – insert a fork and if it comes out clean it is done. Serve warm.

Isn’t that easy and keep checking for  more healthy and delicious options 🙂

Cheers!

Pretty Paper lanterns

Paper lantern balls are all over and are used for almost any occasion in different shapes and colors. They are fun and easy way to decorate any space. In India, the lanterns are associated with the festival of lights – Diwali. But they can be used for any event/occasion to bring in the celebration mood 🙂

img_8212-1
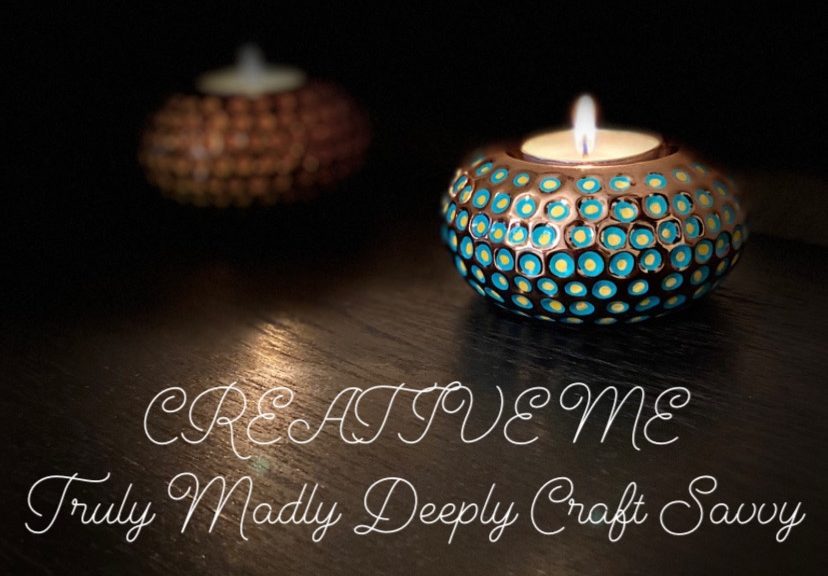
They can be just hanged by themselves or create a focal spot by grouping them together. Or even can be used to place it on a surface like a table top. Well, I made these large festive lanterns for Sankranthi Bommala Koluvu ( Doll festival in January) to cover LED candles on the wood candle holders.

Materials you need :

Choice of paper or poster board – 2 ( pref contrast colors)

Cutting mat

Craft Knife

Glue gun/school glue

Ruler and pencil

Rhinestone lace (from dollar tree)

Step 1: Take 2 sheets of paper. I used the poster board (22×28 inches)from dollar tree . You can make 2 large lanterns 11×14 inch each.

Step 2: Keep 1 sheet 11×14 inches and cut the other (contrast piece that goes inside as a tube) to 11X11. The tube length should be couple of inches shorter than the outer design sheet.

Step 3: Out of contrasting colored sheet mark 1 inch from the bottom of the sheet and draw a line. And on the line mark 1/2 inch dots all through on both the sides.

Step 4: Using a craft knife cut it lengthwise 1/2 inch apart from one end of the marked point to the other end. Carefully separate the strips and Glue the ends to the inside contrast sheet. Fold the sheet to form a cylinder and carefully pull and bend the strips to form different shapes like below.

img_6575-1

Step 5: Glue the rhinestone trims to the both ends of the lantern.

img_6573-1

Step 6: Punch holes at each end of the lantern and add a satin ribbon to hang it on.

These lanterns are just not hanging like traditional way – they also worked well to cover the LED candles

Aren’t they beautiful and  versatile.

Woven bamboo mat

img_8128

Today I am going to share this bamboo sticks mat woven from the scented decorative sticks available @ IKEA. They are in 4 fun colors and I can’t wait to make more projects with these bright n colorful ones.

The packet has 20 sticks priced @ $1.99 and many months ago I randomly picked them and have been waiting for the right project.  Inspired from sushi mat and ikeahackers.net I gave it a try and it worked perfect.

Materials you need – 

SALTIG Decorative stick – 1 pack

Cotton Yarn 

img_8108

Step 1 : Arrange the sticks making sure they all lay flat.

img_8107

Step 2 : Take a piece of yarn double the size of the width of the sticks and make double knot on the first one.

Step 3 : continue making knots on each stick on both the sides and cut the extra thread. And turn it upside down

And Tadahhh……

Isn’t that cute mat to display and brag about 😀

Cheers!

Pond Diorama

There is a long story behind this duck habitat diorama/project that I made for Bommala Koluvu 2016…..;-)

My love for miniatures made me buy the ducks used in this project. They are chopstick stand/holders that I bought in Singapore(China town) just before moving to United States. After we moved to US (2012) while unpacking I looked all my bags but couldn’t find them.

And in 2015 when we were moving from rental to our new home I was packing bags and found a small secret zip pocket on our suitcase that I have completely forgot about.  And I saw 2 bubble wrap pieces. I thought it is trash and almost about to throw it away and it suddenly stuck me ……..

I was so happy to see them again  ❤

Before I loose them I decided to use in some craft and that is when the pond diorama thought popped in my head 😀img_2879

This is a fun project and easy to put together. It can more fun if you have kid at home where you can involve them too in making this. It can be a great school project too..;-)

Supplies  you need to make this are –

Blue sand – Dollar tree

Moss sheet – Michaels

Stones, plastic plants and bushes – Walmart (Aquarium supplies aisle)

White fence (optional) – Hobby Lobby

Glue gun and modpodge/school glue

And here is how you make it –

Step 1: Take a cardboard that matches the size of the moss sheet. Use school glue or modpodge and glue it to the cardboard.

img_3490

Step 2: Mark a boundary for rocks and glue using hot glue gun.

img_3489

Step 3 : Apply some school glue/ modpodge to the inside portion of rocks and add the blue sand in layers. Leave it to dry for couple of hours. Glue the ducks, plants and bushes and you have it ready 🙂

img_3493

I made this for Sankranthi Bomalla Koluvu 2016 and displayed it as a little pond with a fence.

And this year for one of krishna’s stories – krishna playing flute in brindavan.

img_3709

Cheers!!

Bommala Koluvu 2017

Hello Friends,

I am super excited to share Sankranthi/Pongal 2017 Bommala Koluvu/Golu pictures.

img_3736-1It is my 3rd year display and I am so happy that the dolls are increasing and the steps/padi are filling up well.

Like every year, last couple of months have been busy preparing handmade dolls.  Just not the dolls but it took a lot of thought and effort for the golu backdrop. So, this year for a change,  I used a pattu (silk) Indian dress chunni as the main backdrop and added some lights, party streamer garlandfoam leaf toram and clay mural kalash .

And on both sides I have used floor standing candle pillars and replaced the candle with a  a handmade paper lantern ( that I made for Diwali). (tutorial coming soon)img_7385
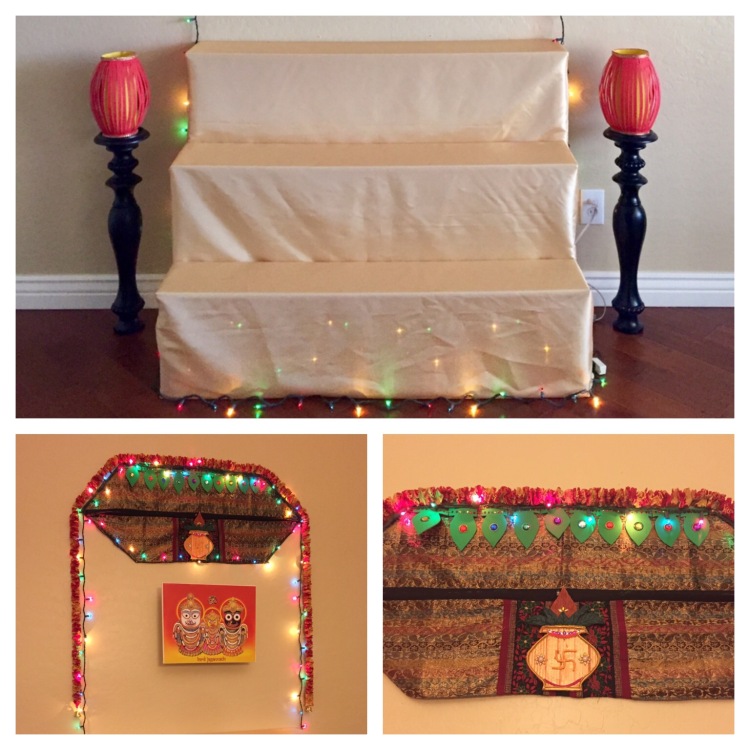
Also, this year theme is 5 stories related to Krishna’s childhood.

img_3709

I already have “Krishna, balarama and friends eating butter” doll set that I made to display @ local Hindu temple on “Janmasthami 2015”.

img_3690

So, I added 4 more sets describing  some of important krishna’s stories ❤

1. Vasudeva carrying Krishna 

The basket and krishna are made of polymer clay! And the snake(vasuki) is air dry clay and painted the details with some acrylic paint.  Vasudeva is a male doll make over – added red dhoti, some brown beads. For the beard and hair used some black felt.

img_3698

2. Baby Krishna killing puthana

Baby krishna is made of polymer and I draped saree to a female doll and curled it’s hair with curling rod and added other details 🙂

img_3704

3. Krishna and twin trees ( kubera sons) 

Kubera sons are again the same male doll as vasudeva and I dressed them up as prince with   some gold lace from hobby lobby and the crown is made of gold foam sheet. The 2 trees are  made of cardstock.

img_3707

4. Krishna playing flute and mesmerizing Brindavan

Krishna and the tree backdrop is from last year Janmasthami – here is the  link to make the cardboard tree.

img_3699
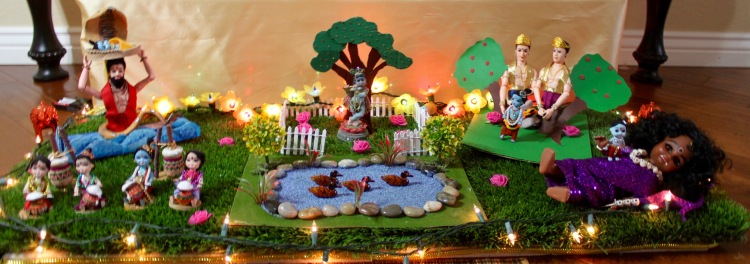
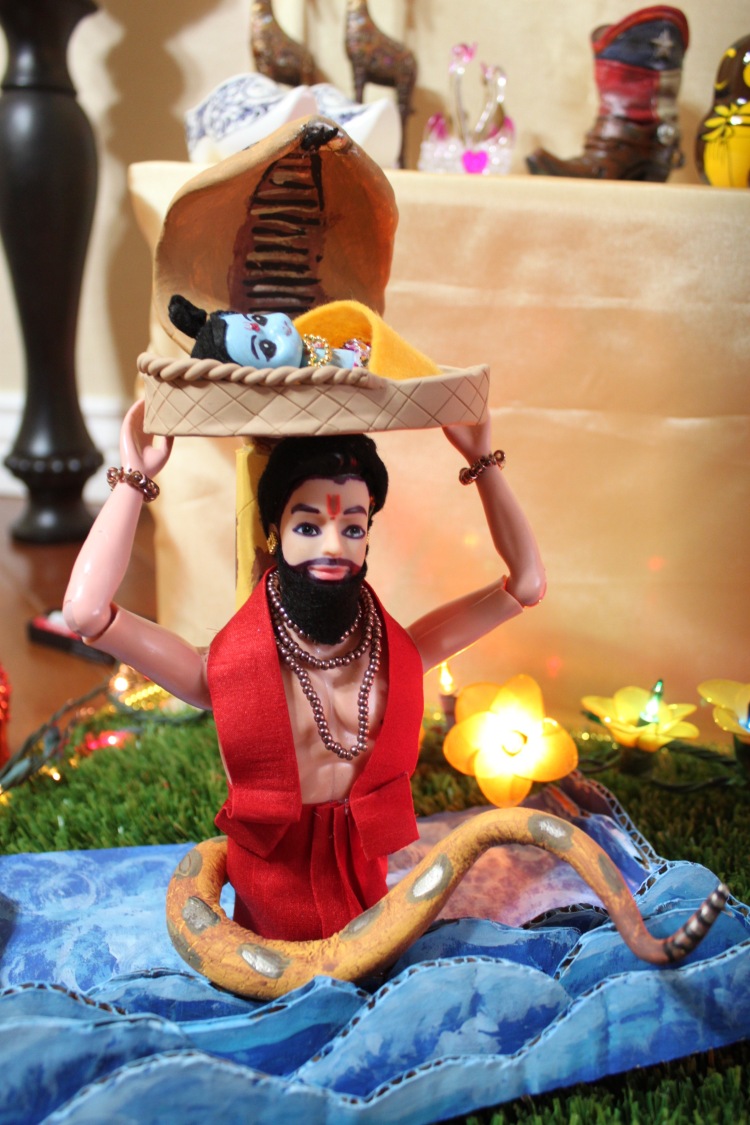
With these 5 stories -I have covered some of the most important events of Lord Krishna’s life and I can’t wait to add more for next year Bombala koluvu display 🙂

Hope you all enjoy this virtual display of our golu/koluvu.

Cheers!

Easily remove bottle labels and repurpose

I love to reuse/repurpose  glass jars/bottles. It may be just because of the size or shape or for some craft and sometimes even as storage for pantry. But the labels on them can be quite annoying 😦

So, Pinterest has countless ideas and tips on how to remove them -but for me the most important was mess free. I tried couple of them but the one I am going to share is absolutely “ZERO” effort.

Isn’t that awesome – the glass bottle is absolutely clean and looks new 🙂

This magic lotion is absolutely mess free and the stickers slide off without leaving any residue on the bottle.

To make the lotion you need –

1 tsp – liquid Dish soap

1/4 cup – Baking soda

1/4 cup – Vinegar

Enough water depending on the size of the bottle/jar

And all you have to do is – 

Fill your sink or a container big enough to submerge the bottle with hot hot water. Add liquid dish soap and give it a gently mix. Then add baking soda and vinegar.Once you add vinegar it will get fizzy for couple of seconds and that’s when the magic begins.

img_7242
Leave the bottles for couple of hours or until you see the labels off the bottle like here 🙂

img_7243

And Tadahhh….they are ready to use 🙂

You can use them to store homemade lemonade or get inspired from pinterest and upcycle them for some fun home decor.

Here is a shampoo bottle that was up cycled couple of years ago to a cute vase using some spray paint 🙂

img_9548

Cheers!

New Year’s Eve Bash

Happy New Year Readers!

We welcomed 2017 in a splendid way by hosting a New Year’s Eve party and it was so much fun and memorable..:-)

I wanted to try something different that’s going to stand out and..Yayyyy! it worked.

Yes, it is the fun photo session with some New Year props and party backdrop. I can’t wait to share how easy it is to set up something like this on budget 🙂

Photo Backdrop & Props -$10

Supplies you need are :

Plastic Table cover – Dollar Tree

Black and Gold Ballons – Dollar tree

Masking Tape – already on hand

2017 Photo Props – Ebay.com

New years Hat and Tiara – Walmart

Gold bead garlands – Dollar Tree

All you do is tape down the table cover on to the wall and add some helium balloons. Keep the photo props ready and let the guests take over…;-)

img_7216

We also played some games and here is a fun game to pass time until midnight 🙂

New Year’s Eve Game – Inspired from Pinterest 

You have to create some cards and let the players pick one each and share their story 🙂

Fill the cards with something like BEST GIFT OF THE YEAR, MOST MEMORABLE VACATION OF THE YEAR etc and it is fun to think about all good things happened in 2016 ❤

img_7211To make it little interesting I placed them in a paper fortune cookie 🙂  Make circles from cardstock and fold them and glue the tips. If needed use some clips until the glue is dry.

And when it is time to ring in the New Year a sweet treat is a must 😉

Here is my countdown cake that is really quick and easy to make. It has 2 layers of chocolate cake with a vanilla caramel ice cream sandwiched and frosted with some icing.

img_7223

The clock topping is edible sugar sheets and letters. To match black and gold theme, I used a metallic sugar sheet cut into circle and glued the edible sugar letters on to the sheet with  sugar water 🙂img_7212

We enjoyed the ice cream cake and ended the night with some fireworks 🙂

img_7230

Hope you all had fun welcoming the new year and wish you all again a happy and peaceful 2017.

Cheers.

Eggless cashew cookies !!

These crispy melt in the mouth indian style butter and cashew cookies go perfect with a hot masala chai ( indian spicy milk tea). They are so quick and easy that you’ll want to whip up a batch right now 🙂

They are also perfect as after school snack for kids or even to share with friends and family during festivals as they are eggless.

Prep time : 20 minutes                   Cook time : 22 -25 minutes                     Yields :24

Ingredients – 

All purpose flour(maida) – 1 cup

Powdered sugar/confectioners sugar – 1/2 cup

Roasted cashews -1/4 cup

Unsalted butter – 1 stick (4 oz) at room temperature

Salt -1/8 tsp

Cardamom powder – 1/4 tsp

Baking powder -1/4 tsp

Let’s see how to make:

Step 1: In a mixing bowl, add the butter that was left to soften. It has to be soft but not melting. Combine powdered sugar little at a time and keep mixing until it is light and creamy. To it add  cardamom powder and mix it well.

Step 2: Take separate bowl to sift all purpose flour(maida) with salt and baking powder. Combine the flour (little at a time) to the butter mixture until it comes together. Knead it well with hands to forms a soft dough.

Step 3: Coarsely grind the roasted cashews in a mortar & pestle and add it to the dough. Knead it until the nuts are mixed well with the dough.Wrap the dough in plastic wrap and let it rest for 15 minutes.

Step 4: Preheat the oven to 300 F (150 degrees C). Divide the dough into equal sized portions and roll them into a smooth ball with no cracks. Place them on a cookie sheet lined with parchment paper and bake for 22-25 minutes.

As each oven is different please keep a close eye after 18-20 minutes.

Let the cookies cool for 5 minutes before transferring on to a cooling rack.

And you have delicious cashew cookies ready to eat 🙂

Store in a air tight container and they stay fresh for 5-7 days.

Cheers!

Clay Urli pot for Diwali

Diwali is incomplete without diyas,rangoli (traditional Indian chalk art), bright and  beautiful decorations, yummy food, family gatherings and fireworks. When I think of decorations – the first on the list is illuminating every corner of the home with diyas/candles and the second is urli pot filled with rose petals/fresh flowers and candles 🙂

Living away from home, I miss having this decorative piece for Diwali and this year I decided to use a terra-cotta cactus/round dish as a substitute. It will not replace the traditional brass uril but for sure warm and welcoming.

Here is before and after picture 🙂

This clay cactus dish is available @ home depot and has perfect depth and width to use it as urli pot. Since it is a garden pot it has drainage hole and all you have to do is to fill it with some waterproof silicone sealant/caulk.

Place the pot upside down and use some duck tape to close the hole.

Turn it right side up and squeeze out some Silicone sealant to fill the hole.

Use a toothpick to spread it making sure the hole is filled without any gaps/vaccum.

Instructions on the silicone caulk says 30 minutes to dry, since the hole is large and we squeezed quite some I would suggest to leave it to dry overnight.

Once dry you have the pot ready 🙂 You can decorate the pot in multiple ways – go with a solid spray paint or give some details with acrylic paints and embellishments.

img_6548

Isn’t that perfect and beautiful for Diwali….

You could use it in multiple ways – indoor or outdoor, on floor or on a platter stand.  All you need is to fill some water and arrange fresh flowers. Don’t forget to use some floating candles for Diwali 🙂

img_6559img_6558

And here is a picture from Diwali 2k16 with the urli pots filled with flowers and floating candles 😍


Happy decorating!!

PLEASE NOTE : THIS PROJECT CAN BE MADE FOR PERSONAL USE ONLY, NOT FOR SELLING OR REPLICATION AND REPOSTING ON DIGITAL MEDIA ( YOUTUBE/INSTAGRAM/WEBSITES).

Cooking Without Limits

Food Photography & Recipes

Travelling Krishnaite

Shekhar Srivastava's Blog

Live-😊-Life..

"It has everything in little as a HAPPY package!!"

DesiCrafts

A blog Dedicated to Indian handicrafts, Fabrics and Supplies

Fulgorine

My adventures with art and polymer clay

The Beaded Bazaar

Polymer clay creations

Learn Polymer Clay

Inspiring you to explore your creativity and get down to work! A great collection of Free Polymer Clay tutorials

Wear the Ducky Tie

A Sewing Blog

sewmanju

Make your own style

SEW KATIE DID

because thread is the best glue.

The Crafty Coup

Finally, you're here! Let's make something!

The Daily Post

The Art and Craft of Blogging

WordPress.com News

The latest news on WordPress.com and the WordPress community.

%d bloggers like this: