Egg toast for toddlers

Egg toast is a popular and most common breakfast/evening snack and in India it is a pretty popular street food too.

Most of us make it very often in our households and have a favorite recipe that worked out well for our family. Well, I am today sharing a very simple basic recipe that my toddler loves.img_2099Firstly, she loves eggs ( in any form) and that is the only breakfast she eats. Also, she loves vegetables. So I add a ton of veggies to her omelette, scrambled egg or just give a boiled egg and avocado with a sprinkle of salt and pepper.

This super quick version of egg toast helped me to make her eat some bread  and she seems to enjoy it too 🙂

img_2148

Ingredients :

2 eggs

2 slices of bread

Veggies of your choice – I used onions, peppers, cilantro, spinach

( Add chillies for older kids who can take spice or adults)

Salt and pepper as per taste

2 tsp of water

Preparation :

Finely chop onions, peppers, cilantro and spinach. Beat 2 eggs and add salt, pepper, water, and chopped veggies and mix everything well.

  1. Take a pan/tawa and add generous amount of butter and spread it well to avoid sticking.
  2. Dip one side of the bread slice in the egg  mixture and fry it on the pan/tawa until cooked. When you dip since it takes only the egg mixture you can top it with some veggies.
  3. Cook until the egg is completely done and fry the other side until crisp.
  4. You can add some grated cheese before flipping.
  5. Serve the egg toast hot. ( dipping sauce is optional)

This makes a great breakfast or after school snack. Or something new to cook during quarantine/lockdown time.

Hope you enjoy it.

Stay home. Stay safe!

DIY Pom-Pom Garland

Pom-pom garlands are fun, colorful, easy, quick and inexpensive décor to add to any room. They look more colorful and cute in kids room/nursery.

img_6456

I love how it turned out in S room. Sometimes a small addition brightens the room and this is one such project/décor. Basically, you can make it in any color – solid, contrast, rainbow or coordinate with the current room décor.

To match the giant paper flowers (from my babyshower), I picked shades of pink and white.

img_6450

All you  need to start this easy project is lot of pom-poms :-). They are available online or look at your local craft store. To make them as a garland you need a satin thread and a large-eye plastic sewing needle.
img_6421

Take a long piece of string (depending on how you want to use) and tie a knot at one end of the thread. Sew the pom-pom’s and while doing it so put little spaces in between and when done tie the other end.

img_6422

The pom-poms will not fall off unless you use a very big needle and a heavy string. So don’t worry about tying knots on either ends to hold them.

That’s it – all done 🙂

img_6455Isn’t that a fun and cute project ❤

If you happen to make this don’t forget to share pictures. See you all in my next post!

DIY Projects for Diwali

Hi Readers,

It is about a month for the festival of lights and here are some easy and fun projects for this Diwali.

DIY Diya painting

Diwali - 2

Diwali Flower Wreath

Diwali - 3

Clay Urli Pot for floating candles and flowers

Diwali - 1

Fun kids craft

Diwali - 4

Paper Lotus wall/floor art

IMG_1504 (5)

Clay Candle holders

Diwali - 5.jpg

Paper Marigold – festive decorations

IMG_2242

Air-dry clay Diyas

Diwali - 6

Ganesha Wreath

IMG_2963 1

DIY Paper Toran/Garland

Diwali -7

Diwali Rangoli

Diwali -8

Hope you enjoy making some of these projects 🙂  See you all in my next post.

Palavelli for Ganesh Chaturthi

Ganesh pooja without palavelli seems incomplete. In the southern part of India, especially Andra Pradesh it is a tradition to hang the wodden grid called palavelli above Lord Ganesha during Ganesh pooja. The pooja prep starts with placing the palavelli.

When we were kids we used to wait for my dad to tie it up to the window and we would decorate it with hanging fruits, mango leaves and flowers. Same was the case with my husband’s family when they were kids. So for both of us Ganesh pooja has fond memories and he is our favorite god too 🙂

And we both performed the pooja post marriage with the same enthusiasm and devotion but one thing that we missed was the palavelli. We thought we should get one from India in our next visit.

However, my husband decided to make one from the basic wood trims and dowel rods available @ Homedepot. He designed it in a way that it can be taken apart easily and reassemble too. Here is how it looks 🙂

IMG_3511It is simple, easy and a quick project. And we have been using from past 5 years and it still looks great and easy to assemble every year before pooja.

All the supplies are available at the local home improvement store..

What you need:

Decorative trims from Homedepot  – 8 pieces ( sold as 8 ft panels and the HD staff helped us to cut into 2 ft trims)

1/2 inch Hardwood round dowels from Homedepot

Magnets – 8

Small hardware nails

Hot Glue Gun/Gorilla wood glue

Basic wood squares (left over from my Golu Padi Project)

Let’s assemble the pieces:

Start by laying the decorative trims as a grid (4×4) and use hot glue gun/wood glue to glue the pieces.
10599411_10152720817357059_8937066836147588088_n[1].jpgUse the hardware nails and add the small wood square base to the dowel rod. This helps in giving some support and stand up well as a mandir. 10457930_10152720814772059_6552548086848904735_n[1]Next add the mangets on the 4 corners of the grid and the dowel rods. Make sure you place the magents on the right side before gluing them. The magnets glue well with hot glue gun.

And Tadahh…..

10641157_10152720817662059_3617094739710470055_n
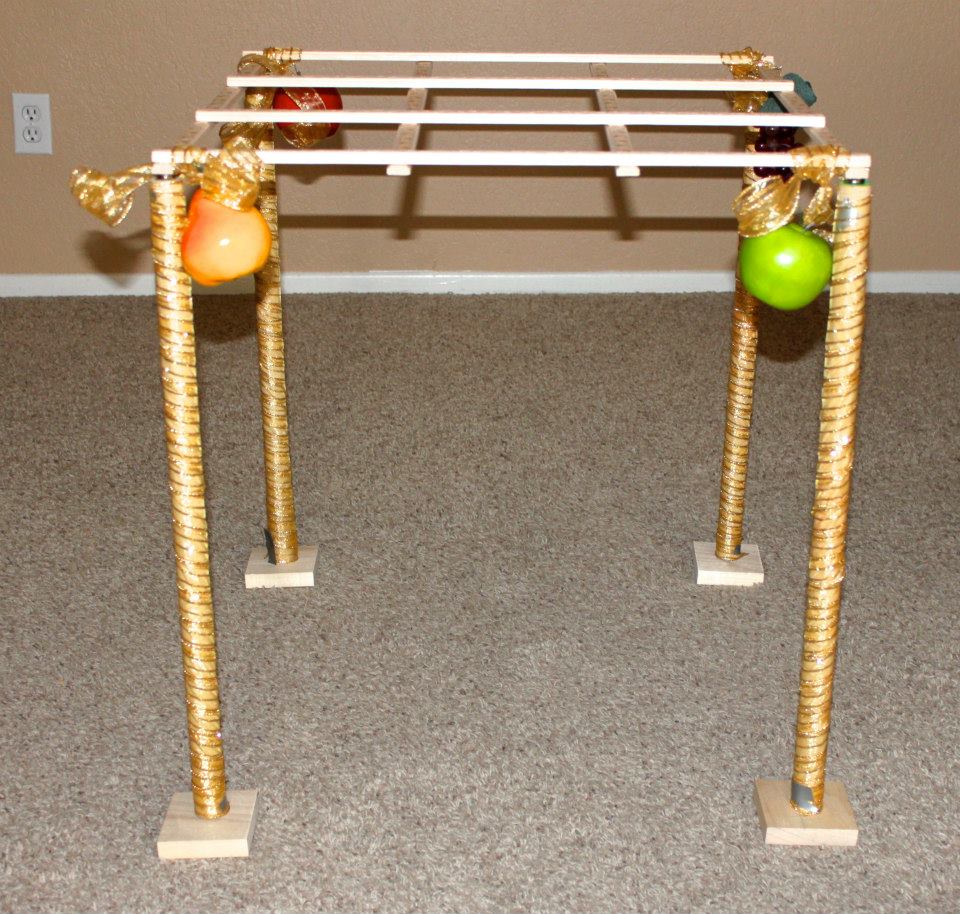
You have the palavelli ready. Decorate the grid and the dowels rods as per your style.

If you have a plan to hang it you can totally skip the dowel rods and hang the grid and use it. And post pooja they are easy to store as well.

Here is a picture from 2016.

img_3493This year Ganesh pooja is falling on a public holiday ( here in the US). I have a week left and can’t wait to make a handmade idol and have the pooja pictures in my next post.. 🙂

Happy Ganesh Pooja!!

PLEASE NOTE : THIS PROJECT CAN BE MADE FOR PERSONAL USE ONLY, NOT FOR SELLING OR REPLICATION AND REPOSTING ON DIGITAL MEDIA ( YOUTUBE/INSTAGRAM/WEBSITES).

Varalakshmi Vratam 2019

Like every year this year too I made a new Saree & Pallu Set for Lakshmi Deity and the colors I picked matched mine and Sisira’s attire (a closest match though) ❤

IMG_1498

The fabric I used is a silk Dupioni (available in the US in yards) and the gold and green silk border is from etsy.com. I wish I was able to decide on the colors when I visit India – so I can shop the fabric and other embelishments. But I am glad we find some of the silk fabrics and trims here too.

Hopefully, in my next trip I get a bunch of colors that match all of my silk sarees 😉

Well, the backdrop this year was Lotus. I made these using cardstock and here is my tutorial to make paper lotus. I have considerably reduced the size of the flower compared to the one I have posted in the tutorial to match the occasion. Here is a closer view of the flowers.
IMG_1504 (5)
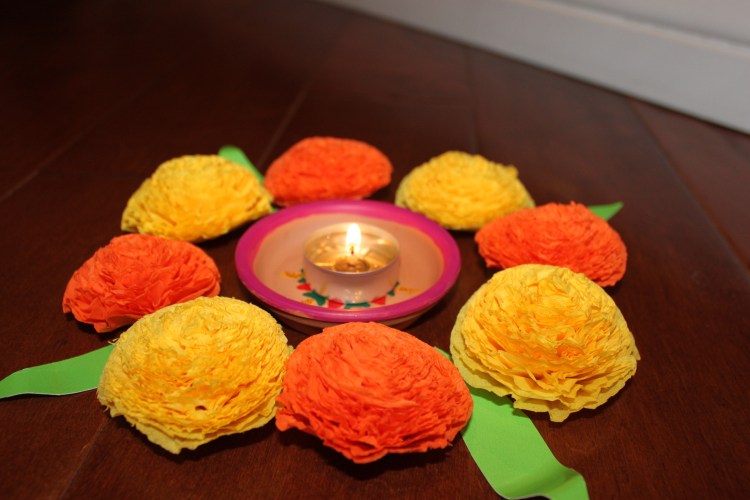
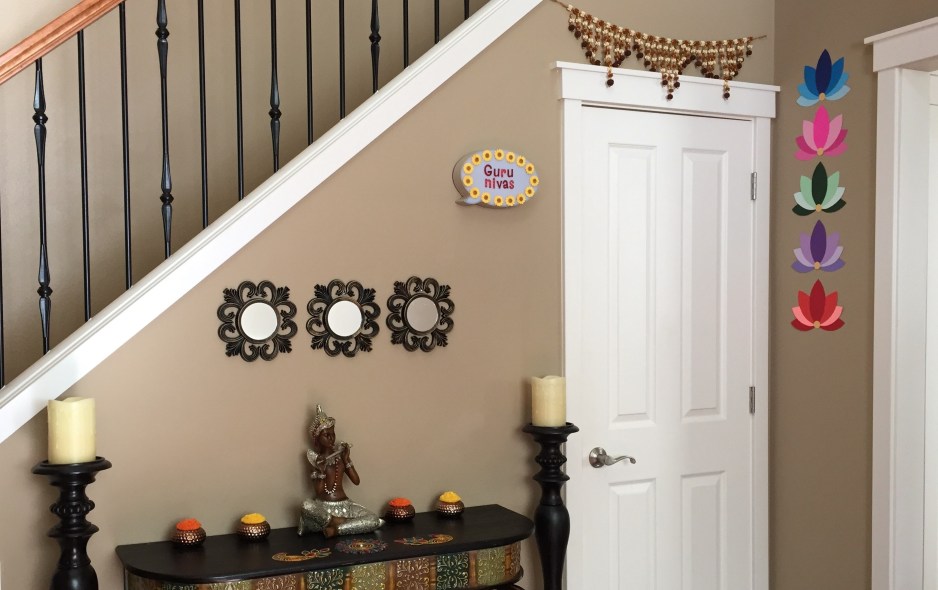
I had a grand plan of setting up those flowers as backdrop but with a super active 17month old I had to change everything and set it up in our prayer room and that has restricted me to decorate. Although I was disappointed for a while I was able to figure out a pattern and loved how everything turned out 🙂
IMG_1514

To glue the lotus flowers I have used painters tape and for the teardrop and the little circles a glue runner and it was pretty quick and sturdy too.

Overall, it was a great day with family and friends.

IMG_1497

And last year ( 2018)  was Sisira’s first pooja and I didn’t get a chance to make a new set – here is a pic of us from last year .

PLEASE NOTE : THIS PROJECT CAN BE MADE FOR PERSONAL USE ONLY, NOT FOR SELLING OR REPLICATION AND REPOSTING ON DIGITAL MEDIA ( YOUTUBE/INSTAGRAM/WEBSITES).

Paper Lotus Wall Art!

Lately, paper crafts have been my go-to party decorations – they are easy, quick and inexpensive too. I did couple of projects on paper flowers and I love how elegant and real they look, if done well.
img_5920
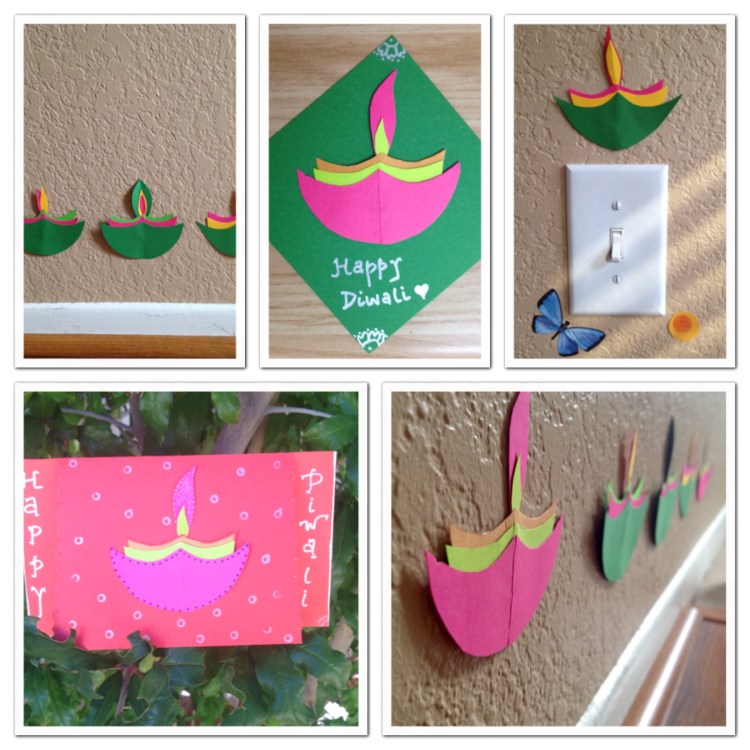
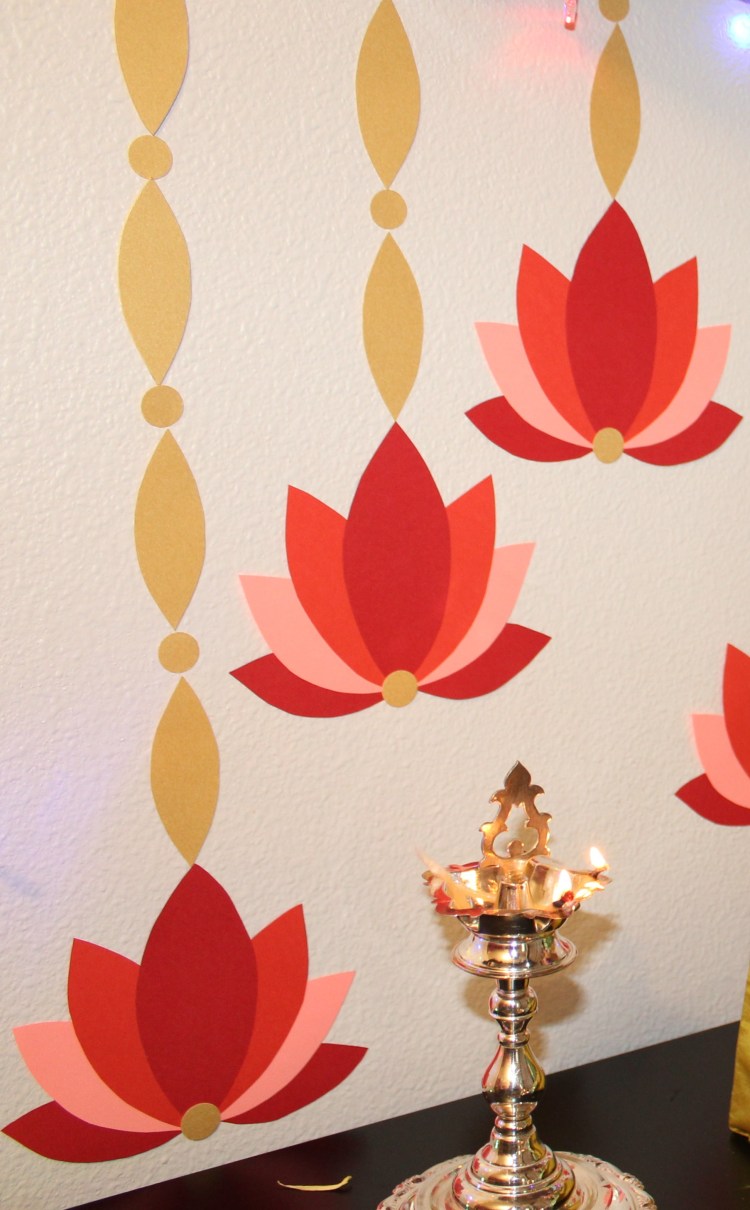
One such project is these paper lotus using cardstock from Michaels, I like using a gradient to create these, but of course you can use whatever colors you’d like.

img_5923So, I started with a free tear drop template and resized to 89% while printing. That is the largest size of the petal and the rest 3 sizes were 80%, 69% and 50% respectively.

It took me couple of trails to get the right size – you can vary the sizes too, based on how big you like your flowers and how you’d like to decorate. Once you have the size trace the petals on to a cardstock and gather the pieces and a glue stick.

img_5883
Let’s start assembling the flower. 

The flower is made by gathering the petals upside down. Start with the largest teardrop at the bottom and glue the next size petal on top and so on until you finish all the petals.

Turn the flower right side up and you have a pretty lotus ready to use.
img_5887
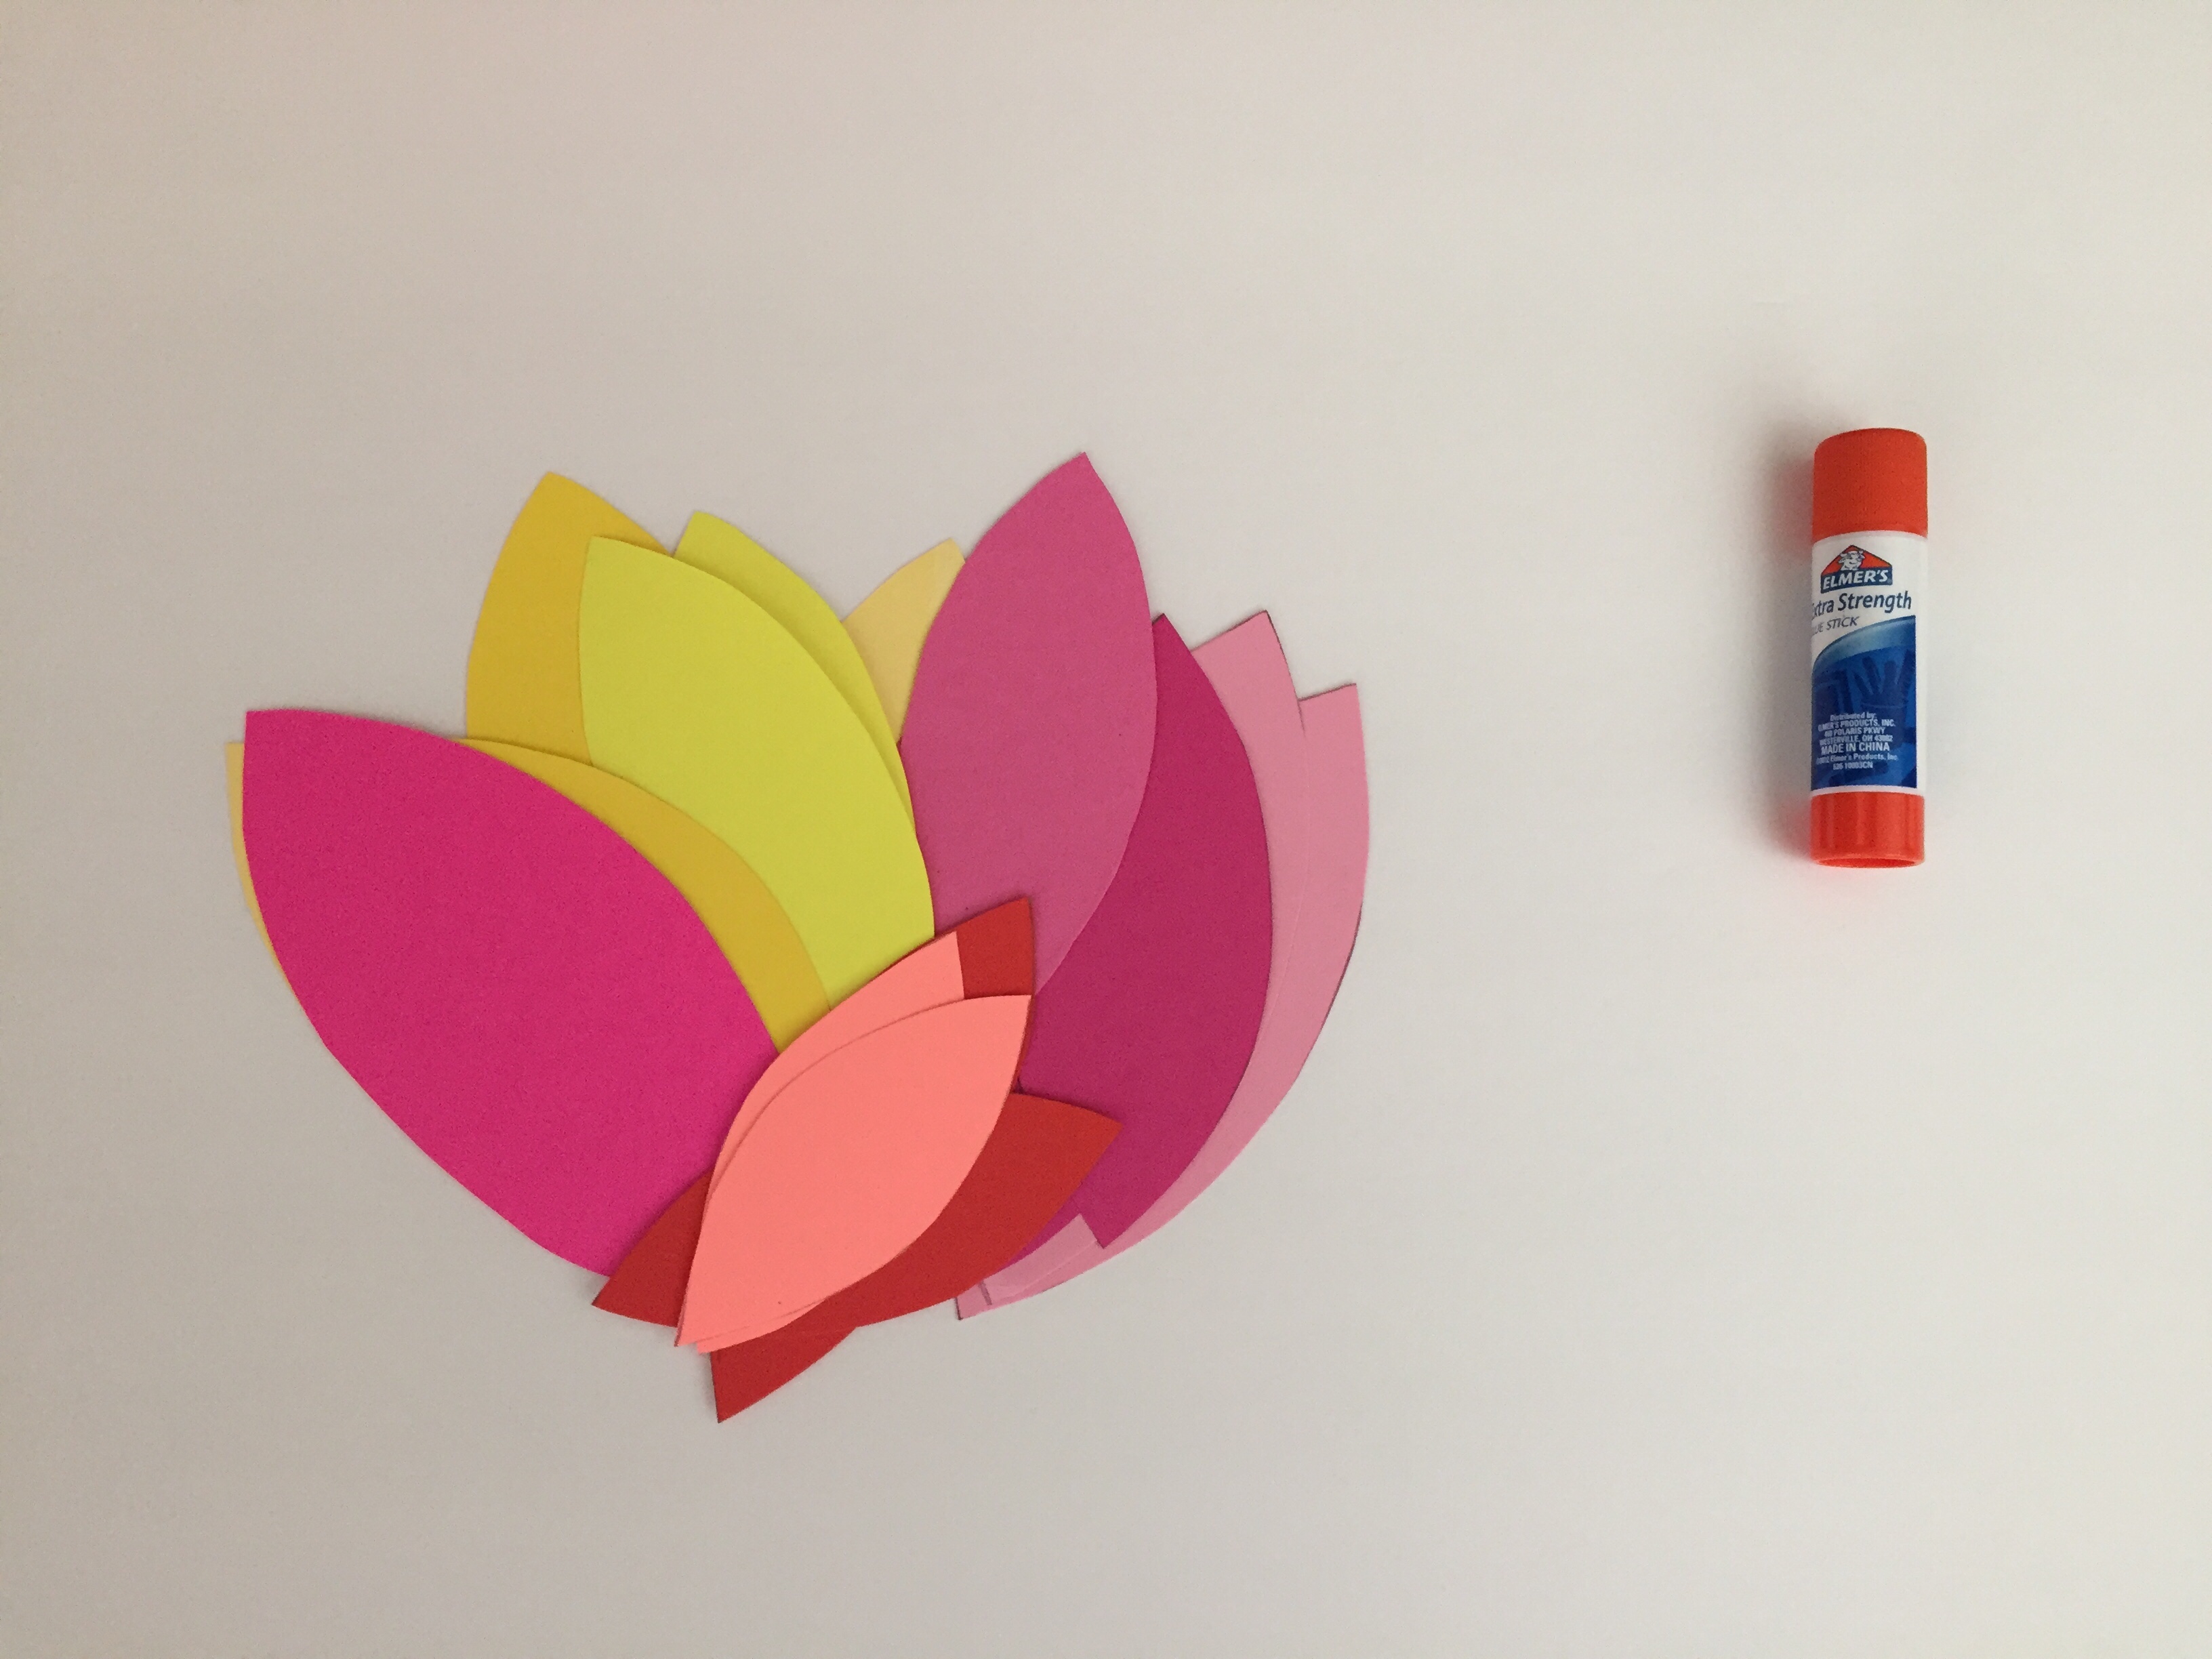
Use the finished lotus as a base to assemble the rest of the flowers.

img_5890
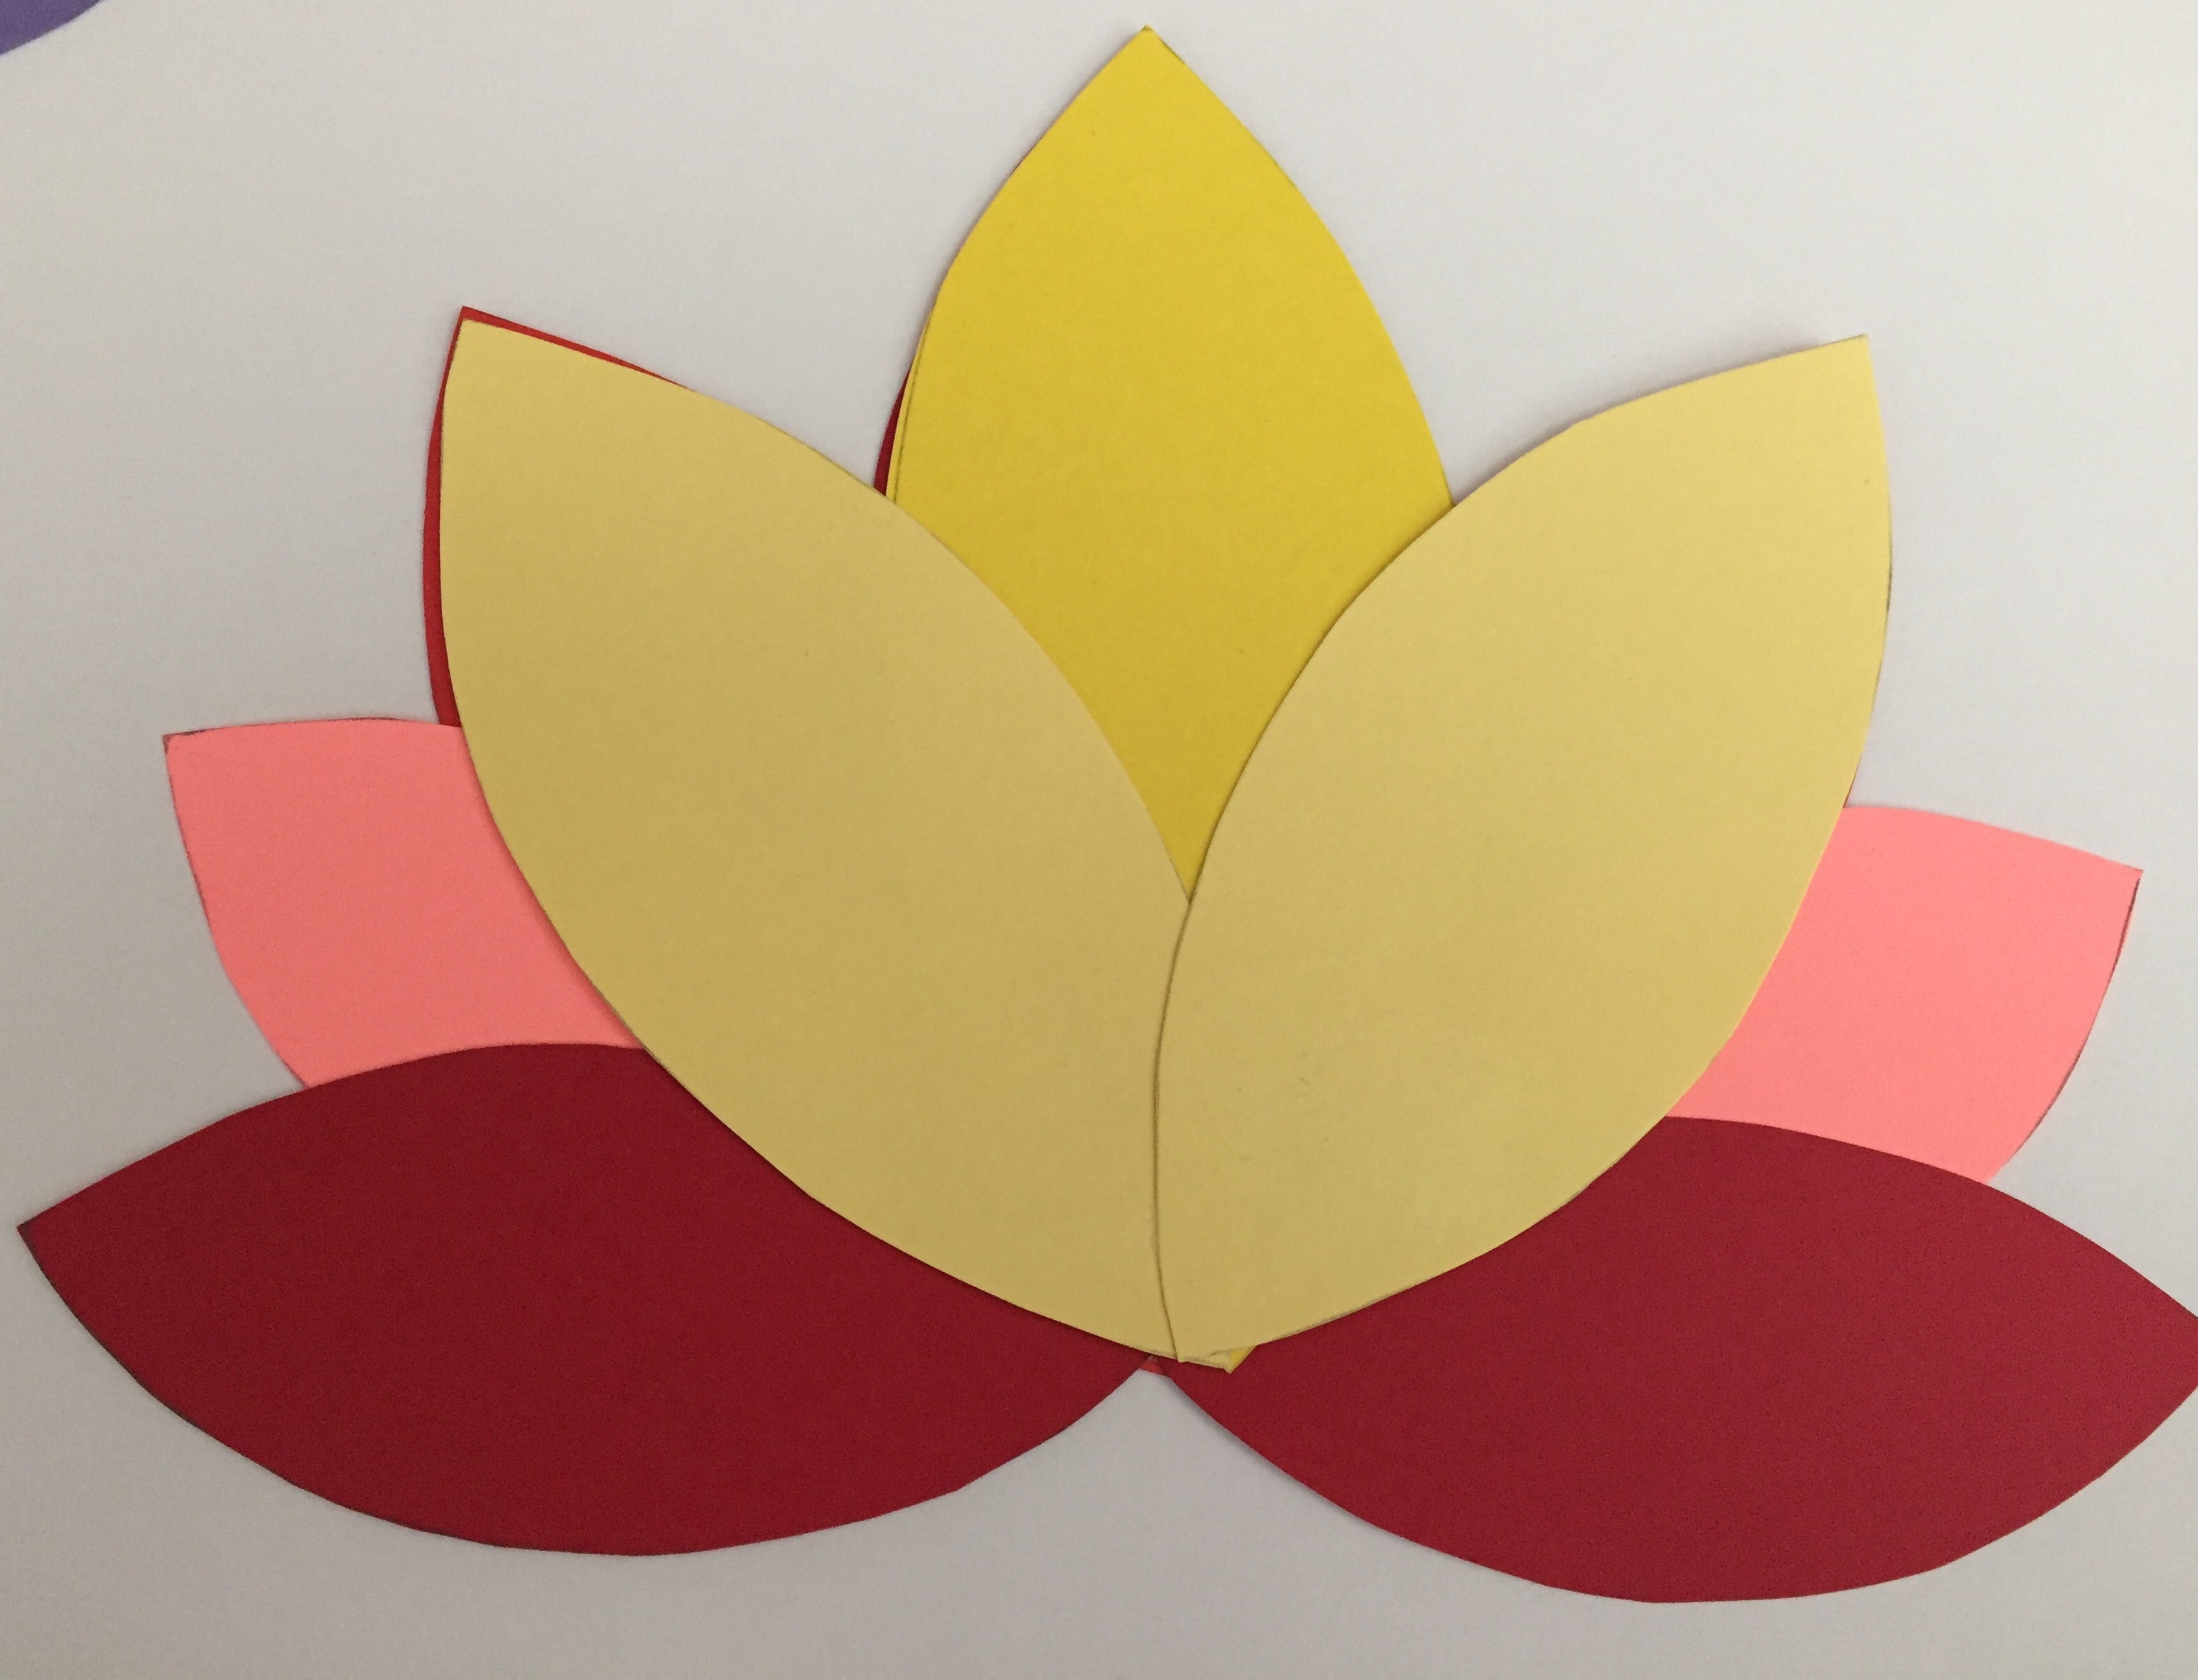
To complete the look I added a small circle at the center with some leftover golden cardstock from my previous projects.

img_5912And that’s it – use some painters tape and they are ready to decorate!

img_5922

Hope you liked it!! I can’t wait to share the gaint flower backdrop I made for my baby shower.

PLEASE NOTE : THIS PROJECT CAN BE MADE FOR PERSONAL USE ONLY, NOT FOR SELLING OR REPLICATION AND REPOSTING ON DIGITAL MEDIA ( YOUTUBE/INSTAGRAM/WEBSITES).

Easy Baby Blanket – Revisited

One of my all time favourtie and practical gifts for babies and toddlers is Blankets. You can’t have too many of these.

So a must project before baby ‘S’ arrived was a set of blankets in multiple sizes and multiple styles 🙂 They were super handy for the changing weather 🙂

img_0650

I have already posted a tutorial on how to make these beautiful baby blankets HERE.

The Giraffe minky blanket and the cat naps fleece blankets are half yard and they were prefect for an infant to use in the carseat/crib.

And this my favorite – we used it for her new born photo shoot ❤
2706602-011

The other 3 blankets were yard size and are great size for toddlers too. Like I mentioned in my previous post Fleece is my favortie fabric and at Joann Fabric you get a ton of cute prints and most of the days they are on sale.

And the skill level for this project is very basic too – so try your hands and I bet you will not stop making baby blankets 🙂

Cheers.


Carrot & Pea patties for Baby/Toddler

I am so excited to share a recipe that will get your kids to eat and love veggies. Here is an easy carrot & pea patties  that are great for baby/toddlers.

img_4817

These patties are so versatile that you can serve them as a delicious savory breakfast, pack them in lunchbox or serve them for dinner.

My 1 year old loves finger foods and she eats better if she feeds herself and she loves “Peas” and also asks in a cute way in every meal. So, I had to come up with a recipe that is delicious and quick too.

Yes, these are absolutely quick and all it takes is 20 minutes and 5 ingredients.

img_4819
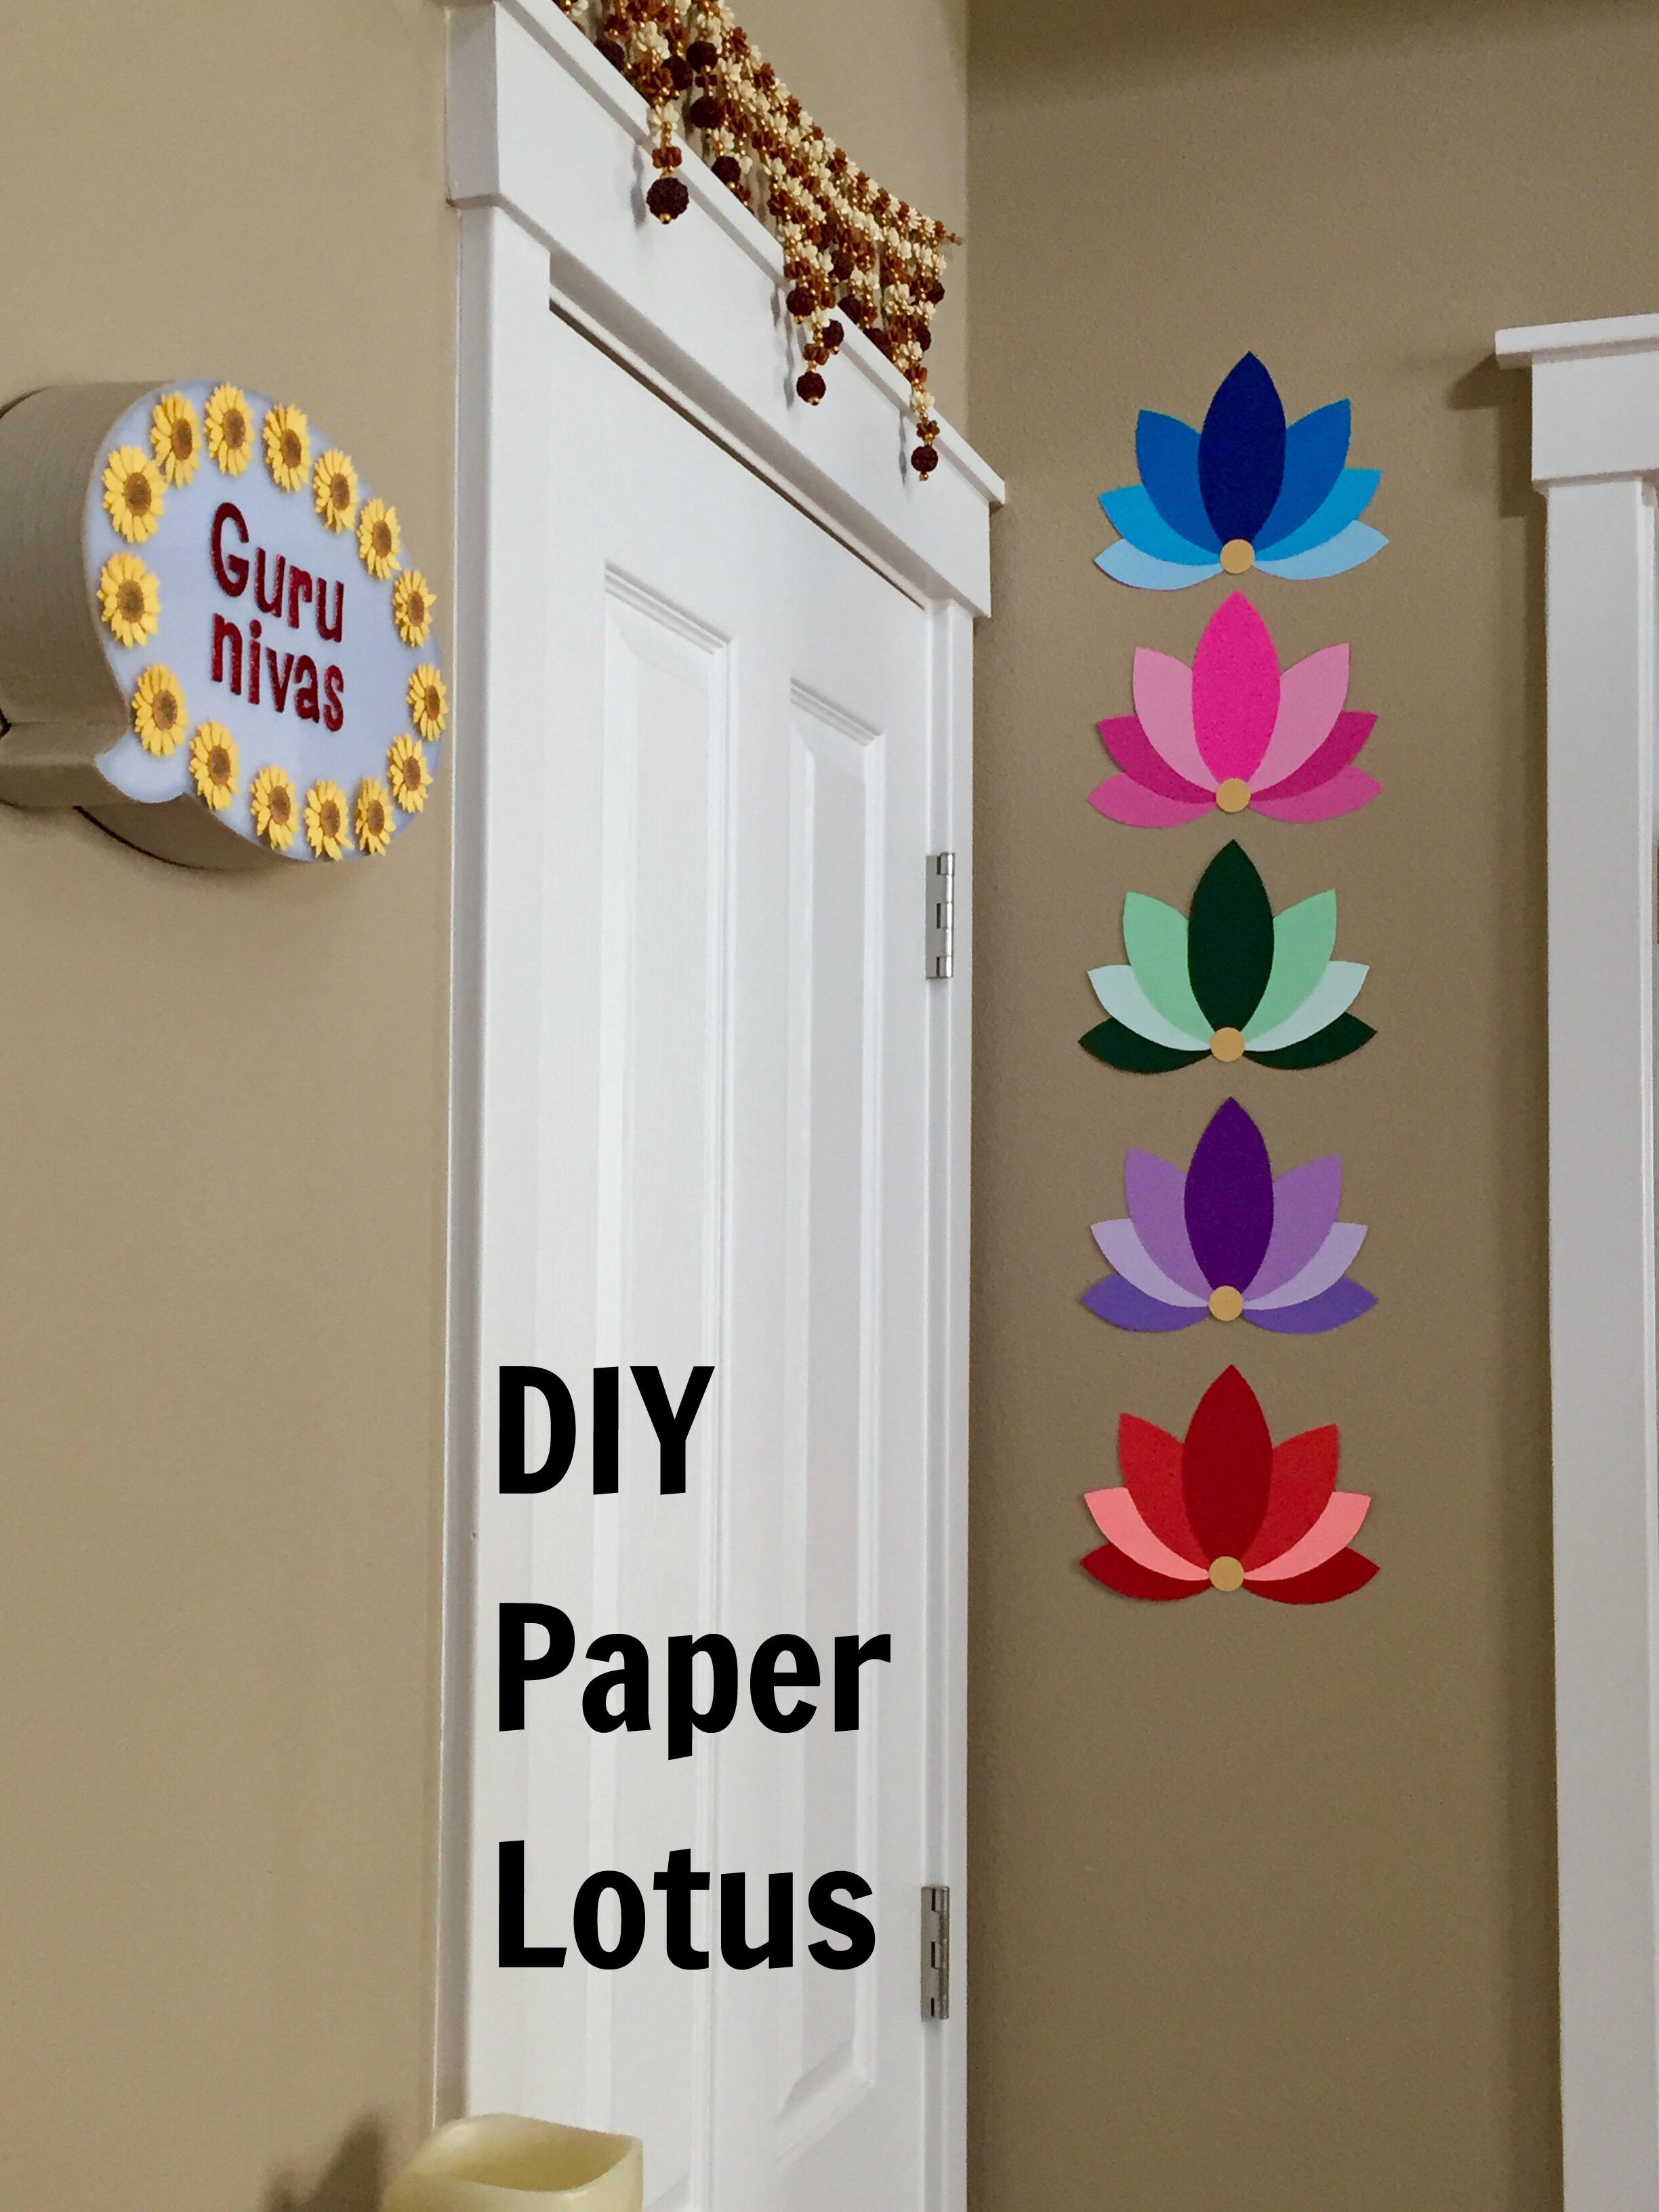
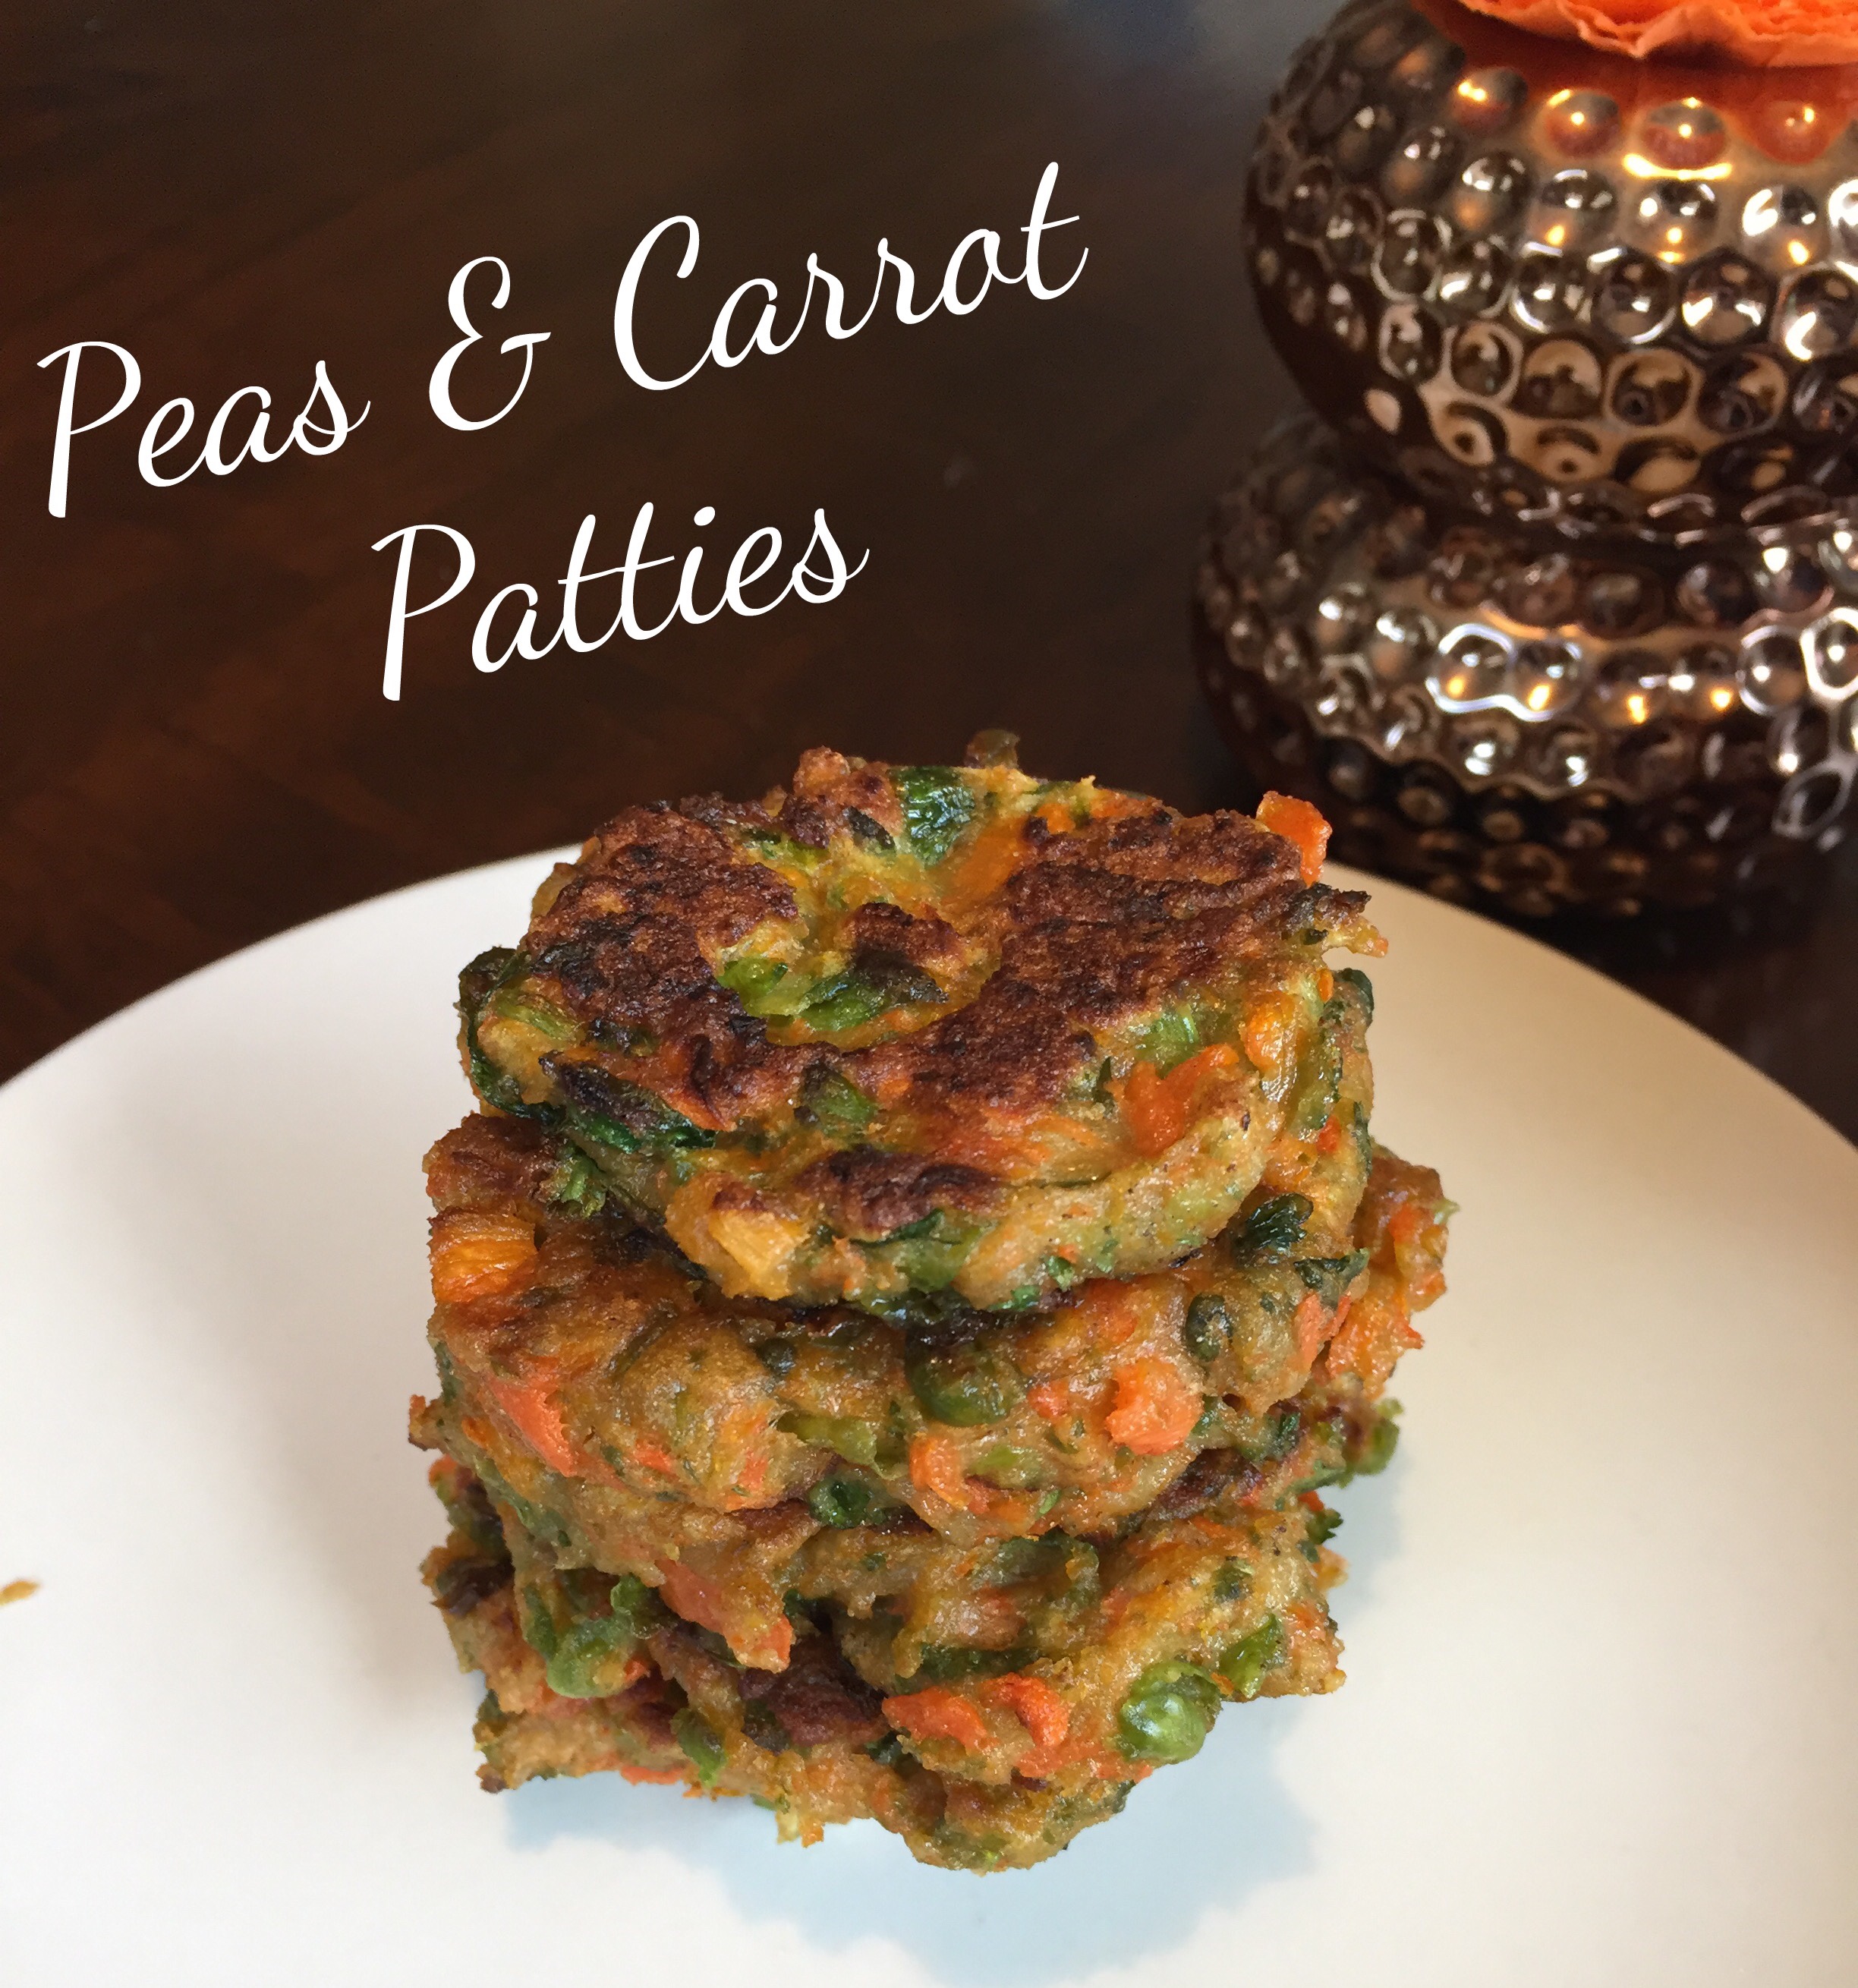
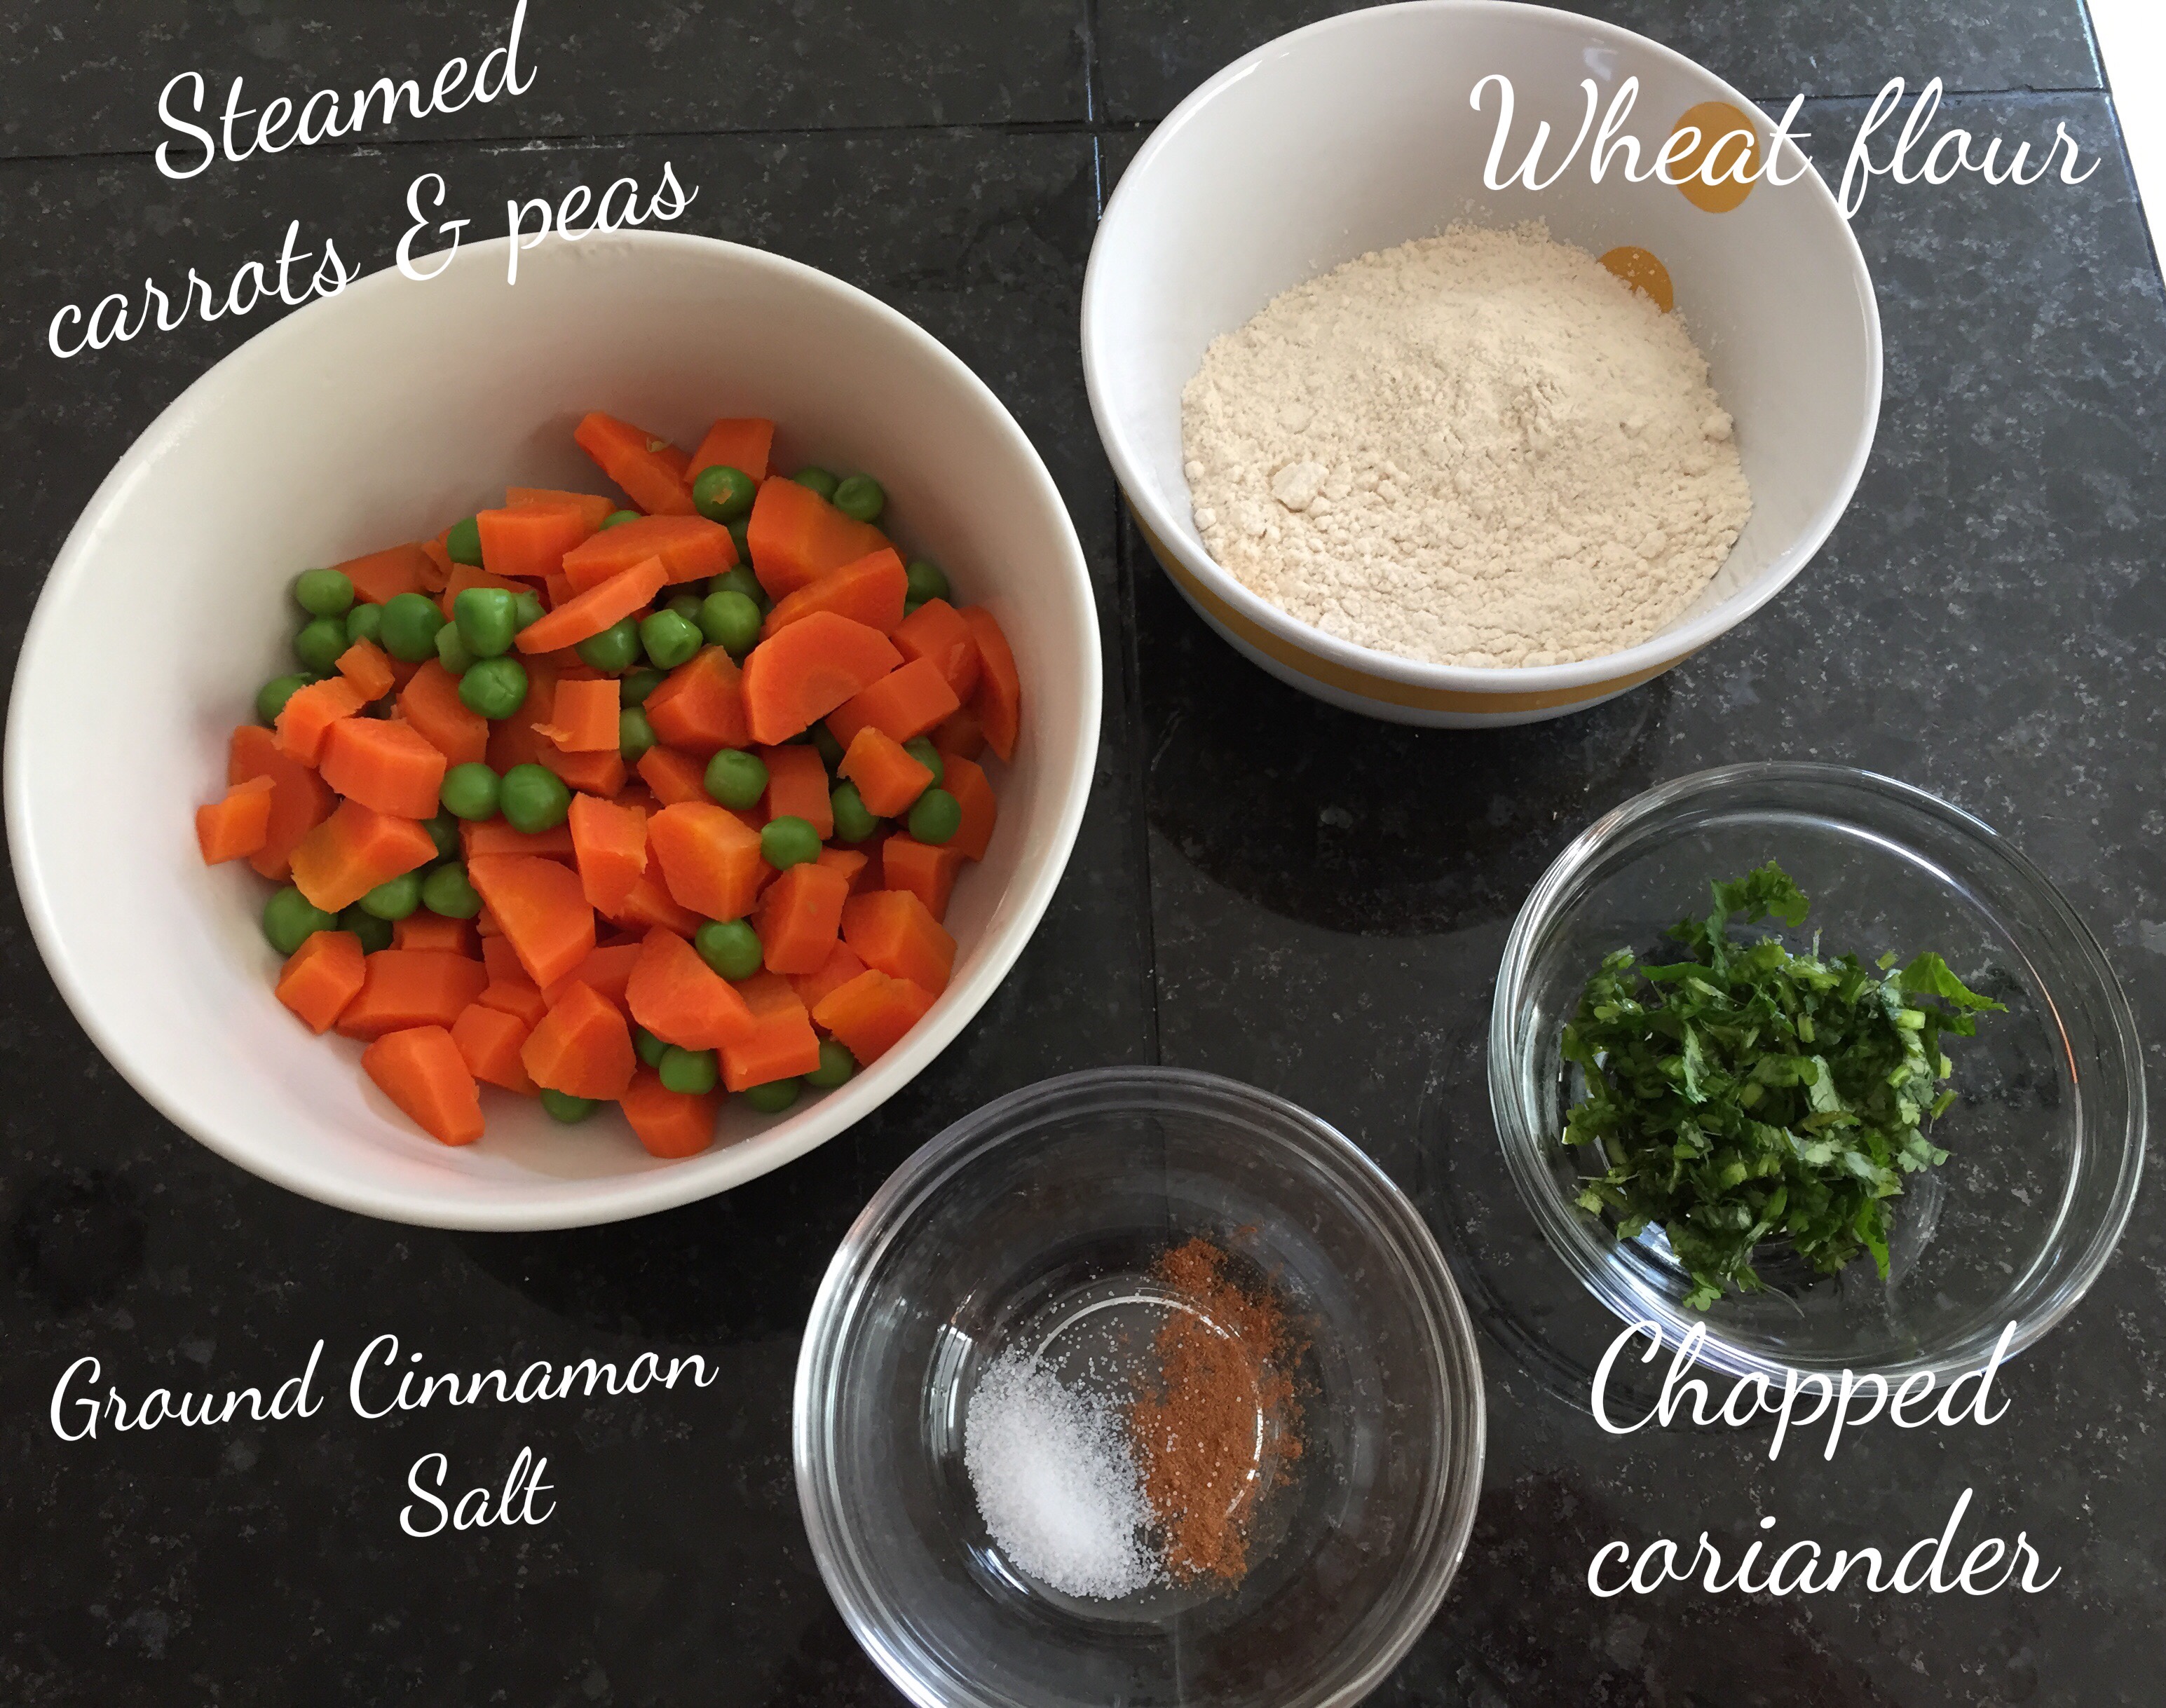
1 cup steamed peas and carrots ( or veggies of your choice )

1/2 cup whole wheat flour( ashirwaad aata)

Few sprigs of Coriander

A pinch of ground cardamom/jeera(cumin) powder

1/4 tsp of salt

2 tbsp. of oil/butter

Mash up the steamed veggies, you can use almost any veggie of your choice. img_4810

In a mixing bowl, add all the ingredients and mix together to form a soft dough. With the moisture from the mashed veggies you should be able to form it without adding water.

img_4811

Form them as patties and cook them in butter/oil of your choice over medium heat until golden brown, approx. couple of minutes on each side.
img_4813
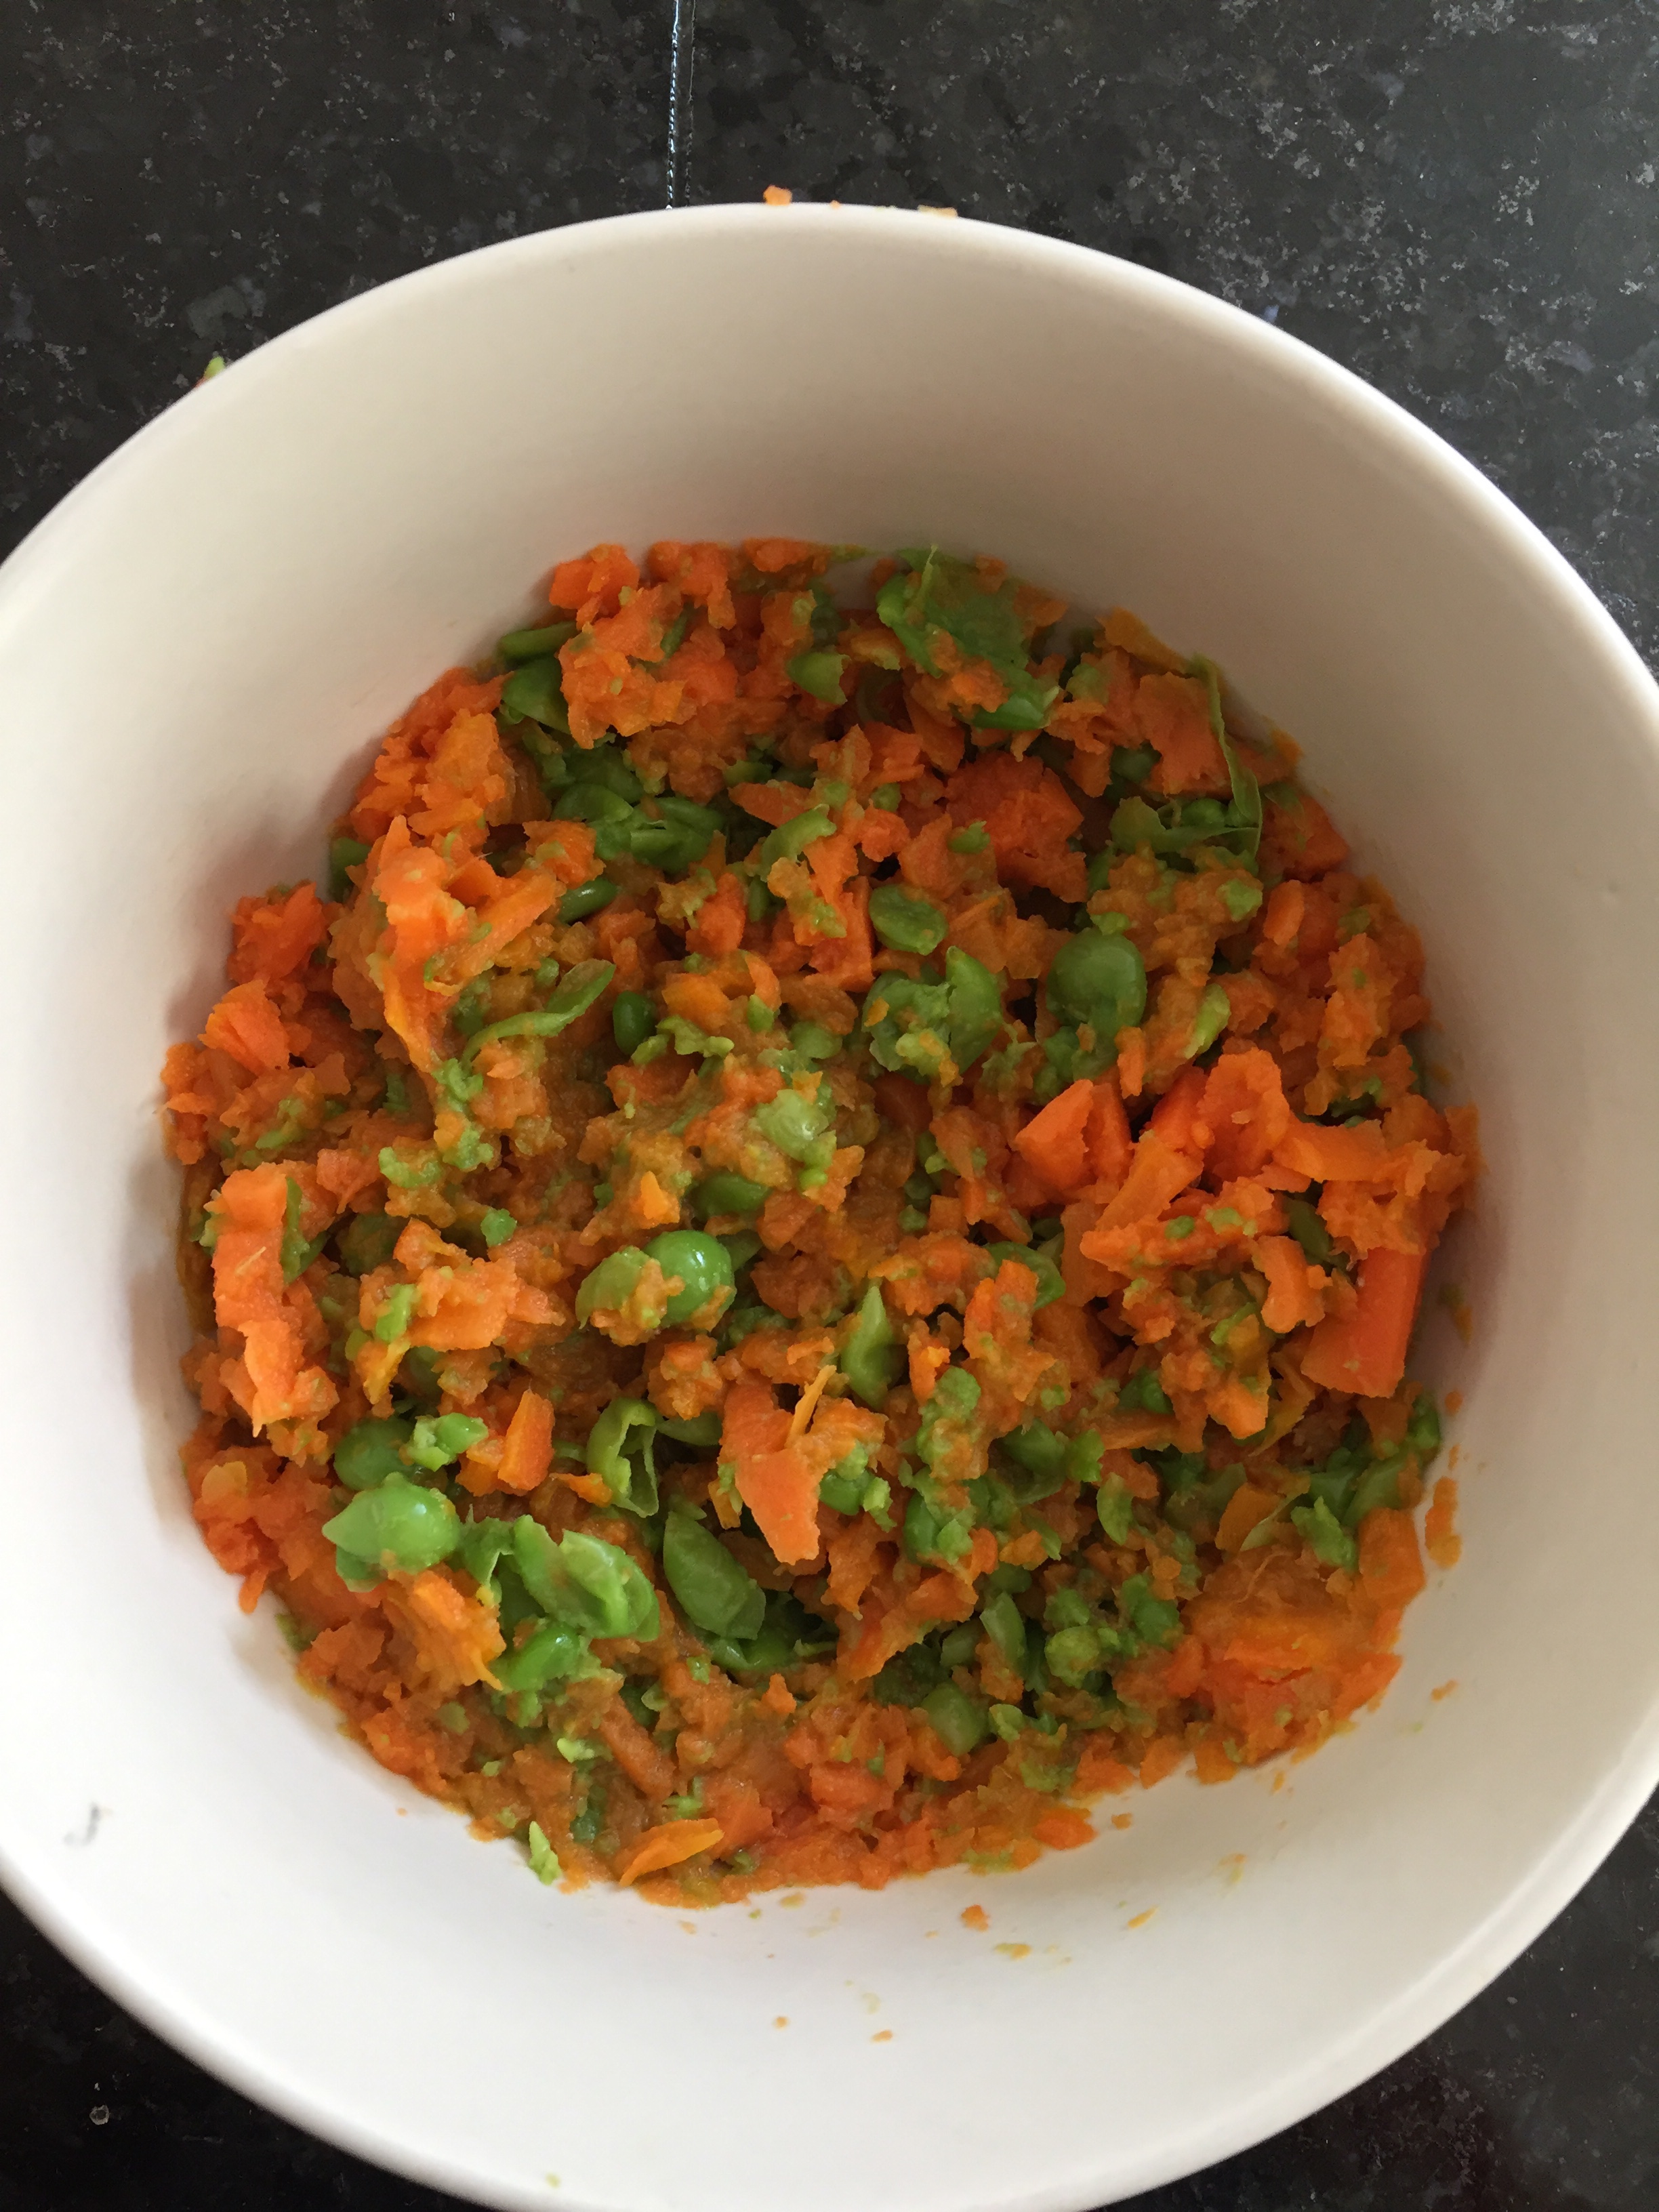
Isn’t that quick healthy yet delicious treat for babies/toddler. For older kids serve with low sugar ketchup or dipping sauce of your choice. img_4818

Baby Burp Cloth

Baby burp cloths make wonderful and practical gifts. They are super useful and can be used in many ways.

I made them as gifts and want to make for my little one too and it is one of the first baby projects I took up. The burp cloths I have done before for my niece and nephews and couple of other friends babies were just basic rectangle ones.

However, this time I wanted to try a new pattern and I must say they were absolutely great and super handy and I still use them and they are always there in my diaper bag.

img_4708

They are lot of fun when sewn up in cute flannel prints. The curve helps to stay on your shoulder while burping and also easy to wrap around baby’s neck as a bib 🙂

My mom loved them so much that she always had one on her shoulder ready before burping baby S 🙂

They can be made in cotton or flaneel. Flannel are my personal favorite becoz they are soft on new born’s skin.

img_0131
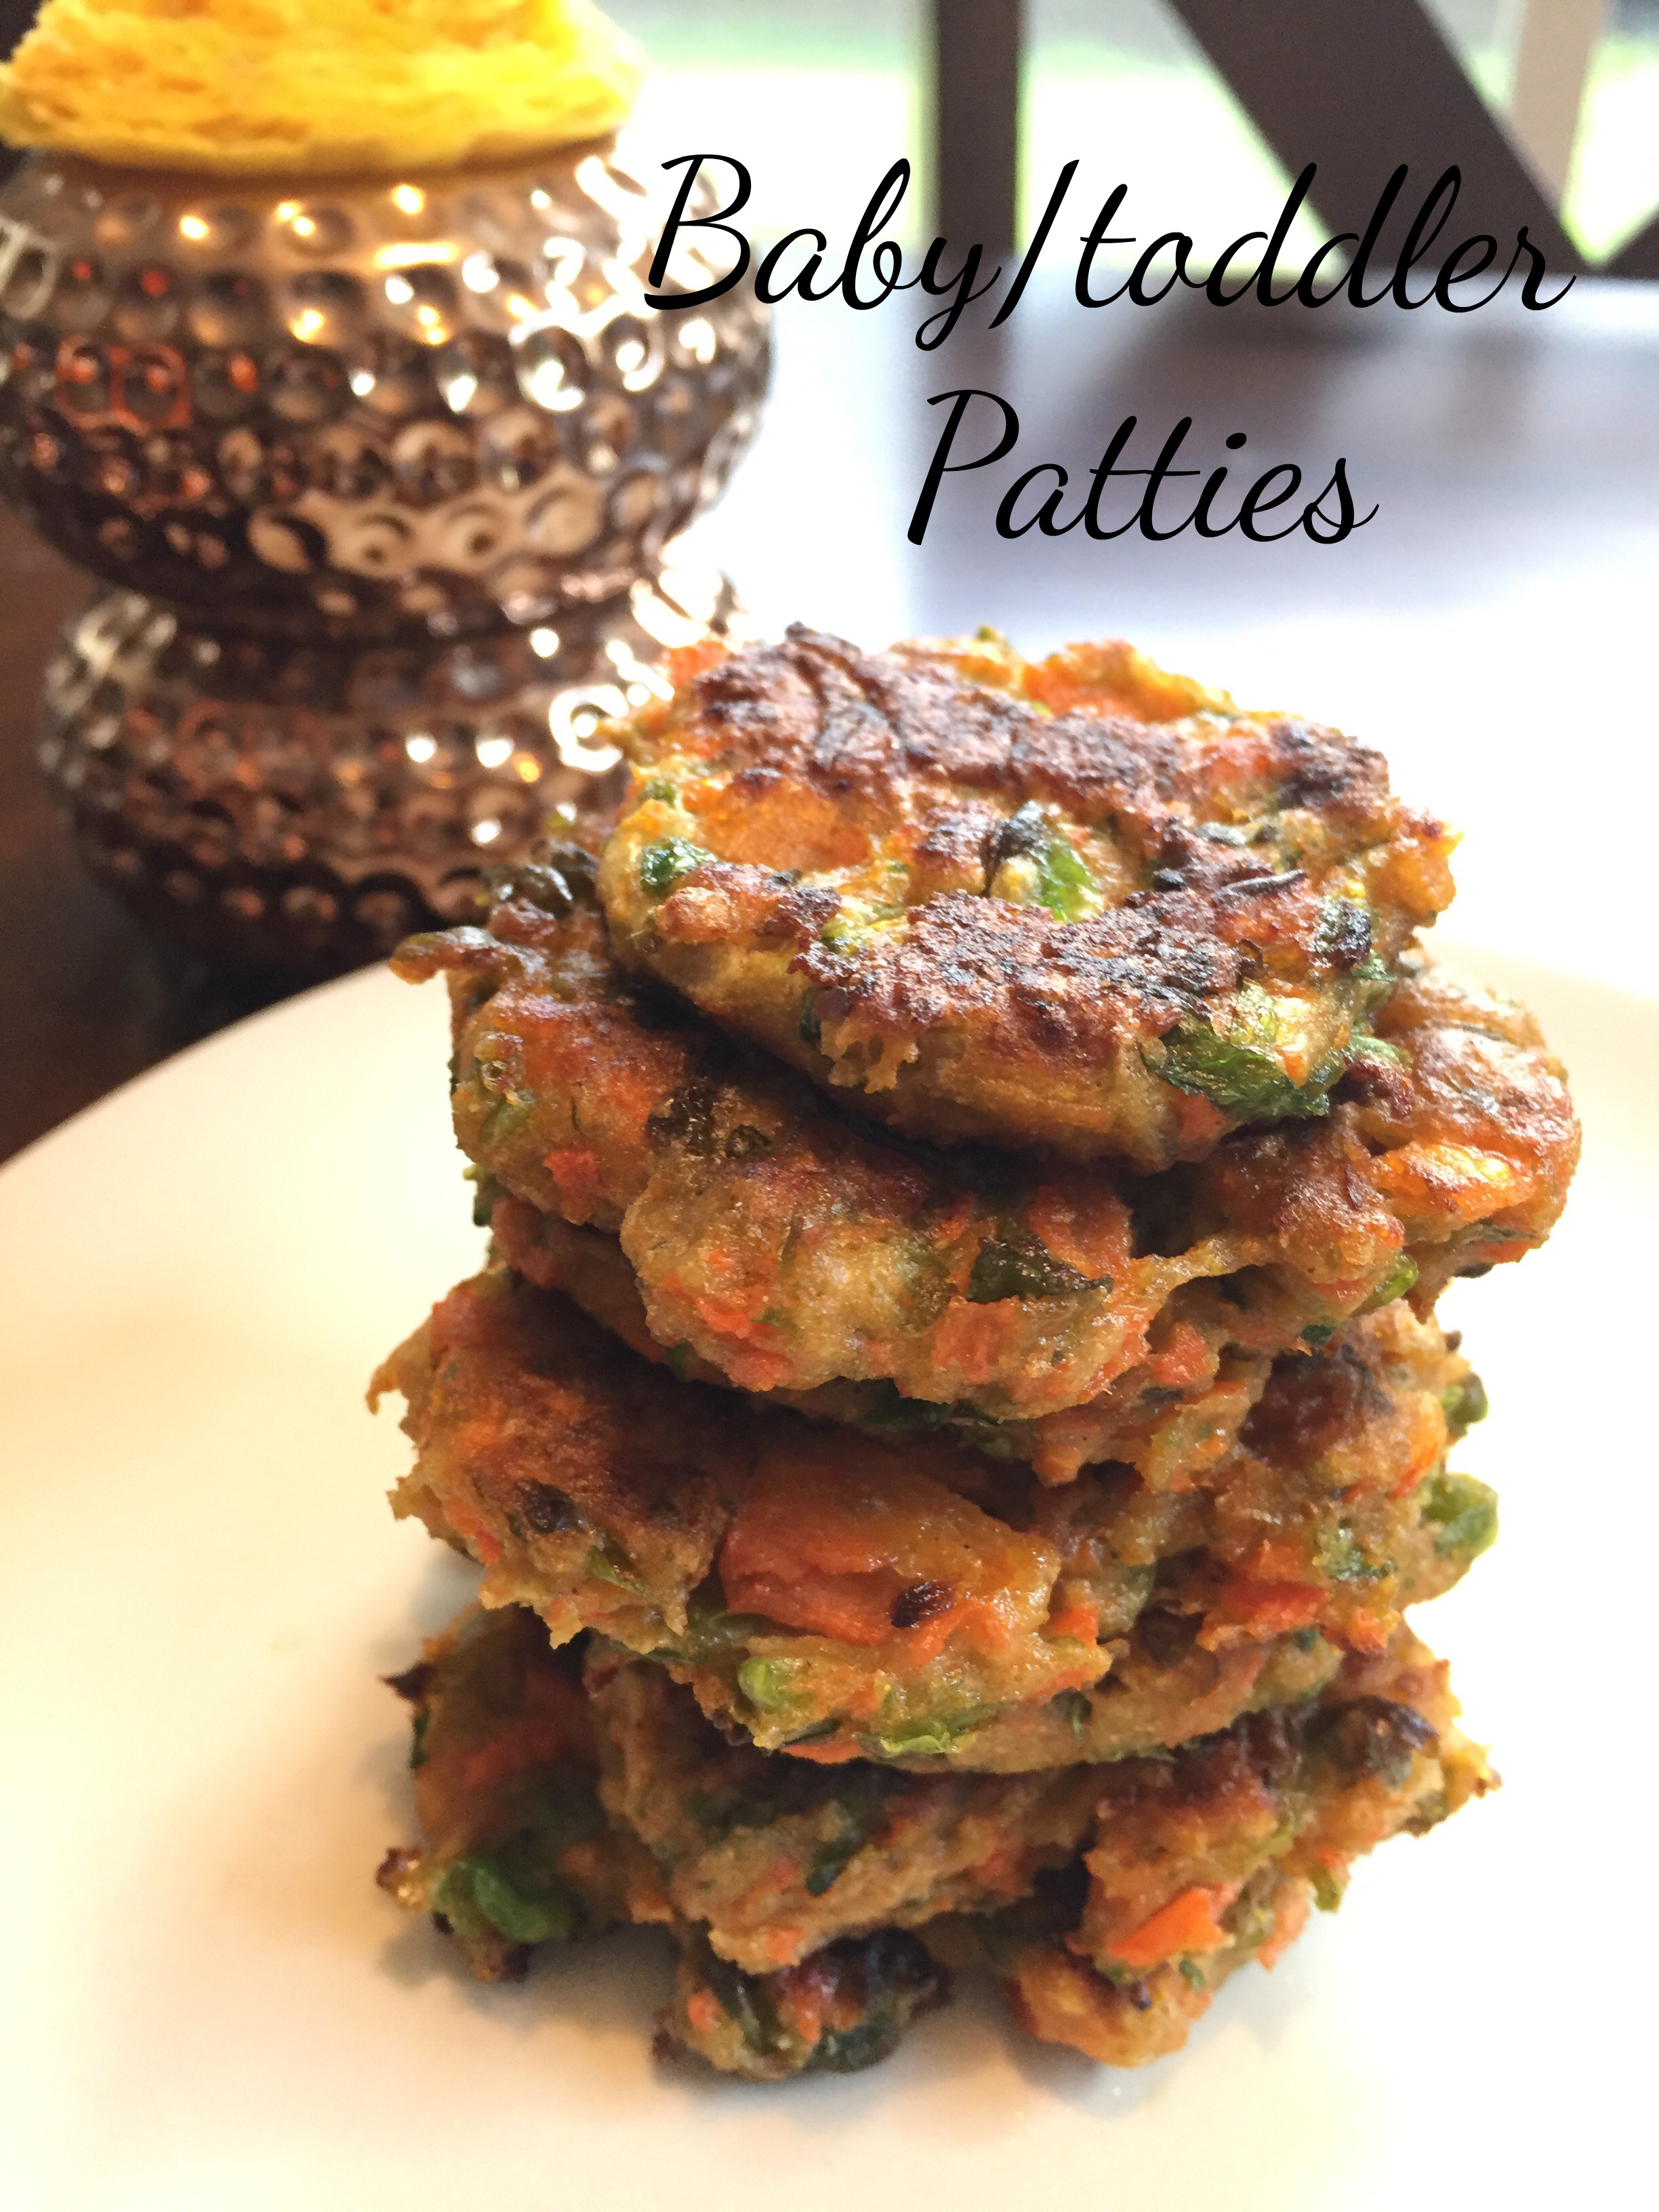
You get 2 burp cloths from half yard of flannel using same fabric front and back.  I love to use different prints front and back so you can use the half yard for 4 burp cloths.

So let’s get started –

The fabric is from Joann, make sure to wash and press the fabric before using. I have used a free pattern available on pinterest, pick the one you find it easy to follow.
img_0135

Cut the flannel fabric (front and back) per the pattern and pin them together on the worng side leaving a gap along the opposite side of the inside curve. That opening is to flip the cloths right side out.

Sew the edges leaving the opening. Once sewn cut off the excess fabric and flip the burp cloths right side out.

Fold the excess fabric of the opening inside the burp cloth and pin them together and make a top-stitch all along the burp cloth.

Isn’t that quick, easy and  great baby gift!

img_4756

See you all in my next post!

Introducing our bundle of joy – Sisira!!

Hey friends,

I am excited, anxious and terrified all at once to get back here and start writing. Its been more than an year and a lottt of changes have happened. I must say it has been a rollercoaster ride.

I apologize that I have not shared my pregnancy news, why I didn’t post for long and lot of stuff that has happened in the past 1+ year.

Finally, life is getting back to some certanity and I found time to get back to my passion.

So, she is our first and my pregnancy has been a breeze but still I didn’t find time to blog! I was too busy enjoying my pregnancy and getting prepared for the baby and taking up DIY baby projects.

Here she is – We named her Sisira ❤ and she is born on 21 February 2018 ( we named her after the season – Sisira ruthuvu). I can’t believe she is already 1 .

IMG_1238
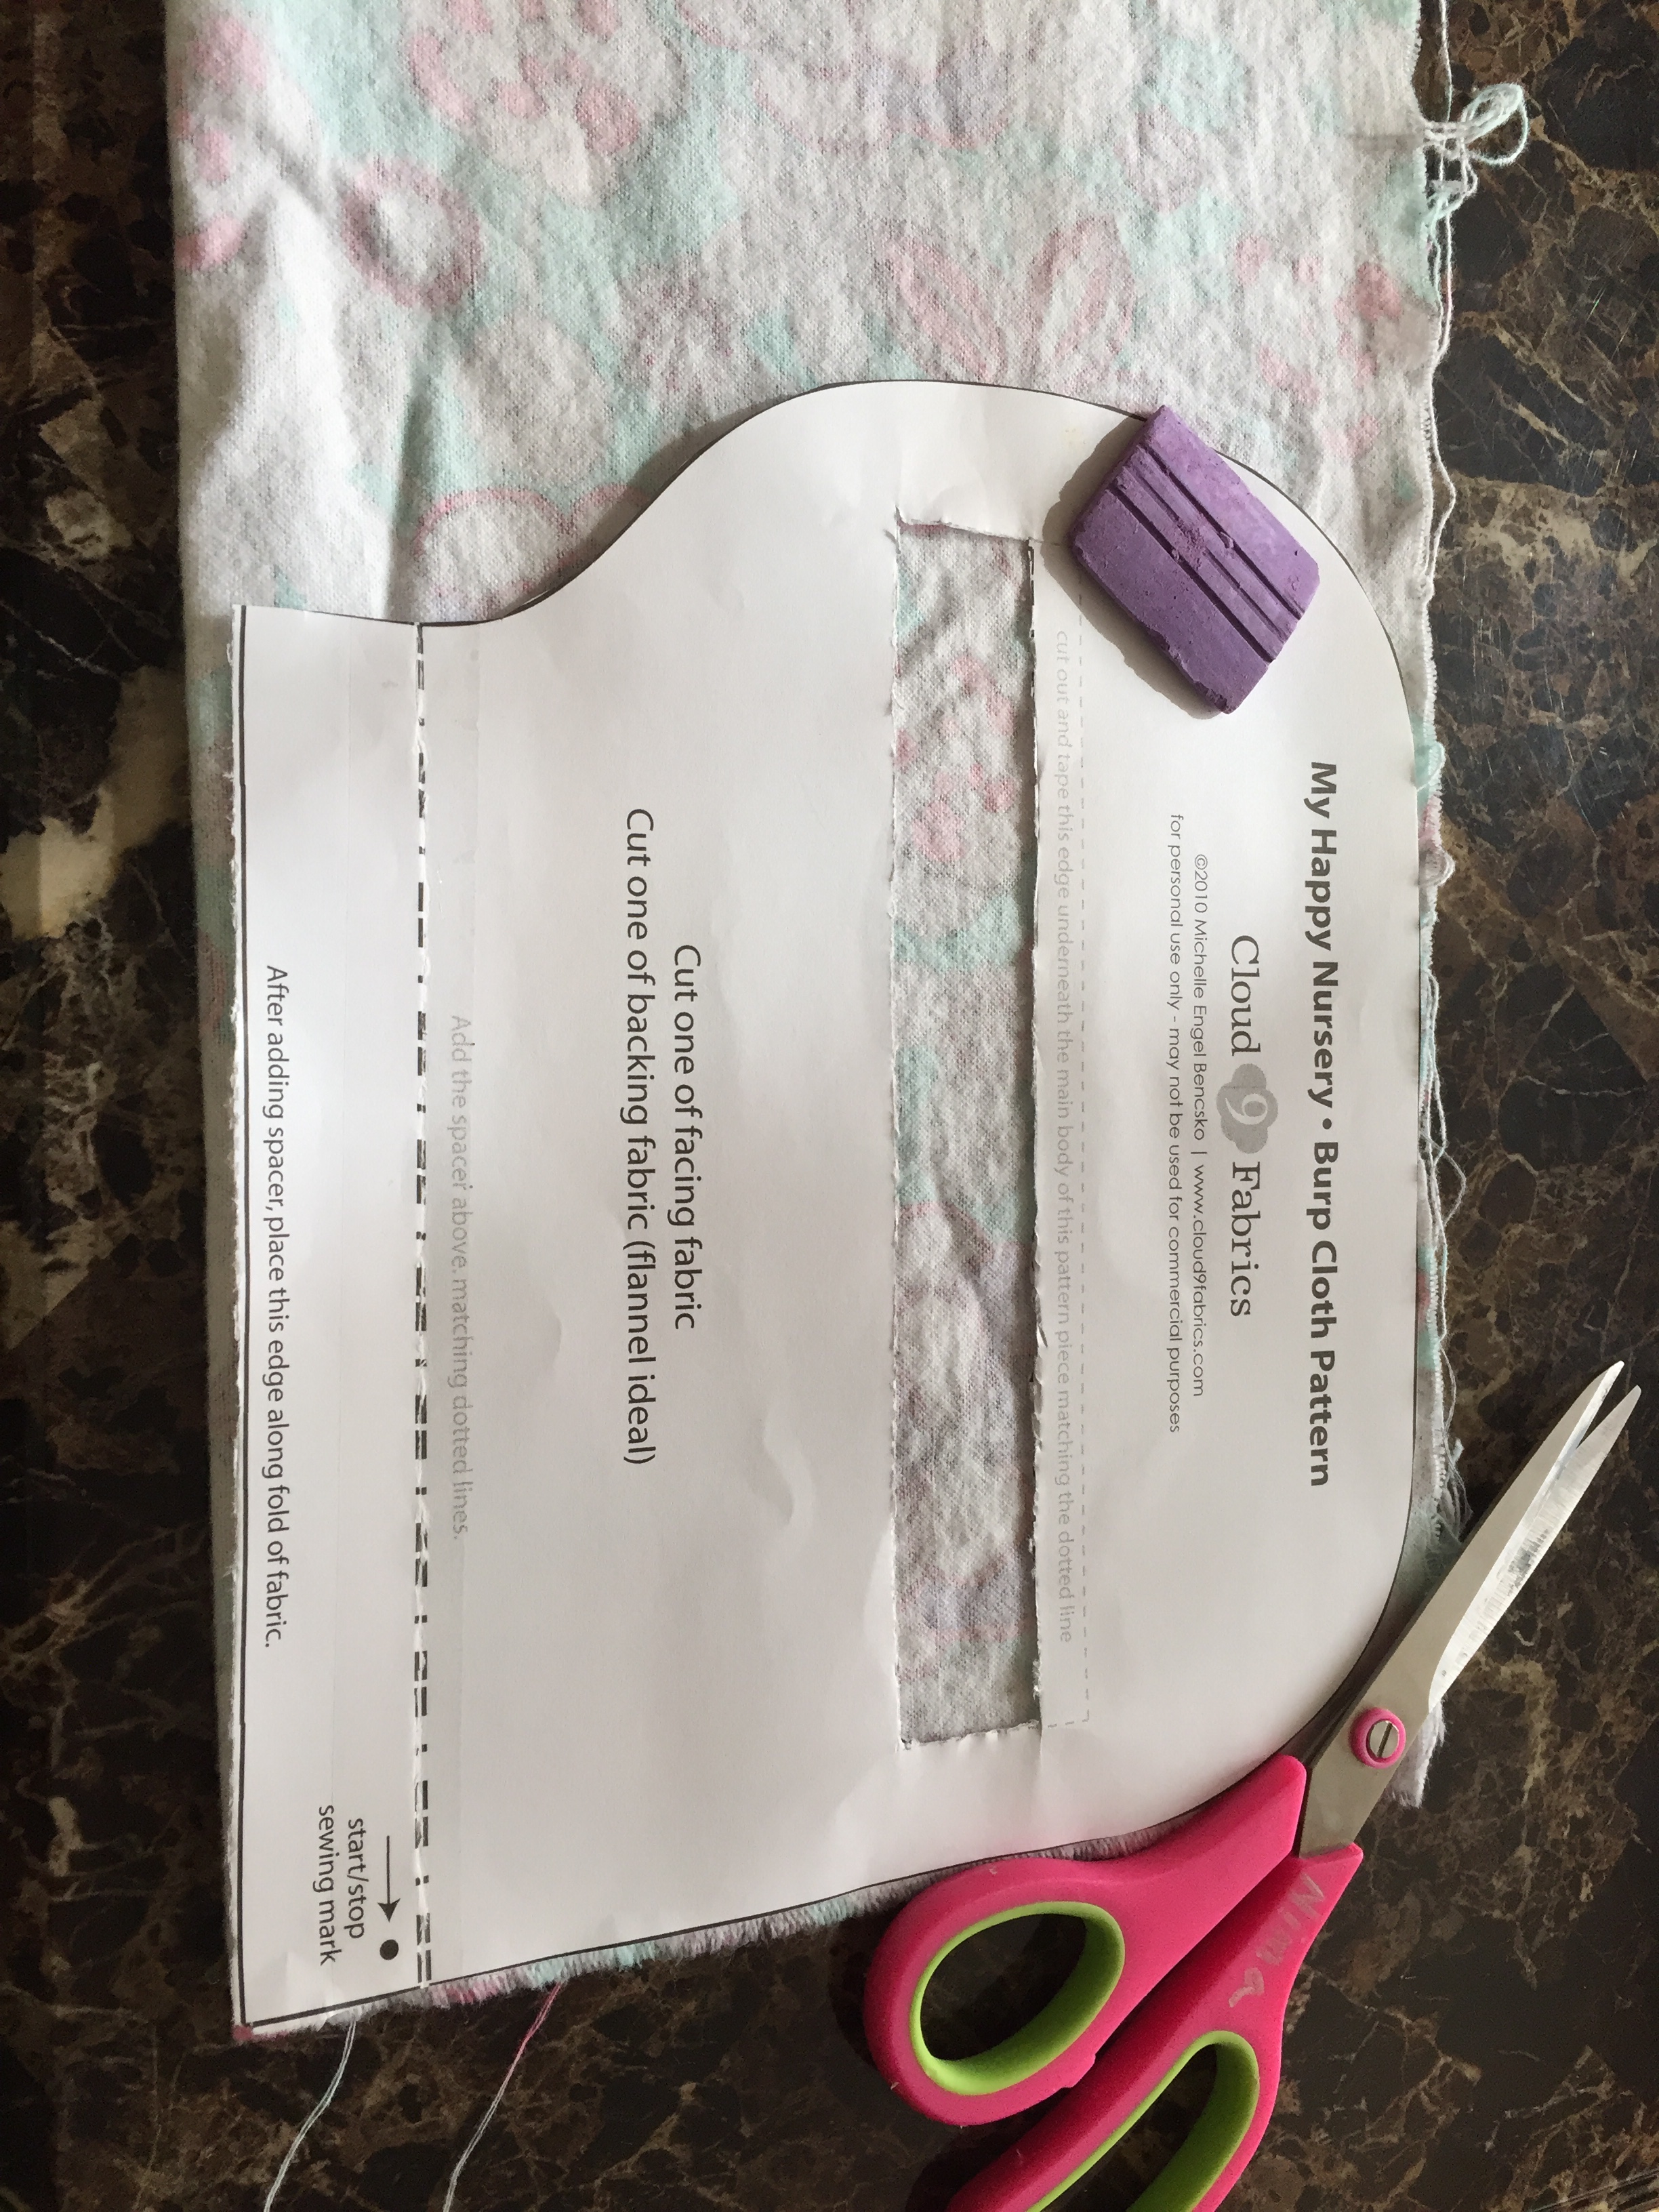
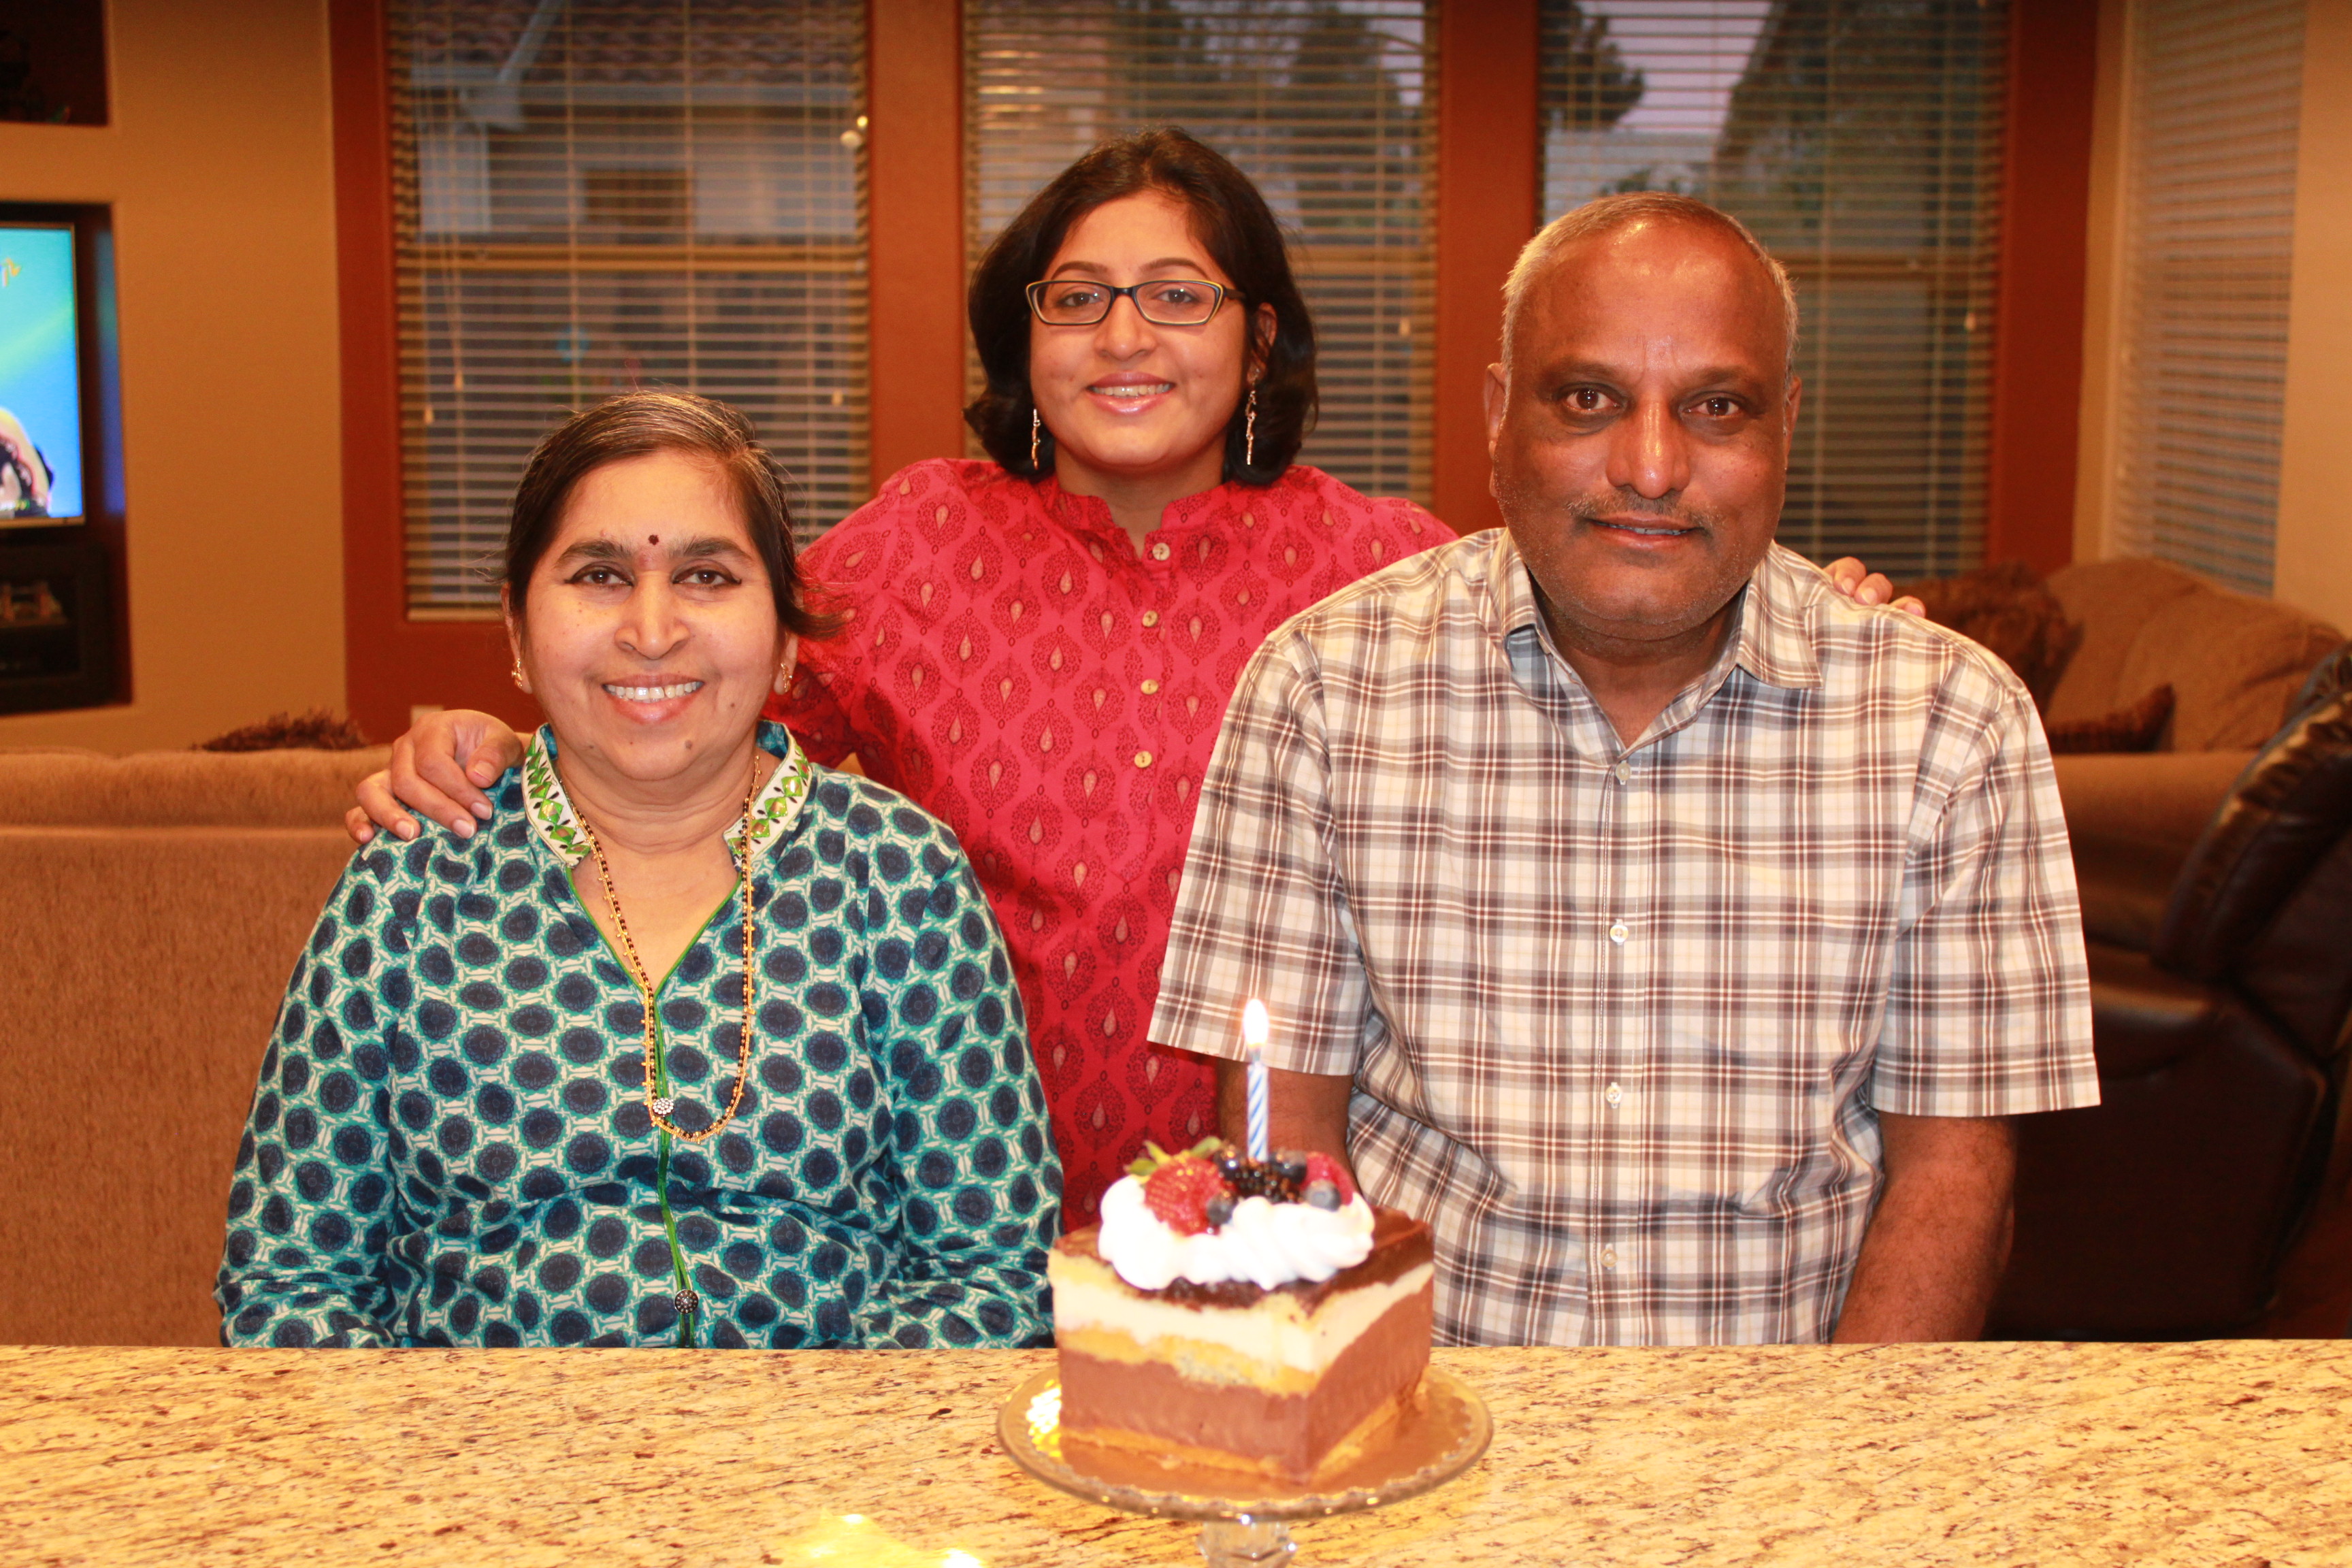
My parents were here from India a week before my due date to help us out and I was so excited – they were visiting us for the first time after our wedding(7 years). We got to celebrate my mom’s birthday after many years together. Here is a pic from my mom’s birthday ❤

img_4909

And couple of days later baby S arrived ❤

sisira and me

Life took a huge turn with a newborn and before we were adjusting to the new change – my husband had to take up a new job in Portland, OR (of course, after a lot of thought and deliberation before or after the baby we decided to relocate after the baby is 3 months).

It wasn’t an easy decision because we had to sell our house, our furniture ( we were planning to lease out an apartment) -it was a huge downsizing project. And my parents had to leave to India too, I was recovering from my surgery and Postpartum – it was the most stressful times of our lives and we survived!


We will forever miss Arizona, our first home and place where Sisira is born, friends we made and everything about it!

So, all this kept me/us super busy. I am happy to get back and can’t wait to share the tutorials of all the projects I made in the past year.

See you all soon in my next post.

Happy Monday and rest of the week ahead !!

Cooking Without Limits

Food Photography & Recipes

Travelling Krishnaite

Shekhar Srivastava's Blog

Live-😊-Life..

"It has everything in little as a HAPPY package!!"

DesiCrafts

A blog Dedicated to Indian handicrafts, Fabrics and Supplies

Fulgorine

My adventures with art and polymer clay

The Beaded Bazaar

Polymer clay creations

Learn Polymer Clay

Inspiring you to explore your creativity and get down to work! A great collection of Free Polymer Clay tutorials

Wear the Ducky Tie

A Sewing Blog

sewmanju

Make your own style

SEW KATIE DID

because thread is the best glue.

The Crafty Coup

Finally, you're here! Let's make something!

The Daily Post

The Art and Craft of Blogging

WordPress.com News

The latest news on WordPress.com and the WordPress community.

%d bloggers like this: