Fun with Polymer Clay!!

When I first saw FIMO canes for nail art back in Singapore, I was surprised of the variety and designs. I thought they are machine made.

But then, few months ago when I saw those again on amazon I ordered and set and was curious to know what they are made of and did some search on internet and was really amazed to learn that they are polymer clay and with little practice you can actually make them 🙂

And I forgot about them for a while until I saw polymer clay miniatures on a blog – http://www.joojoo.me/2013/04/more-miniature-veggie-magnets.html

After watching some tutorials on youtube I couldn’t wait and got SCULEPY polymer clay @ Hobby lobby

Well, I made some jewelry sets and this is how they look.

IMG_4604 IMG_4602 IMG_4603 IMG_4599 IMG_4597 IMG_4598 IMG_4600 IMG_4601

They are an inexpensive way of making a ton of matching jewelry sets 🙂 Some pics that explain the process:

IMG_4572IMG_4573IMG_4574IMG_4575IMG_4576

IMG_4577IMG_4578IMG_4579IMG_4581IMG_4582IMG_4583IMG_4584IMG_4585IMG_4586IMG_4589IMG_4591IMG_4592IMG_4534IMG_4535IMG_4536IMG_4537IMG_4538IMG_4539IMG_4540IMG_4545IMG_4546IMG_4547IMG_4548IMG_4532IMG_4533

The best part is it is soft, easy to work and you can bake(as instructed on the package) the pieces in the oven and make some pretty jewelry with few jewelry making supplies and they are perfect(water resistant too) 🙂

Deliciiiious Dessert!!

Dessert = Delicious = Yes!!

Dessert = Healthy & Delicious = Hmmm!!!

Oh yes, absolutely quick, easy and a healthy dessert with pineapples. And the best part is throw them in the oven  before you sit for dinner and by the time you finish, you have them ready to dig in 🙂

IMG_4530

Lets get started:

Step 1 : Cut pineapple into 1/2 – 1 inch circles and place on a baking tray covered with a foil.

IMG_4519

Step 2 : Pre-heat the oven to 400 F

Step 3 : Now time to prepare the spice mix and some workout for your arms 😉

In a mortar and Pestle add 5 Cardamom, 2 cloves, 1 Cinnamon stick, few Pistachios and 1 tsp of Sugar and grind into fine powder

IMG_4521

IMG_4522

If using ground spice:

1/4 tsp of ground Cardamom

1/4 tsp of ground Cinnamon

1 tsp of ground Pistachio

A pinch of ground clove

Step 4: Sprinkle generous amount on the pineapple disks and bake for 10-12 minutes.

IMG_4523

Step 5: After 12 minutes turn over and sprinkle the rest of the spice mix.

IMG_4524

And you have a delicious dessert that is tender, marinated with spices and cooked at perfection 🙂

Adding a scoop of vanilla ice cream also enhances the flavors 🙂

IMG_4531

Tip of the Week!! Mg – MAGNESIUM

It is considered as the most powerful RELAXATION mineral.

I don’t believe in taking supplements rather eat healthy quality food that helps us to build the essential vitamins and minerals.

Most of us know soaking in EPSOM salt is the best relaxation medicine. It is an easy and natural way of absorbing magnesium.

Also, some of us sleep like a log after a tiring day however, some of us experience sleep issues. It is because our muscles are not relaxed.  And if you are looking for a solution, magnesium based food for dinner/after dinner absolutely improves your sleep. By eating you are not only relaxing muscles but helping anything that is tight, irritable, cramp and stiff – whether it is a part of your body or mood.

It is a good practice to eat  handful of almonds/brazil nuts/cashews/walnuts/pecans/figs/dates or anything that is rich in Magnesium 1/2- 1 hr before you sleep. It helps kids and toddlers too.

Magnesium-Rich-Foods1

NOTE: This is a tip shared as I have seen a lot of improvement and heard it works from friends and family. Please do enough research/internet search to get convinced before you start practicing. 

Happy Thursday!!

DIY Candleholders & Floating roses!!

It is never early to make holiday/festival decorations!!

So, today I am here with an absolutely low budget project that you can make for this Diwali(Indian festival of lights)or for any special occasion. Most of us who are living outside India cannot find or fill homes with traditional clay lamps(oil & wick), and we decorate with candles and bring the festive mood 🙂

Today, I am going to show you some  tea light rose petal holders. I know it is not a new thing and am sure you will find a lot of different ways to make these. But then, thought I will share my way 😉

IMG_0409

To make these beautiful holders, all you need is some glue(already on hand), scrap cardboard and the only thing you have to buy is silk rose petals from Dollar Store or Walmart.

Let’s get started:

Step 1: Trace the candle on to a cardboard as shown in the image and cut little larger(1/8th inch)than actual. You can use business advt flyer too as they are sturdy.

IMG_4342IMG_4343

Step 2: Using a hot glue gun or super glue place the first set of petals this way on the top.

IMG_4344

And if you want the flower to be dense placing this way would help.

IMG_4349

Step 3: Glue the petals alternatively, simultaneously making sure you have enough room to place the candle. You will be done in 2-3 layers and it looks something like this.

IMG_4345 IMG_4346

Step 4: Now time to turn the flower and start glueing 2 more layers(bottom of the flower) using something close to 20-25 petals and the final piece should look like this.

IMG_4347

If you want to make floating flowers for any special occasion or jus to have them in your garden, here is how you can make.

Just replace the cardboard base with a sturdy plastic. Try to find a plastic product packing something like this:IMG_4352 IMG_4353

After couple of layers on top and bottom it looks like the picture below.

IMG_4370IMG_4366

Now time to form the center a bud shape. Don’t worry nature is not perfect so jus do the way you want and I am sure it will still look pretty!! And also this is the best way to use the folded petals that are not in good shape

IMG_4368 IMG_4367

Tadaahh!!

IMG_0411

Happy Tuesday!!

Easy Peasy makeover!!

Friends,

I hope you remember my earlier post on Popsicle wall art.This is another project from her blog. I am so inspired and couldn’t wait to give a new look to my IKEA Table lamp that is lying around..:)

It hardly took any time and can be a great addition to a themed room to have a matching lampshade.

Also can be a quick makeover of a simple table lamp/shade that you already have on hand.

All I did was picked an silhouette image, cut it and glued it on with glue runner.

IMG_4313

I am going to use it for Halloween too 😉

To know more about this project click on the below link:

http://www.pinkstripeysocks.com/2014/01/reveal-hidden-lampshade-silhouettes.html

Tip of the Week – Fun with carrot!!

Happy Thursday!!

So, I am here today with the tip of the week.

Well, let me begin this way, how often do you use grated carrot?

I use it in almost everything. For me after peppers, this is the world’s perfect veggie that is colorful and nutritious.  My fav evening snack is boil some sweetcorn and add grated carrot with a pinch of salt and pepper. I use in salads, appetizers, sautéed beans, rice, quinoa and almost everything 😉

Then, couple of weeks ago, I was looking for some healthy vegan recipes and found something very interesting. Yes it is carrot noodles.(click on carrot noodles for recipe)

Since then i haven’t used my grater,and now if I use grated carrots my husband is not very happy 😉 One day I will own this fancy tool – julienne peeler, but with a regular peeler it is equally possible and here is how they look 🙂

Image

Applique/Patchwork

We always have some favorite things that we are not ready to get rid off, even after they get old. And for me clothes are one such thing. So, when you/your kid have really pretty designs on a top/dress/tee/shirt, one of the way to feel good is to repurpose 🙂

ImageToday, I am posting one of my sister’s appliqué project on a market bag and a laptop bag 🙂 It is absolutely easy and quick project to give a simple, plain bag a vibrant look.

All she did is cut the design and stitch. She picked the designs from some old cotton tops and the best part is you don’t have to buy any material to make one 😉

Well, I am glad I found the pictures of the tops ( I used to wear them here and in my last visit to home I was forced to leave) she used and here is how they look 🙂

ImageImage

And Tadaah!!! Aren’t they pretty???

ImageImage

Wedding Keepsake!!

The memorable occasion of wedding comes once in life and every bride and groom have expectations for their D-Day. It is a day filled with fun and enjoyment by family, friends and guests.

India is known for its cultural diversity, particularly popular for its weddings. Guests play a very important part of an Indian wedding. We make sure to inform them of  the wedding events and other rituals in the form of a Wedding invitation card.

It is the first time that the name of the bride and groom will appear together in the same place 🙂

Well, I wanted to save our wedding cards(groom and bride)in an unique way and was looking for ideas. After coming to US, I found the shadow boxes are popular and less expensive (compared to Singapore). Initial plan was to add some silk flowers around the cards and store in the shadow box. Unfortunately, it didn’t look great 😦

When I got introduced to quilling, I was surprised to know that this art is very popular in India. The first blog that I saw was http://papercraftss.blogspot.com  and was very inspired by her work.

The quilled wedding knot project  http://papercraftss.blogspot.com/2013/04/quilled-wedding-knot.html on her blog really caught my attention and I couldn’t wait to remake 🙂

And here is how mine looks after placing the cards 🙂

IMG_0145


Pizza Bites!!

I always want appetizers to be easy,quick and delicious. it is something that has to be prepared right before the guests arrive and you don’t want to spend too much time and have a messy kitchen..;-)

One such alternative is Puff Pastry. I mastered in making curry/vegetable puffs and I don’t want to dull my guests with the same dish again and again.

After looking couple of recipes on internet, Puff Pastry Pizza’s are quite popular. I made it twice and both the times they are a hit.

IMG_4228

They have a really nice texture, you can change the toppings and so incredibly easy to make with impressive results.  I know it is not hard to find the recipe, however, thought I will share my version:-)

So, lets get started and see what we need:

IMG_4210

Step 1:

Thaw the puff pastry as instructed.Preheat the oven to 415 F and place a skillet with 1 tsp of oil and heat on medium flame.

IMG_4215 IMG_4212

Step 2:

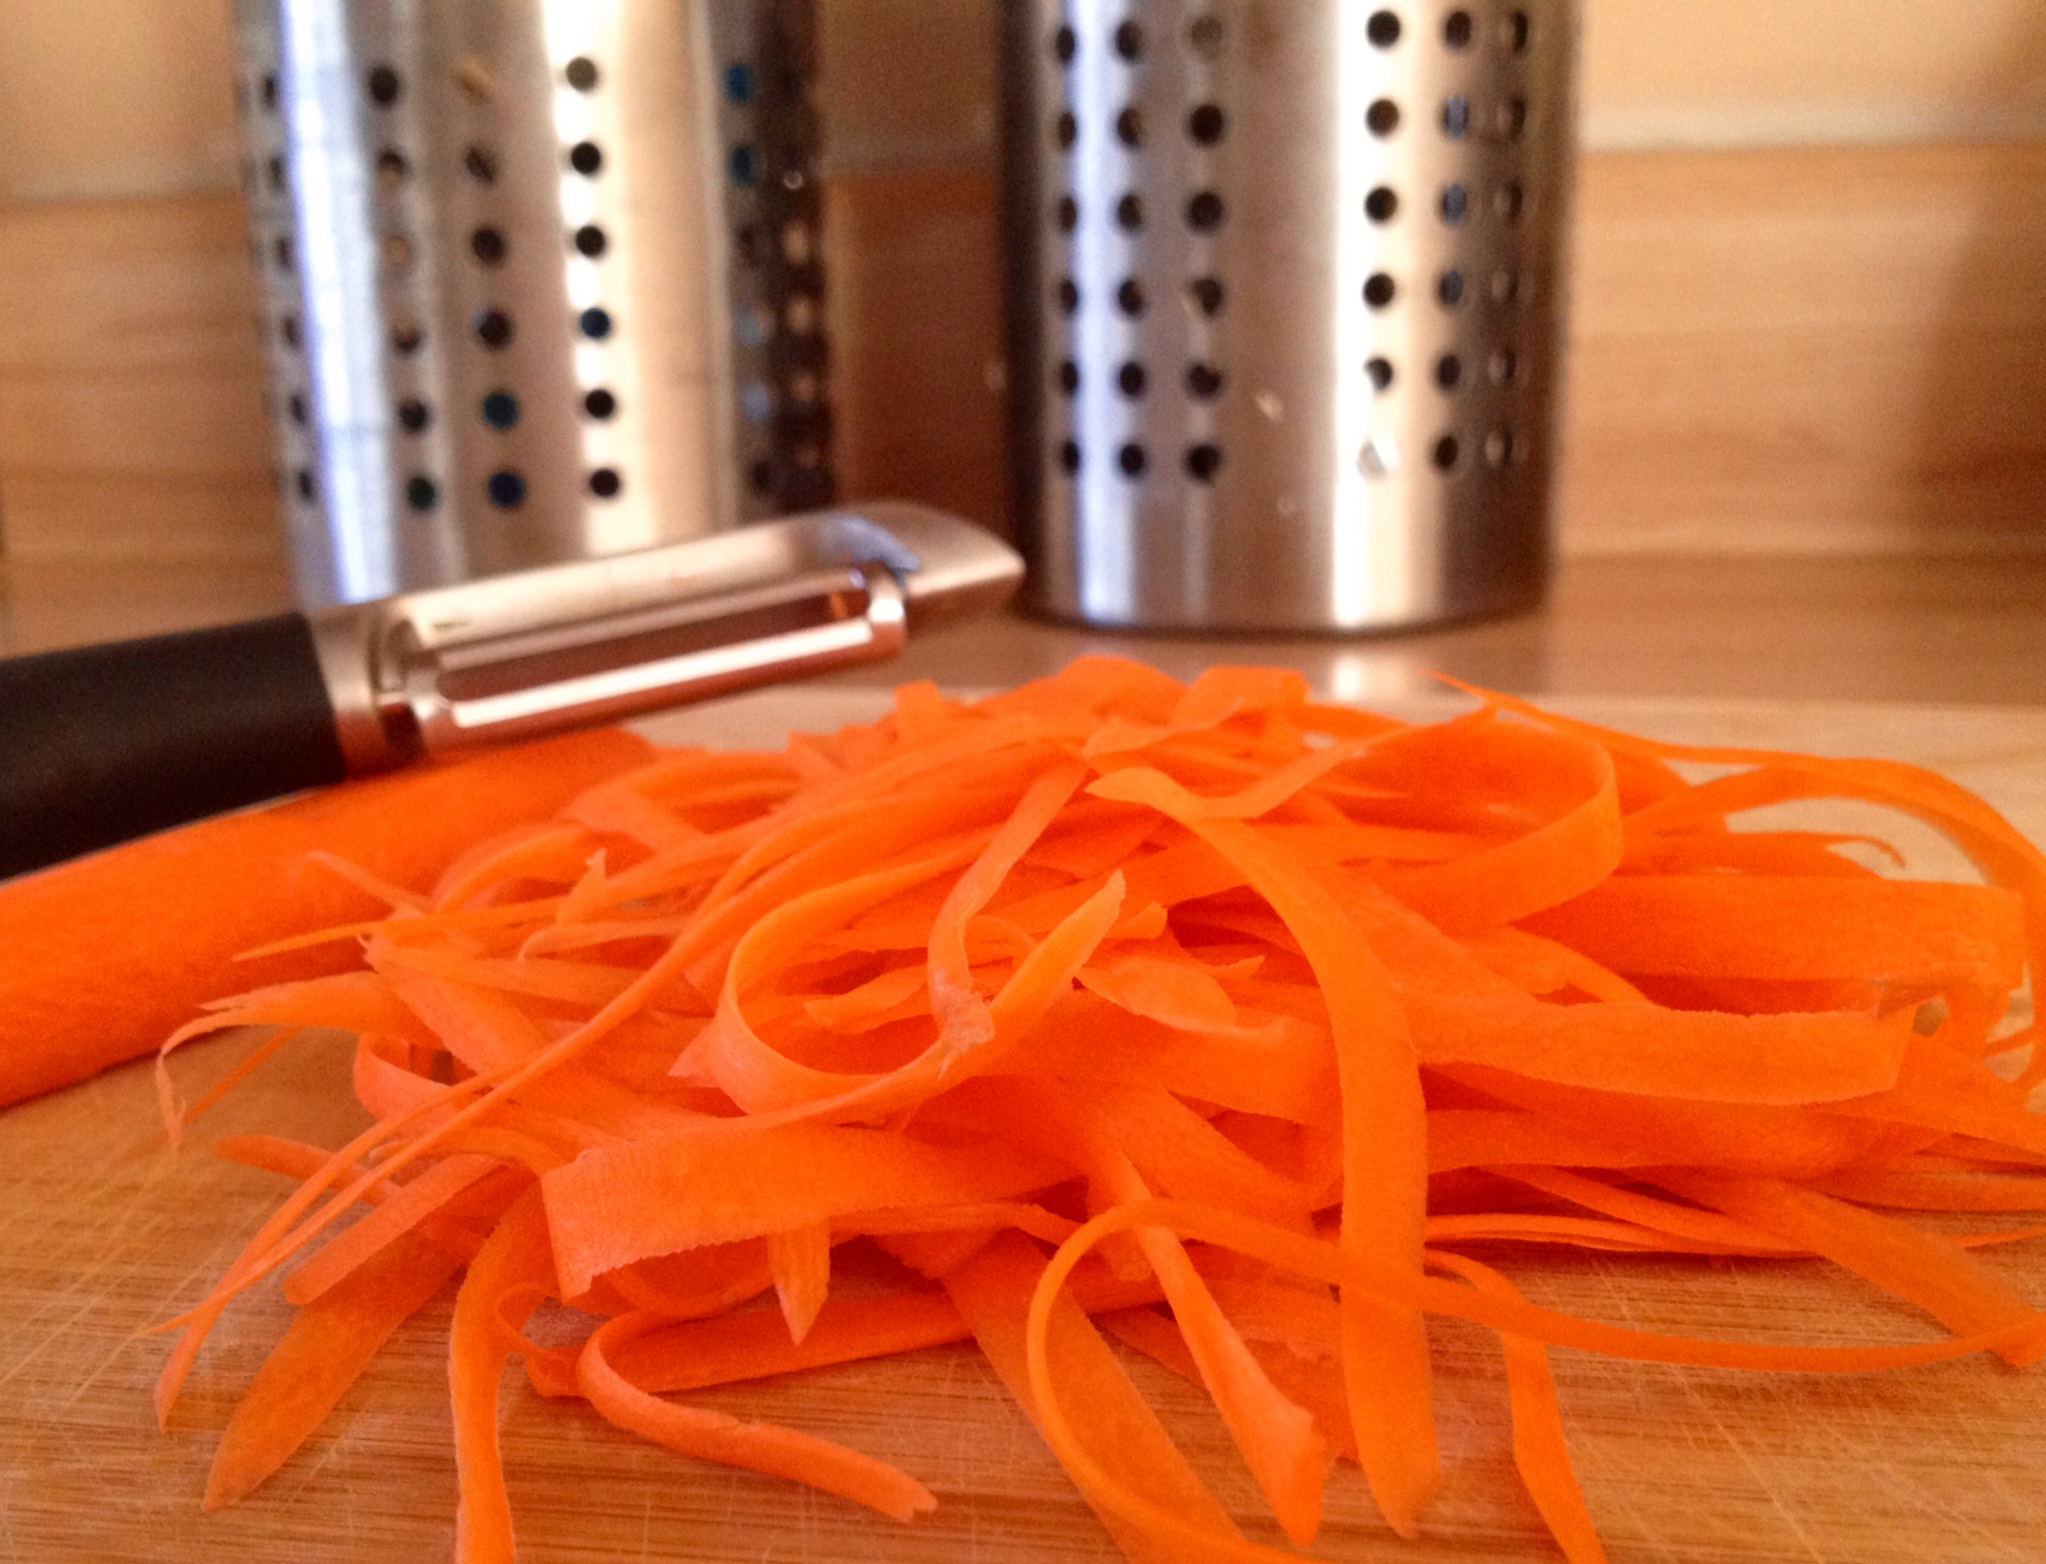
Chop the onions, mushrooms and sweet peppers as shown and sauté the onions and mushrooms until tender
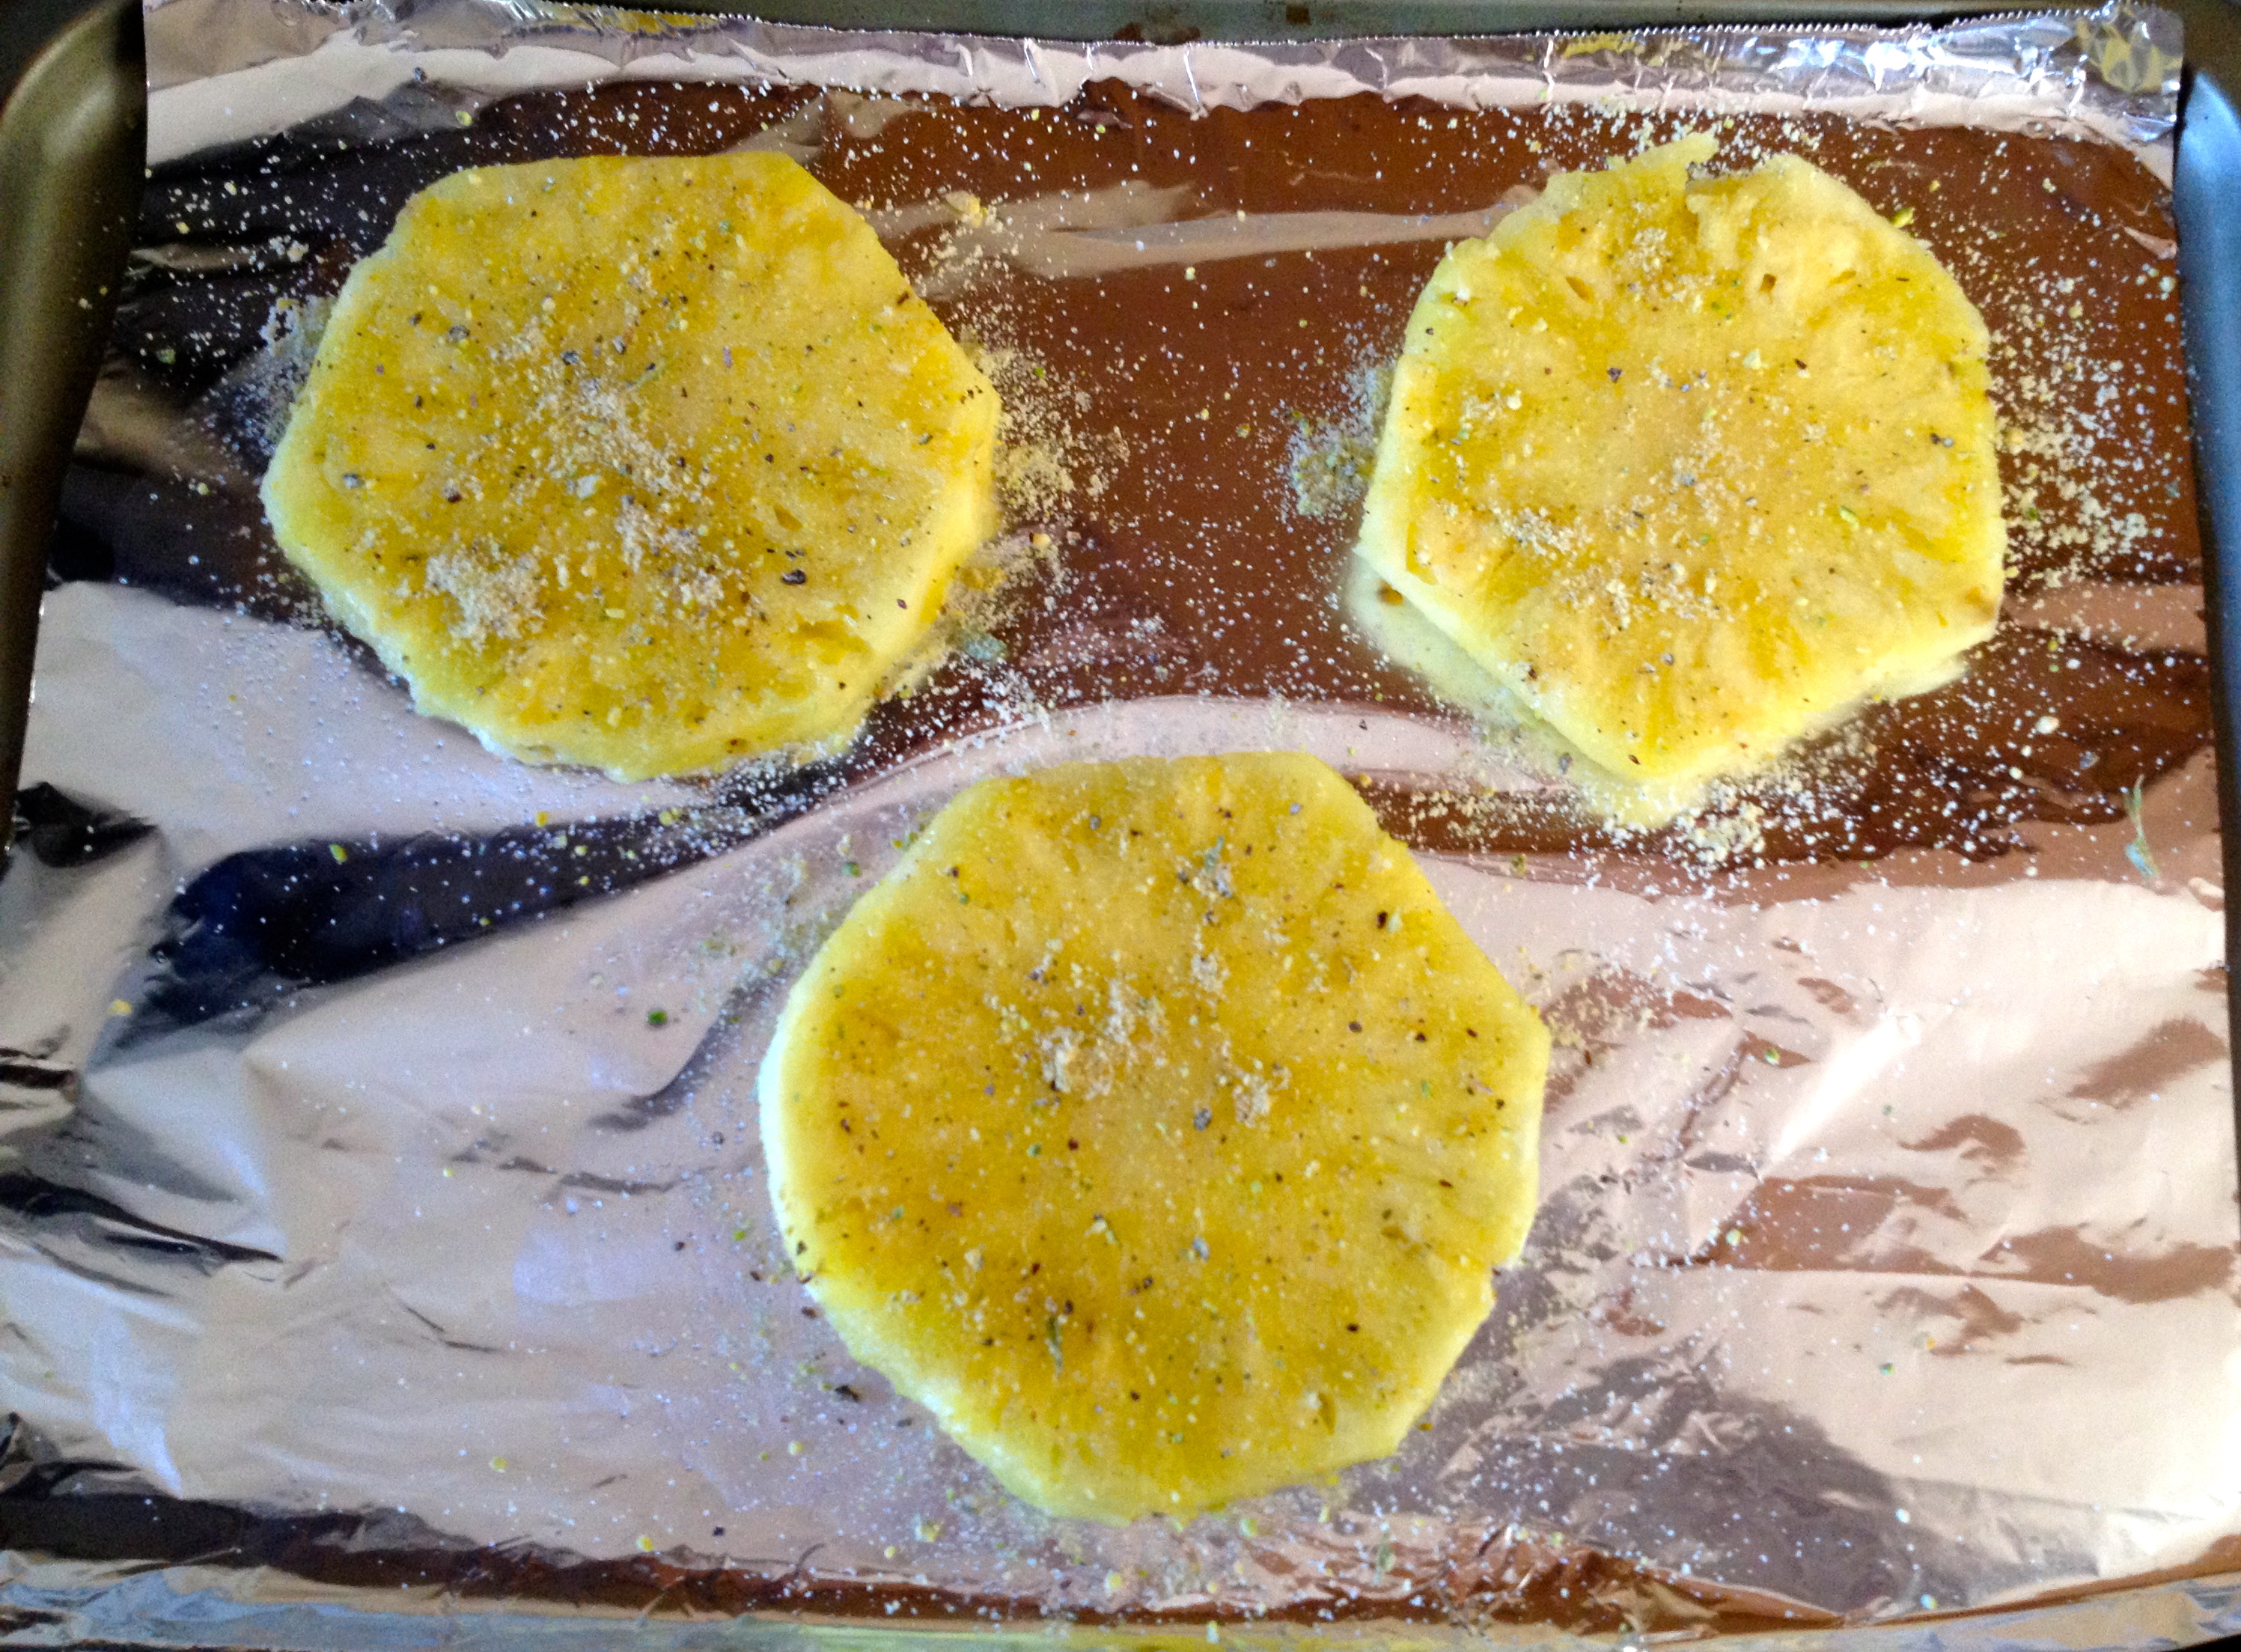
IMG_4214 IMG_4217

Step 3:

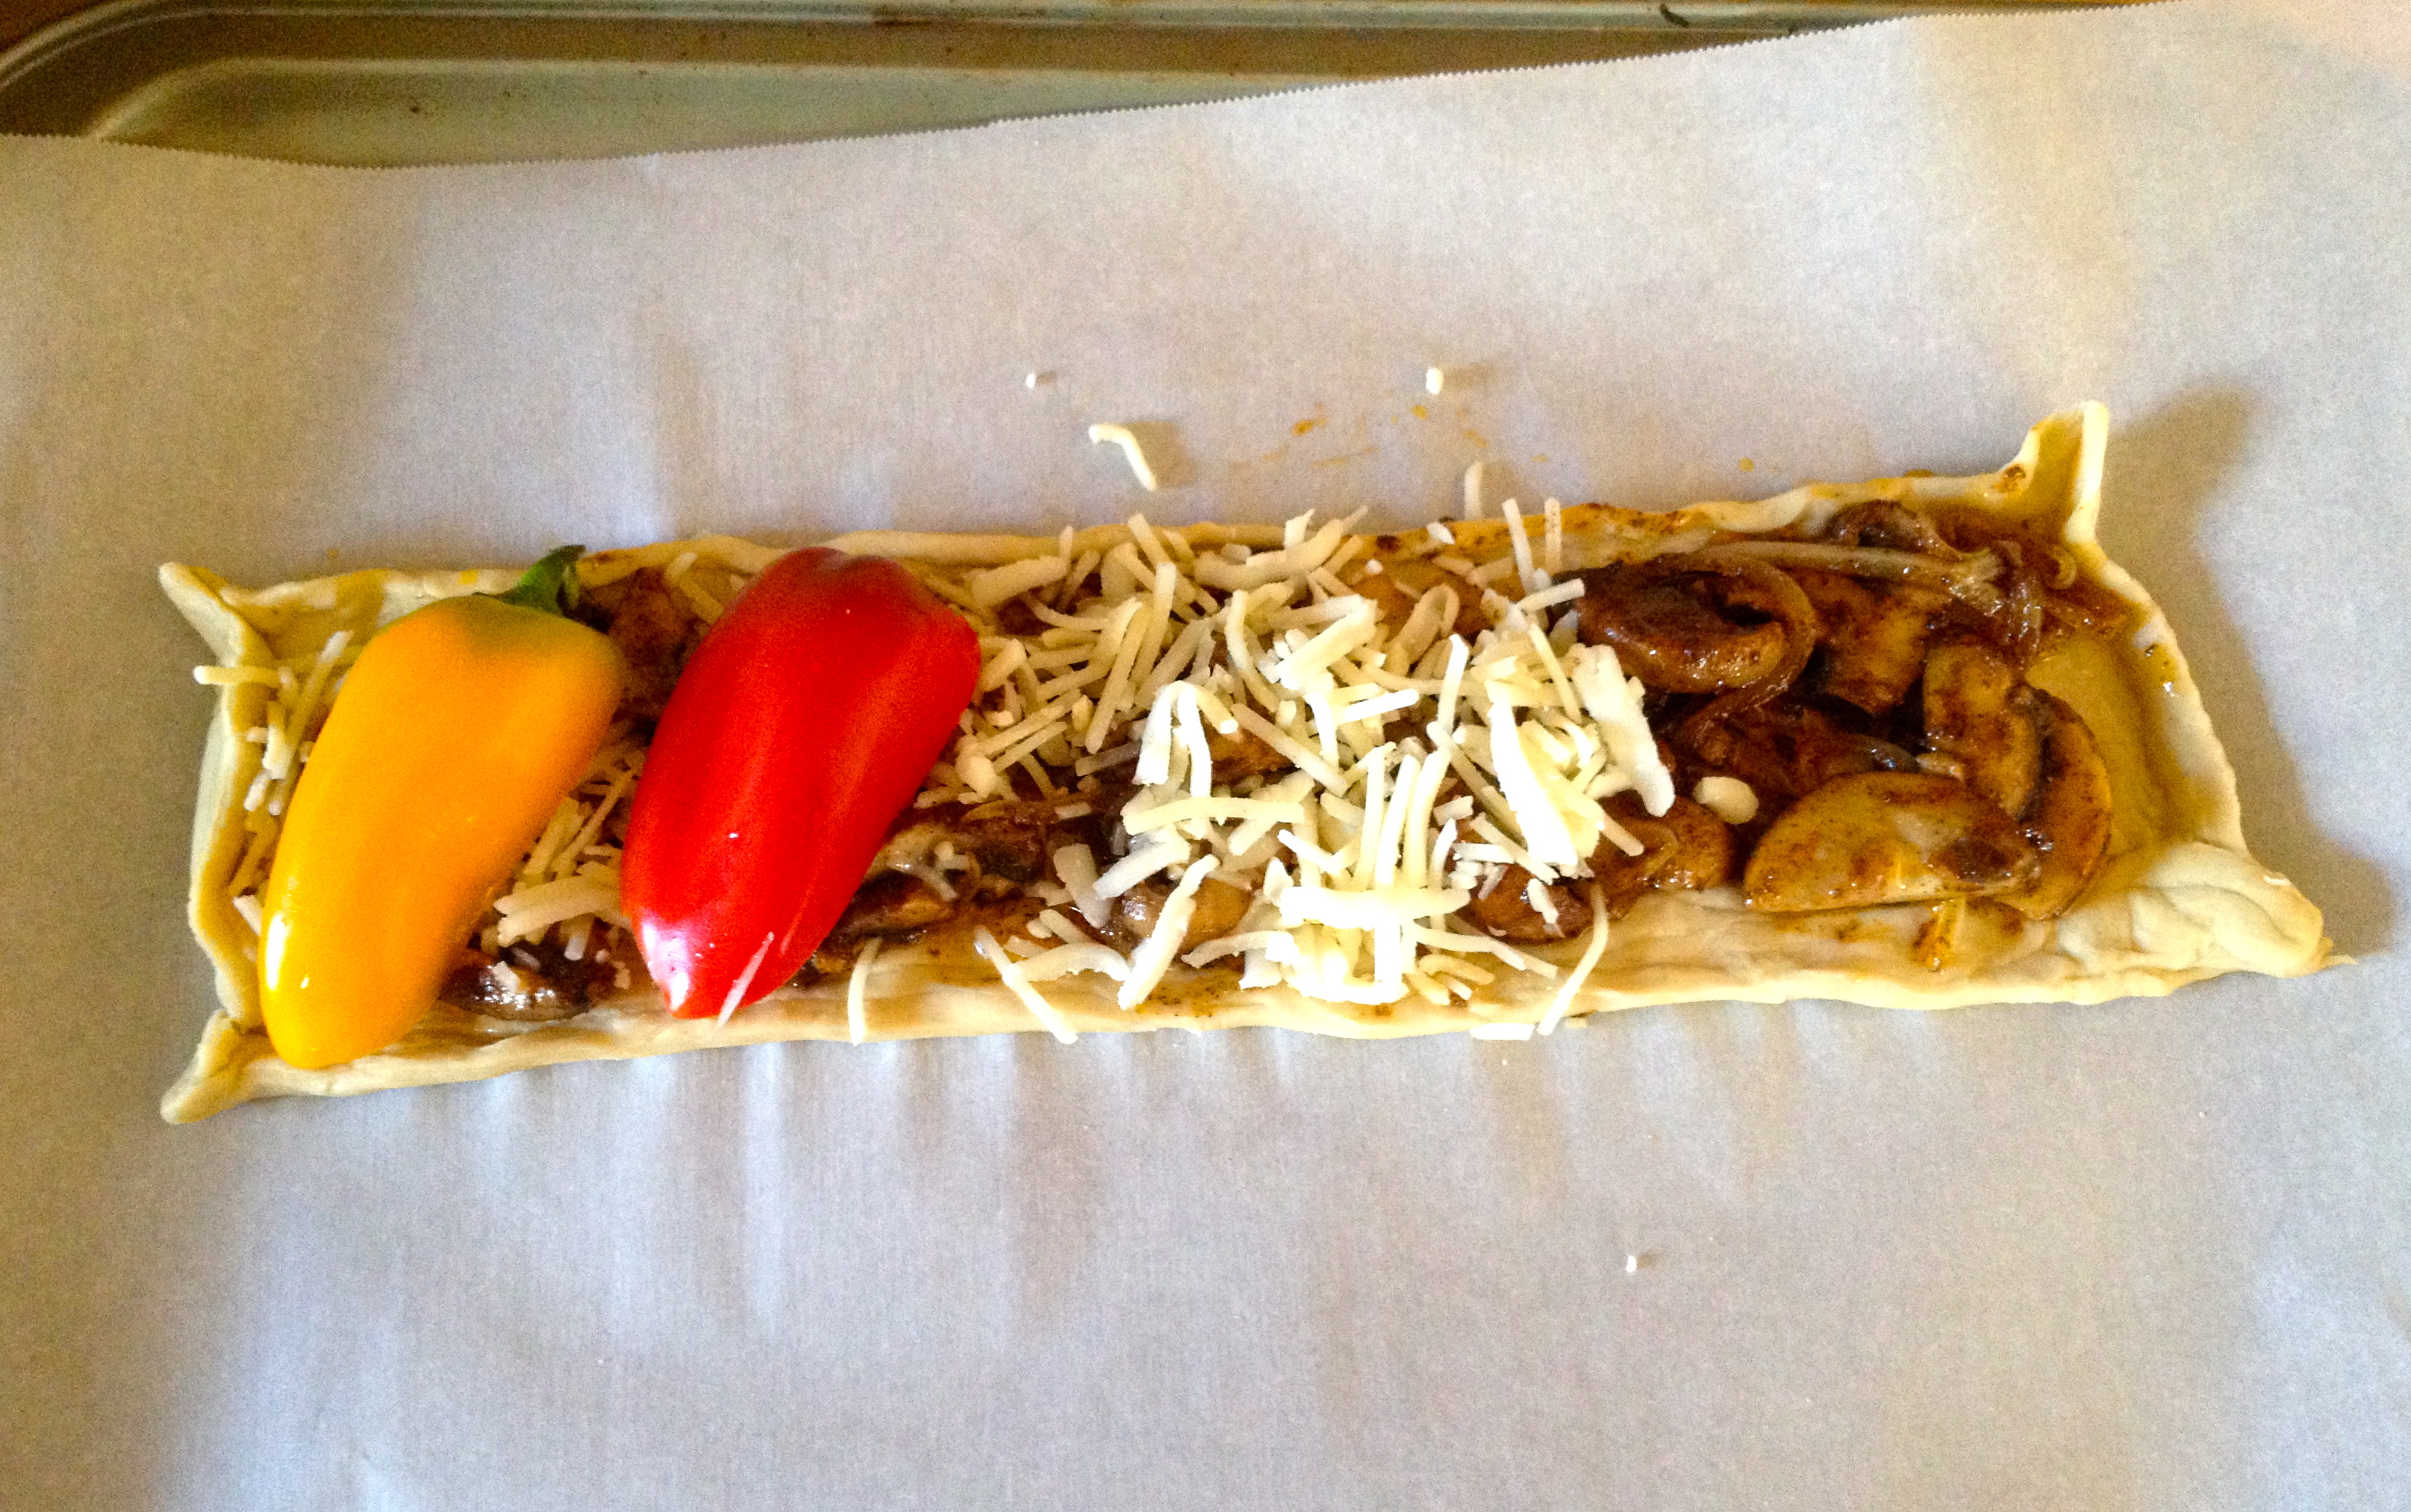
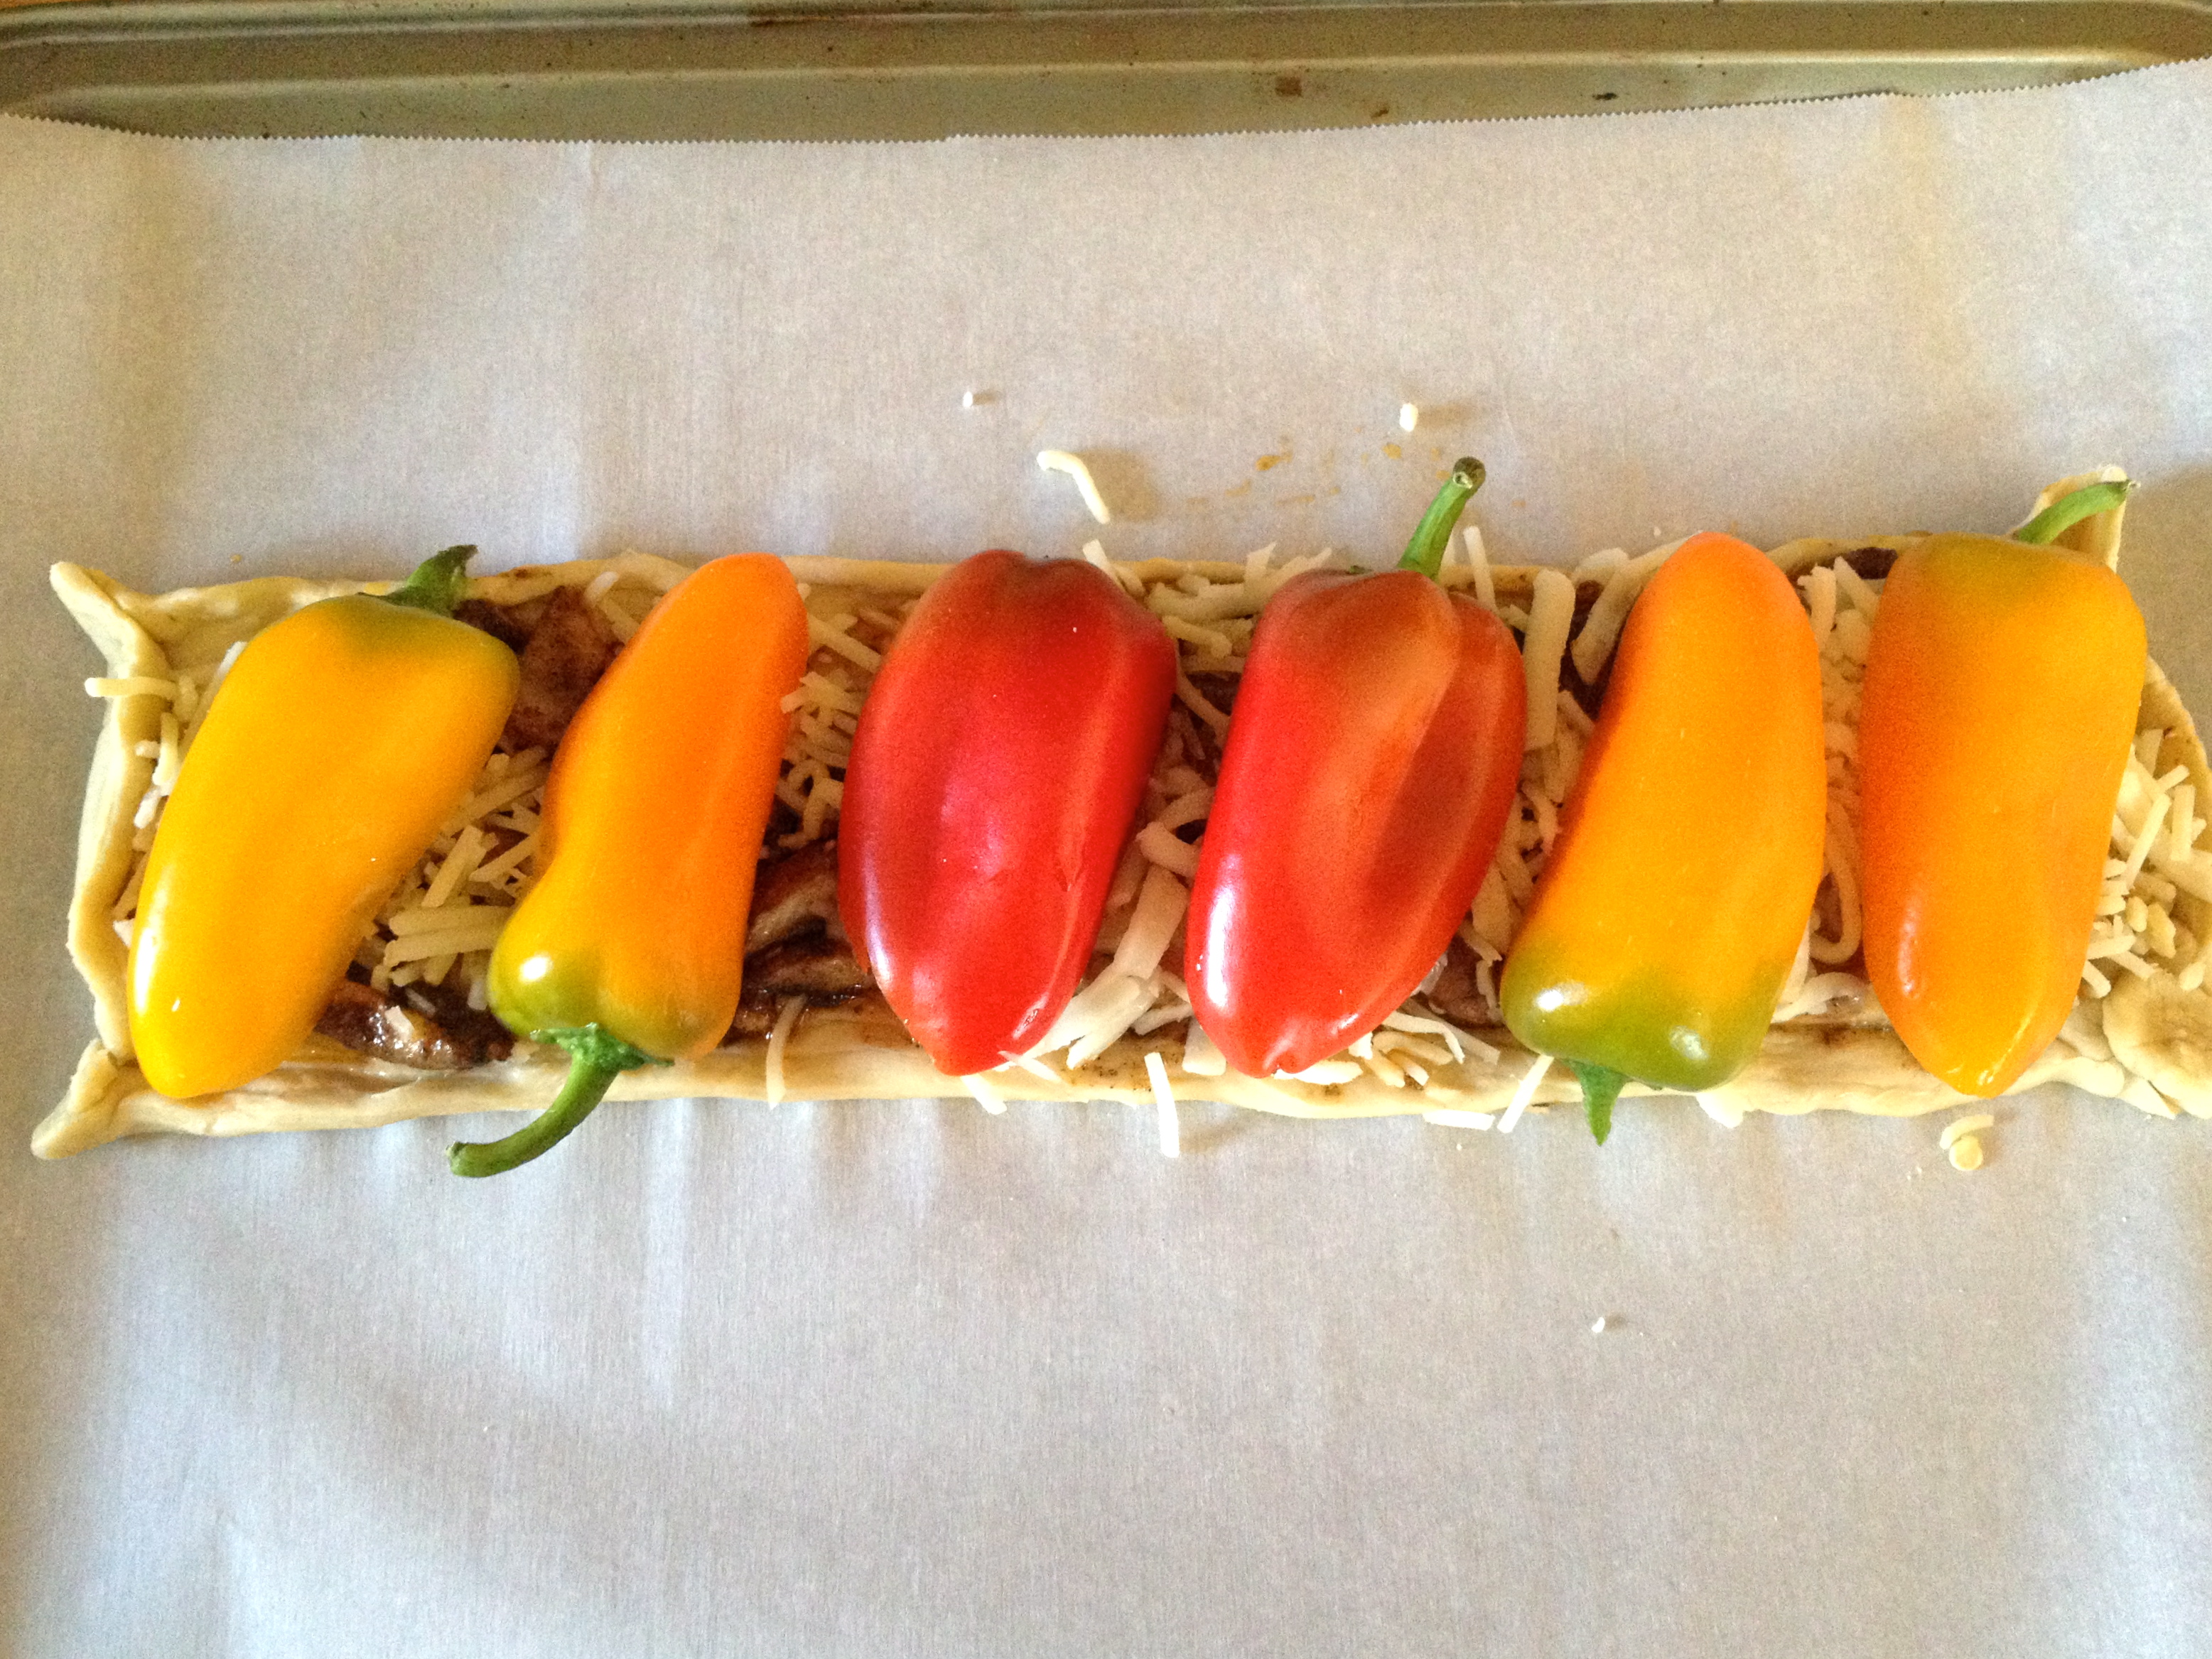
Season the mushroom with some paprika, Oregano, salt and pepper. Spread it on the puff pastry and top it with Mozerella & parmesan cheese and finally with some sweet peppers and bake it for 18-20 minutes.

IMG_4218IMG_4220

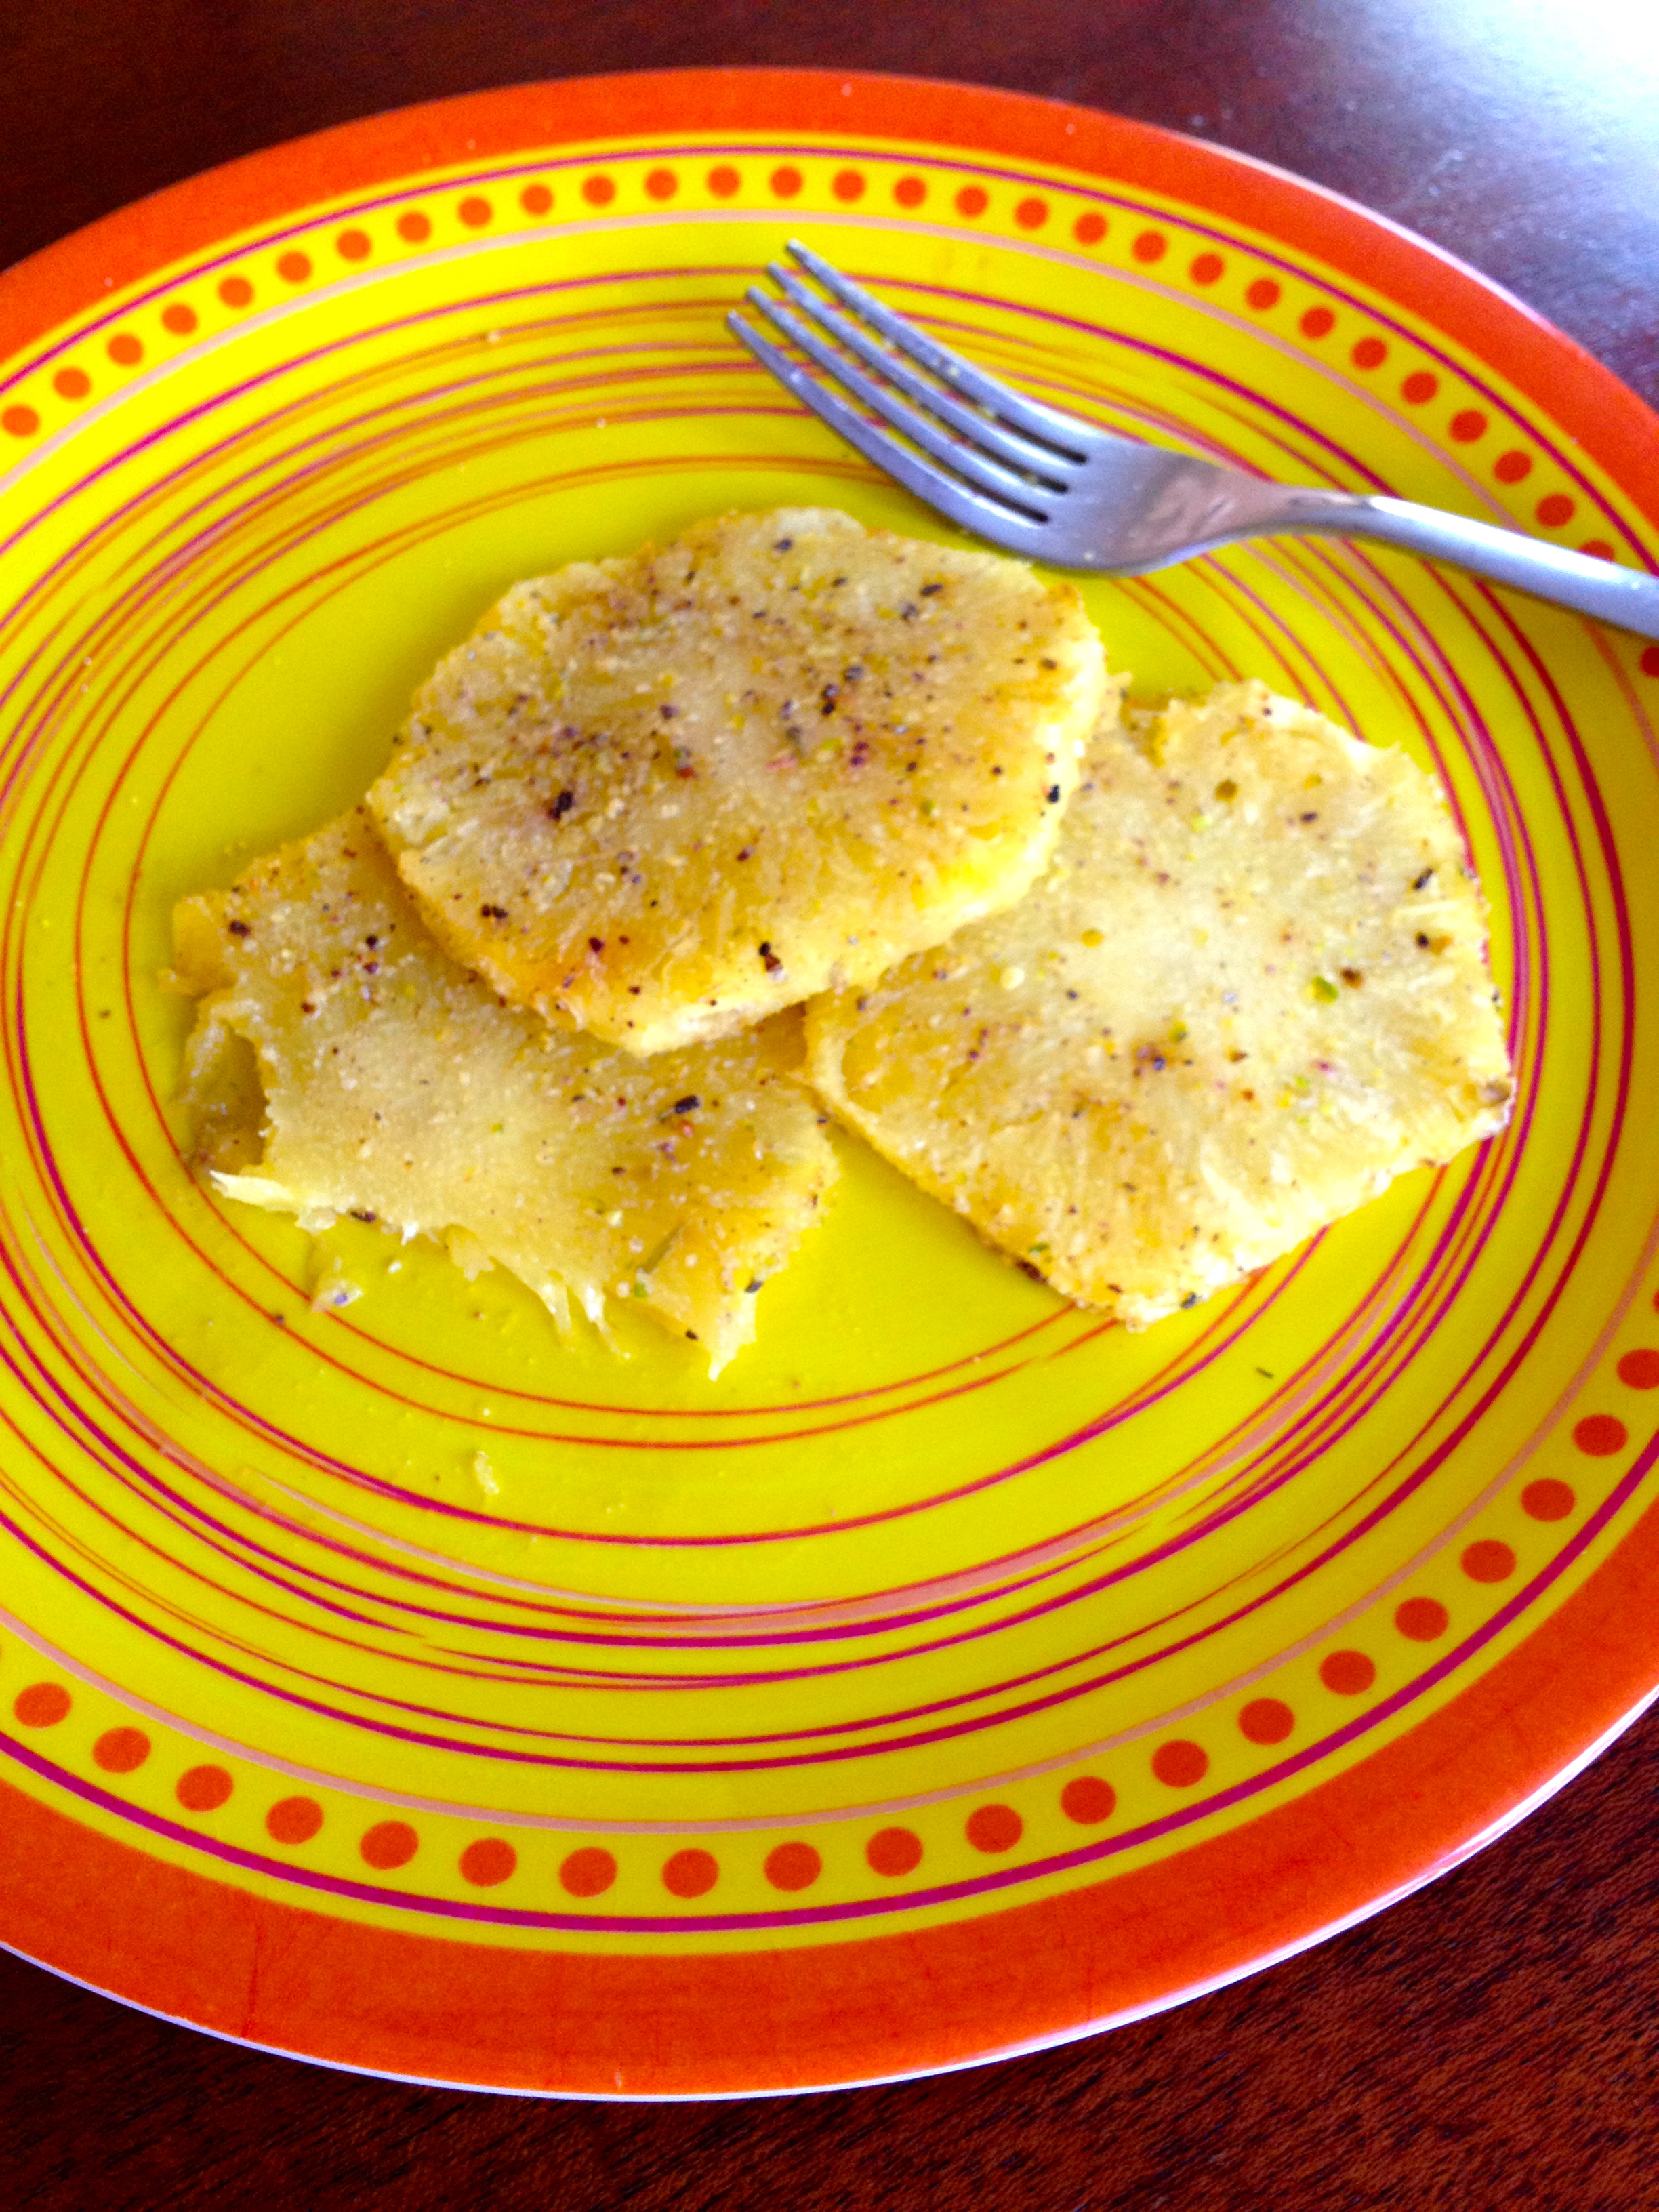
And you have a delicious appetizer, you can make them as bites too. Also, you can change the topping and make a customized pizza with some salad or soup for dinner.

IMG_4223

Printable Recipe: 

Total time: 25 mins    Prep time: 5 mins   Cook time: 20 mins

Servings : 2 (really ;-))

What you need:

Puff Pastry sheet

1 tsp Oil

3 Mushrooms

4 Sweet peppers

Few chopped onions

1/4 tsp Cumin powder

1/4 tsp Oregano

Salt & pepper ( as per taste)

1-2 tablespoons of grated Mozzarella Cheese

1-2 tablespoons of grated Parmesan Cheese

How you make:

Step 1 : Thaw the pastry sheet as instructed on the box. Preheat the oven to 415 F and heat the skillet on medium flame with a tsp of oil.

Step 2: Chop the mushrooms and sweet peppers and keep ready.

Step 3: Once the oil is hot sauté mushrooms and onions and season.

Step 4: Spread the pastry sheet with seasoned onions, mushrooms and top with cheese and peppers.

Step 5: Bake for 18-20 minutes or until the puff pastry edges get golden brown

“Happiness is Handmade”

Don’t you agree!!

Yesterday after spending 8 hours ( of course with multiple breaks) I finished 8 placemats for our dinner table(extendable) 🙂 and when I was finally done, I was absolutely happy and forgot all the pain..:)

IMG_4163Aren’t they pretty?? And it costed me less than 15 bucks 😉

I found the placemats in stores are bigger than I want and have been looking for right size that fit my table. To have a customized size I decided to DIY.

I have chosen canvas drop cloth as it is water and stain resistant and also wanted to do some stencilling.  I have cut the size(10X12) that matches my table and stenciled a flower and sewed the ends.

This project need couple of supplies that may not be handy so please keep everything ready before you start.

IMG_4141

Firstly, cut the fabric into 16 pieces ( for 8 placemats). If the fabric is thick, then you don’t have to double the number.

Secondly, prepare the stencil. To get more details on preparing the stencil please refer to the below link:https://nimasonti.wordpress.com/2014/04/04/stencil-cutter/

IMG_4137 IMG_4139

Next, using painters tape, place the stencil on to the fabric.

I used Tulip Fabric paints and they are very smooth and easy to apply. Also used a little metallic gold paint. Using foam brush apply/dab evenly.Make sure you stencil it on a cardboard so that you don’t stain the carpet or floor.

IMG_4144 IMG_4145 IMG_4146

It is not a quick project for sure as it takes 3 hours for the fabric paint to dry.

Lastly, after the paint is dry sew the ends. Sew the 2 pieces together, leaving a small opening and turn them inside out. They should look like the picture below:

IMG_4154IMG_4155IMG_4156

Iron and sew around the edges.

IMG_4160

And I have pretty placemats that adds color and also matches my style 😉

Have a great day!!

Cooking Without Limits

Food Photography & Recipes

Travelling Krishnaite

Shekhar Srivastava's Blog

Live-😊-Life..

"It has everything in little as a HAPPY package!!"

DesiCrafts

A blog Dedicated to Indian handicrafts, Fabrics and Supplies

Fulgorine

My adventures with art and polymer clay

The Beaded Bazaar

Polymer clay creations

Learn Polymer Clay

Inspiring you to explore your creativity and get down to work! A great collection of Free Polymer Clay tutorials

Wear the Ducky Tie

A Sewing Blog

sewmanju

Make your own style

SEW KATIE DID

because thread is the best glue.

The Crafty Coup

Finally, you're here! Let's make something!

The Daily Post

The Art and Craft of Blogging

WordPress.com News

The latest news on WordPress.com and the WordPress community.