DIY Cutters – Repurpose used tea light candles

Have you ever thought of making your own cutters??

I am very excited to share my recent discovery of making them with used tea light candles.

Couple of weeks back, for one of my polymer clay projects I was looking for a circle cutter. The cutters I use are all available at home . I typically use the cap of a body mist, deodarant bottle cap or a pen cap etc.

So none of them matched to the size of the circle I needed. I started looking around and saw the used tea light candle lying on the countertop. I gave it a try and it was the perfect circle.

That’s when I collected the used candle holders and started shaping, and they work great for my projects.

They can also be used for play dough, cookie cutters or jus to draw shapes.

All you need is a sharp knife and used tea light candles.
IMG_5547

You can also use these to create roti/tortilla bites. I am sure kids will jus love them 🙂 But make sure you use cling wrap or parchment paper on the surface, before you cut.

IMG_5564

Look, how well they are puffed and kids can jus dip the bite in milk and finish in minutes 🙂 Jus not kids, I enjoyed the bites too, prepared for the tutorial 😉 

IMG_5565

I hope you enjoyed the tutorial. Have a great day!!

Repurpose Milk Carton

We all take vacations and tend to bring back something as a memory. It can be a souvenir or a travel keepsake. Sometimes, it can also be a small gift from a friend.

So, I have collected a lot of such items in past few years. In the US, I started collecting fridge magnets as they are easy to store. You don’t have to worry about figuring out a place to hang or organize them.

Post wedding, after I moved out of my parents home I couldn’t carry all of the stuff I collected. But made sure I get something back from every trip to home(India).

Now, I have a decent collection.

IMG_5476

Then, the bad part is, they are small, accumulate lot of dust and more important, it is really difficult to organize. I have been looking for small boxes or a big box with compartments to store them.

But couldn’t find anything that match my requirements. I decided to DIY and  thought cardboard box was the perfect choice. But, the only challenge was, cardboard may not be sturdy  as some of  these stuff are little heavy.

That’s when I decided to use milk carton boxes. I am not quite sure of the material but they are not jus cardboard, they were sort of thicker foam and cardboard material. I customized the carton box  and was surprised on how well they look and all you need is a push pin to place them on the wall.

IMG_5484

I used Kirkland milk carton box and cut into desired size(i did in 2 halfs). Before you use make sure you wash and dry for couple of hours. One half will have a base and the other half  can be discarded or use a cardboard piece as base.

IMG_5495

Next, used a self adhesive vinyl to cover the outer surface. To give a wood look I used a brown one.I prefer not to cover the whole inside part of the box becoz I wanted to use a flameless LED candle and having a dark background may not work well.

IMG_5497

Or you can customize the box based on the object you are placing. I used a light color A4 sheet and cut into the size of the box and placed it with double sided tape. For the background I took a printout of a traditional design and sticked it on.

IMG_5485

Don’t they look great?

Tip of the week!!

This is a great tutorial on how to drape a Saree Lehenga in 10 easy steps by Kalpana Shah.

1. Tie the underskirt a little looser than usual.

 1501204_10152200921248132_282459067_o
2. Start by tucking in your Saree with a folded box pleat.Flatten it and pin it in place.
 901229_10152200921263132_406049735_o
3. Turn the underskirt towards your right hip, make another pleat, pin it and turn the skirt again.

 1495173_10152200921258132_2089175984_o
4. Continue until you reach the first pleat.

1417619_10152200921568132_748406287_o
5. Make sure you have 7 to 8 pleats distributed all around your waist.
6. 3 pleats at the back, 1 pleat on the right and 3 in front.
 1495206_10152200921798132_61509421_o
7. Once the lehenga is complete tighten your underskirt and start pleating your pallu. Make up to 4 1/2 pleats.
 1502783_10152200921913132_1837220207_o
 8. Drape the pallu down your right shoulder. Stretch the innermost border on the left and tuck it into the skirt.
 1425458_10152200922108132_222841869_o
 9. You can tie a belt around your pallu,to complete the look.
 775755_10152200922333132_97717758_o
10. This is how the Saree Lehenga should appear from the back.

 1504363_10152200922523132_1448936728_o

Hope you enjoy this new style!!

Happy Thursday!!

DIY Jhumkha (Traditional Dangling earrings)

Jhumkhas are traditional earrings that are matched to Indian attire like Salwar Kameez or Sari. They dangle and are very elegant. You can wear simple ones on tunic tops too.

Well, last week I made a pair with polymer clay and they looked perfect. It is easy and doesn’t require lot of tools. You can use the very basic ones that are available at home and make amazing designs. For extra bling, some metallic acrylic paint works well.

So, here is tutorial:

Step 1: Make a small ball (aprox size of  2 garbanzo beans). Roll it well making sure it is nice and smooth. Depending on the polymer clay you use, there is a chance of it being soft. In such cases put it in the freezer for couple of minutes. Hardening it a little helps in cutting it easily without spoiling the round shape.

Step 2 : Use a sharp blade to make it half( keep rolling the blade on the ball and cut). If you want a bigger one, you can make 2 equal size balls and cut 1/4th and use the 3/4 piece.

IMG_5298

 Step 3: Using a pen, blade, tooth pick or match stick you can make designs on the clay ball.

IMG_5299

Step 4 : For the stud part too, make a ball cut into half and make a design of your choice.

IMG_5300

 Step 5: Now time to add the basic jewelry findings. Take an eye pin and add to the bottom and stud part of the earrings. For stronger bonding, I use Poly paste – polymer clay glue.

IMG_5302

Step 6: You can buy ear posts at your local craft store or @ Amazon/Ebay. Bake the pieces as per the package instruction and let them cool. Once cool add ear posts to the stud part with super glue and use jump rings to join. Or  if you want a simple one, add a fish hook ear posts( as shown in pic).

IMG_5304

For extra shine use an acrylic metallic paint. It can be done like show below:

IMG_5307

Isn’t it easy and looks great too!!

You can make any kind of jewelry and any color that matches your outfit. And for the necklace you can use yarn, jewelry cord or  satin ribbon and they look fab.

IMG_5228 IMG_5282 IMG_5376

Hope you enjoyed the tutorial. If you happen to make any I would love to see 🙂

Have a great day!!

Leek n Potato Curry!!

Leeks, like garlic and onions, belong to same family. I never got a chance to eat Leeks in India. In Singapore I did taste them and they are used in lot of soups and actually started cooking them only after moving to United states. I so much enjoyed the flavor and replaced  it with green onions. And now, this superfood is part of our diet 🙂

I usually sauté chopped leeks  with some tomatoes and make a delicious curry that goes well with rice or roti/naan(Indian bread) or Leek & Potato soup, more of a curry soup.

Whenever I served the soup, my husband says a curry version with hot roti’s(Indian bread) would be a great combination too. After constantly hearing, one day I made it for dinner and we absolutely loved.

In fact, this is the first time we ate only potato curry. I really don’t prefer eating potatoes (esp for dinner) becoz they are very filling and sometimes find it hard on tummy. But this curry version was so light and delicious.

For a moment, I thought I might be first one making it;-) Unfortuantley not, I found a lot of videos and posts, so this is not new, but sharing my version 🙂

IMG_0524

You don’t need a lot of ingredients for the curry. My version is a low-medium spice, you can always add more spices as per your taste.

IMG_5115

Tomato and red onion are optional. The curry powder I used is an Indian one, you can replace it with Mccormik Curry powder.

Screen Shot 2014-07-30 at 9.20.42 AM

Make sure you wash Leeks properly. If you are using it for the first time, watch some youtube videos. Don’t be surprised, if you find a lot of dirt in the layers.

Chop the onion, leeks and cut the potatoes and keep ready.Heat a pan and once oil is hot add cumin seeds, red onions and sauté until onions are cooked. Then add leeks and let it cook for 3-5 mins. Then add coriander powder and the curry powder or masala.

IMG_0541

Adding the spices to onions helps in removing any raw flavor.  Add 2 cups of water/vegetable broth, potato pieces, little more salt and spices(of your choice) and let it cook for 20-25 mins or until potatoes are tender.  If you want to fasten the process, you can microwave the potato pieces.

IMG_0546

And here is the delicious curry ready to dig-in with some Indian bread 🙂

IMG_5151

Printable Recipe :

Servings : 4

Leek – 1

Potato – 2 (medium sized)

Red onion – medium sized

Curry leaves – few

Curry  Masala – 1 tsp

Coriander Masala – 1 tsp

Cumin seeds – 1 tsp

Oil – 1 tsp

Salt ( as per taste)

Water or vegetable broth – 2 cups

Tomato – 1(optional)

Step 1 : Wash the leeks and chop them finely. Also keep the red onion and potato peeled & chopped .

Step 2: Heat a pan, add 1 tsp of oil and once it is hot add cumin seeds & curry leaves.

Step 3 : Add the chopped red onion, add little salt and let them cook for few minutes. Then add the leeks and cook for 3-5 mins. Now add spices and cook until the rawness gone.

Step 4:Add 2 cups of vegetable broth/water, add potato pieces, little salt and spices if required and let it cook on low-medium heat for 20-25 mins. Cook until the potato pieces are tender and garnish with herbs of your choice 🙂

Eat Hearty!!

Veggie Art!!

Suddenly, when you recall certain childhood memories,it makes us nostalgic which is a very strange emotion 🙂

Something like that happened to me couple of weeks ago. I am sure you will recall too, if you happened to do art with vegetables.

And it was our  favorite art during summers. We used to make flowers from okra & cauliflower and leaves with  beans. Basically, you use them as stamps.

It is not only a fun art for kids, adults enjoy too and it comes handy  to enhance your gift packing.

IMG_5207

Yes, when you have a not so fancy gift wrapping paper, this is the best way to enhance and make it unique.

All you need is some veggies like Okra, carrot, beans, leek, cauliflower etc, a paint brush and some water or acrylic colors. You can as well use color stamp/ink pads.

IMG_5194

For demonstration purpose, I used an empty box and brown gift packing paper.

IMG_0532

 So, cut the veggies, rub some paint or use ink pad and stamp it.

IMG_0534

So get creative and make it or help your kid to make a card for special occasions.

Also, if you think of using/used any other veggie please drop a comment.

Cut Canvas!!

Recently I learnt, Canvas is just not for painting, you can cut a pattern and make a stunning wall art.

After seeing couple of pins on cut canvas @ Pinterest I decided to try my hand at making a simple art. Though it is not perfect I am pretty happy for the attempt 🙂

IMG_0491

After some internet search, saw some awesome DIY projects on Nine Red blog page. It is one amazing place where you find a lot of  inspiring projects that you can’t wait to make 🙂 And the best part is, the tutorial is detailed and easy to follow.

Since, this is my first one, I used an old canvas. As mentioned in the tutorial, I applied the glue and water mixture and let it dry overnight.

IMG_0484 IMG_0485

I picked a simple silhouette as pattern and traced it on the backside. Using Xacto knife I have carefully cut the pattern. It took a while but give enough time and have patience and you will be able to complete it easily.

IMG_4900 IMG_4901

Finally, to hide the old canvas painting, I used silver spray paint 🙂

IMG_0492

Wait for more of these projects for Halloween and Christmas.

I hope you enjoyed and Happy Monday!!

Appetizing Soup!!

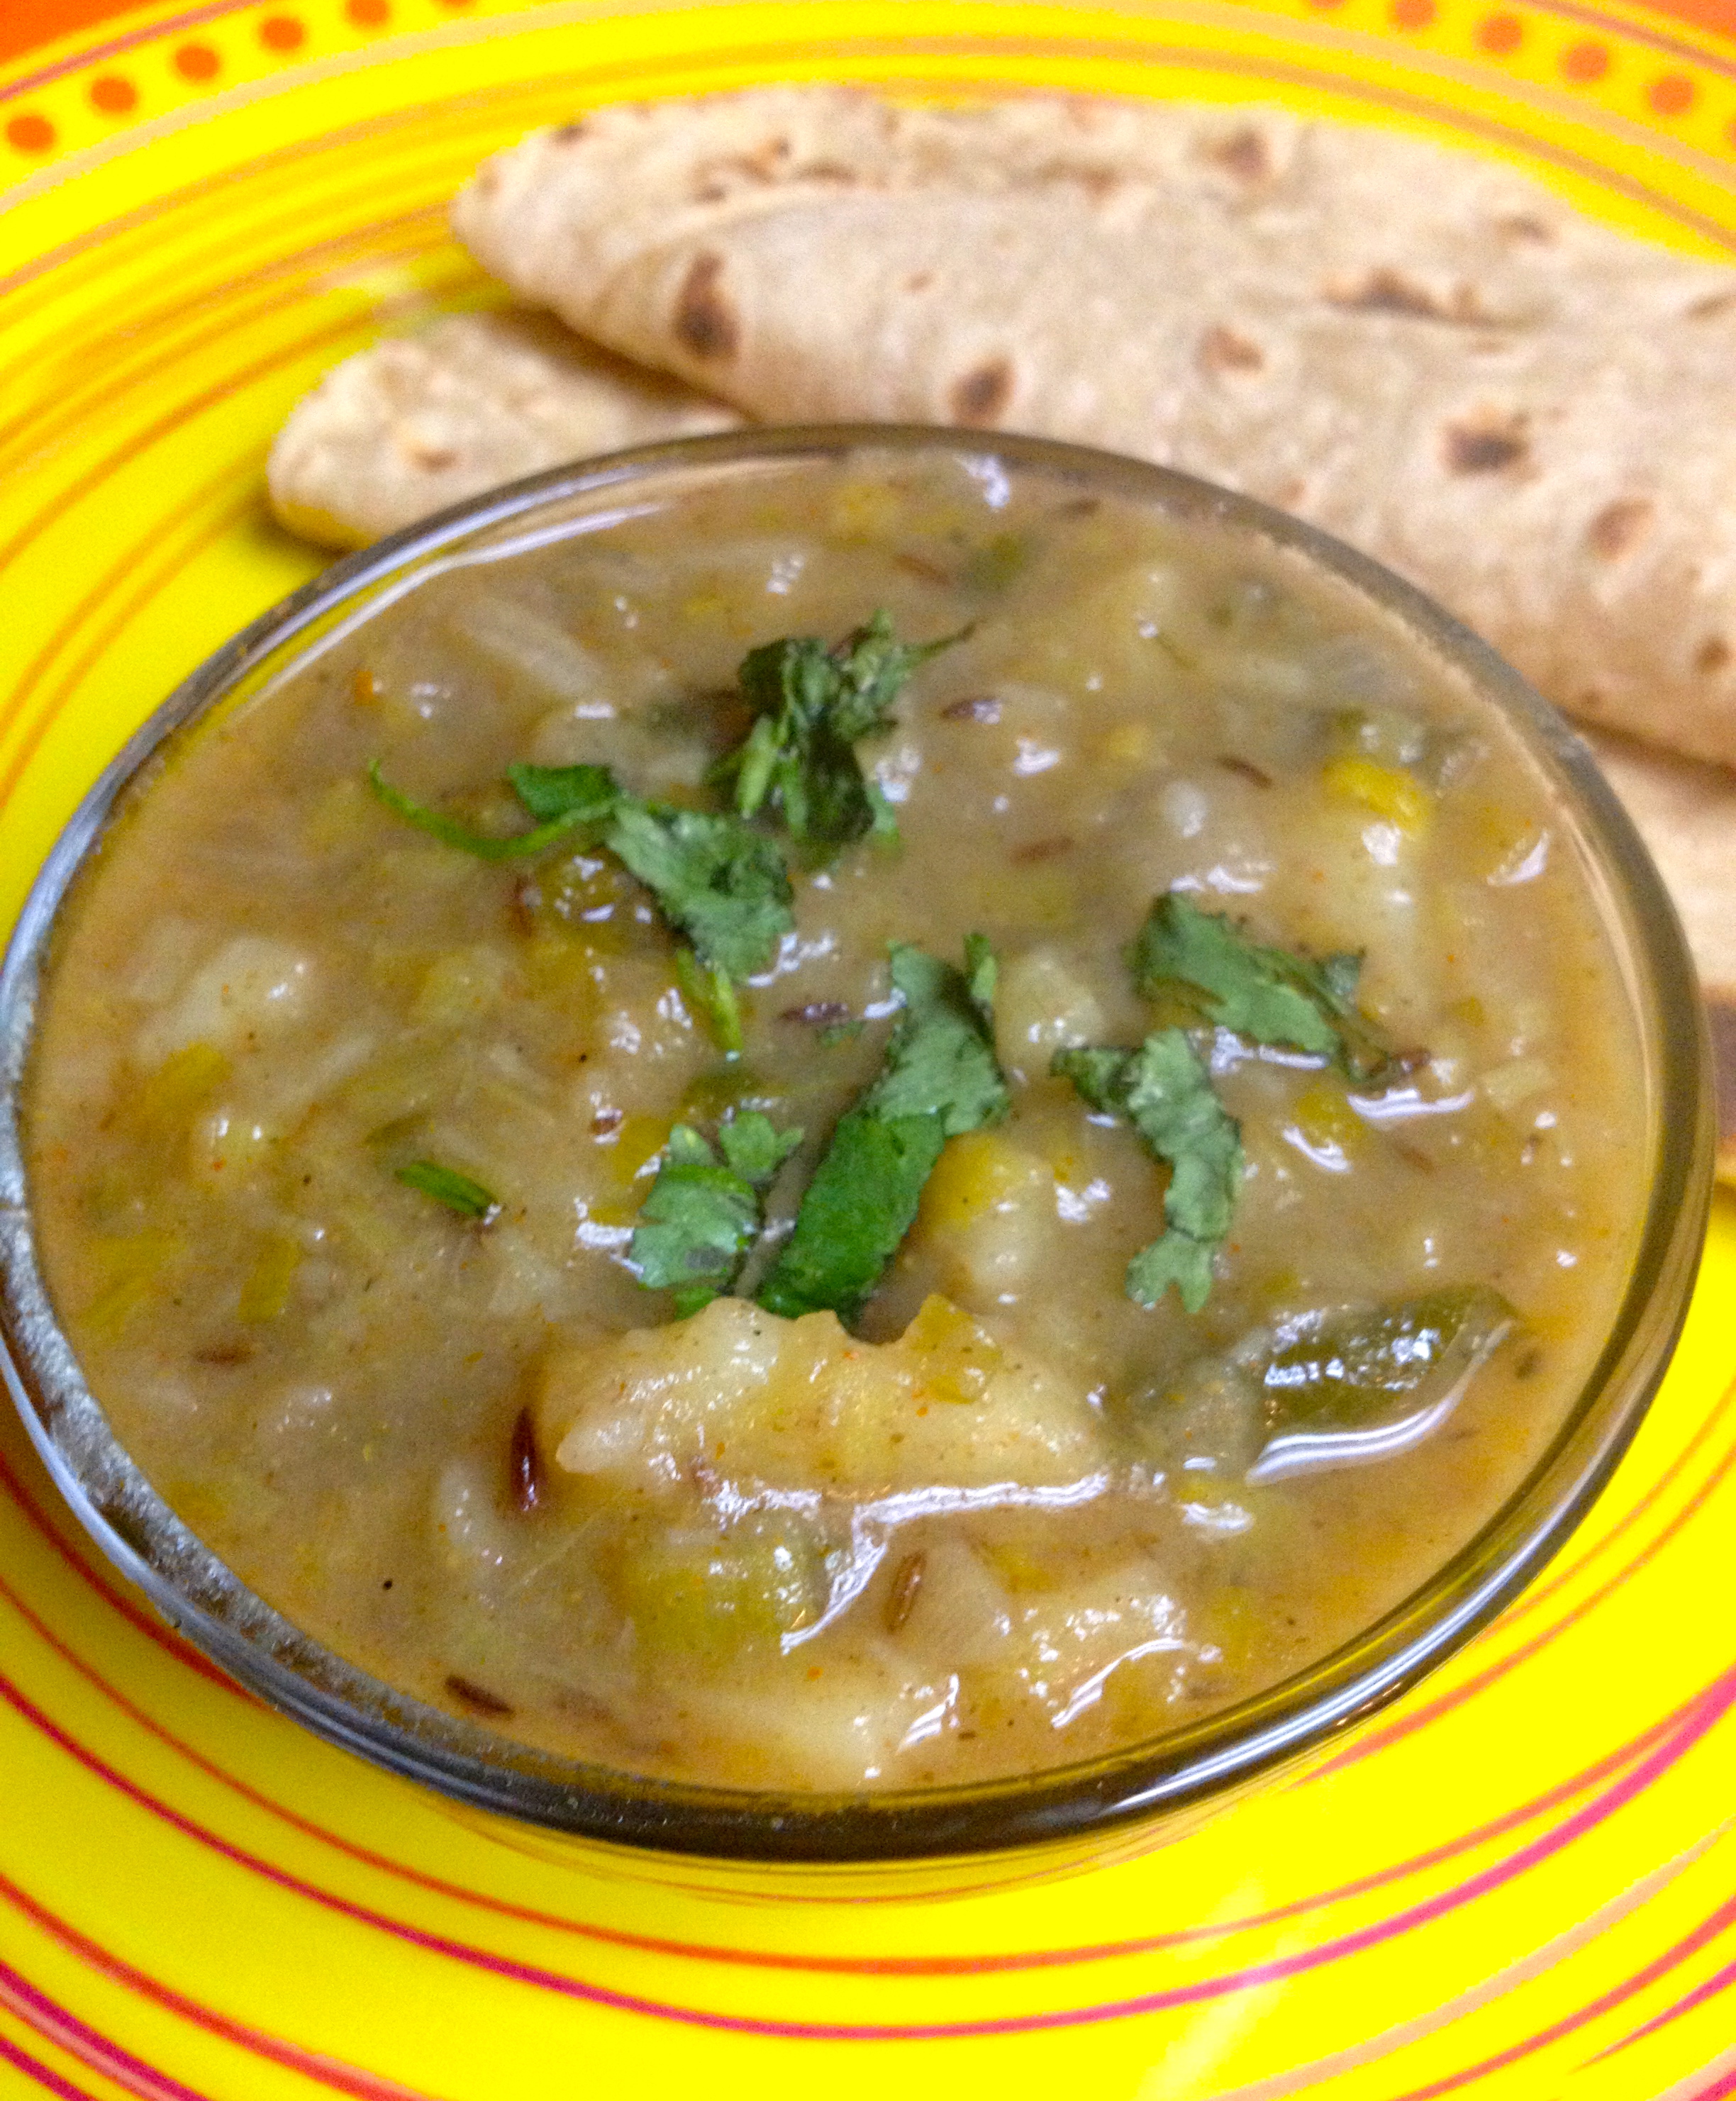
Home -made soups are so yummy that you can’t stop with one bowl or ever need a side dish.

I simply love bell peppers, particularly the colored ones. They go well with alsmot any dish and are mild in spice and crunchy. I think they are super food because of all the goodness such as  low in calories, rich in vitamin C, good source of Vit E and also contain B6.

I can’t wait  to share a delicious roasted pepper soup with and added flavor of Indian spices,tomatoes and carrots 🙂

IMG_5072

You don’t need a lot of ingredient and is quick too.
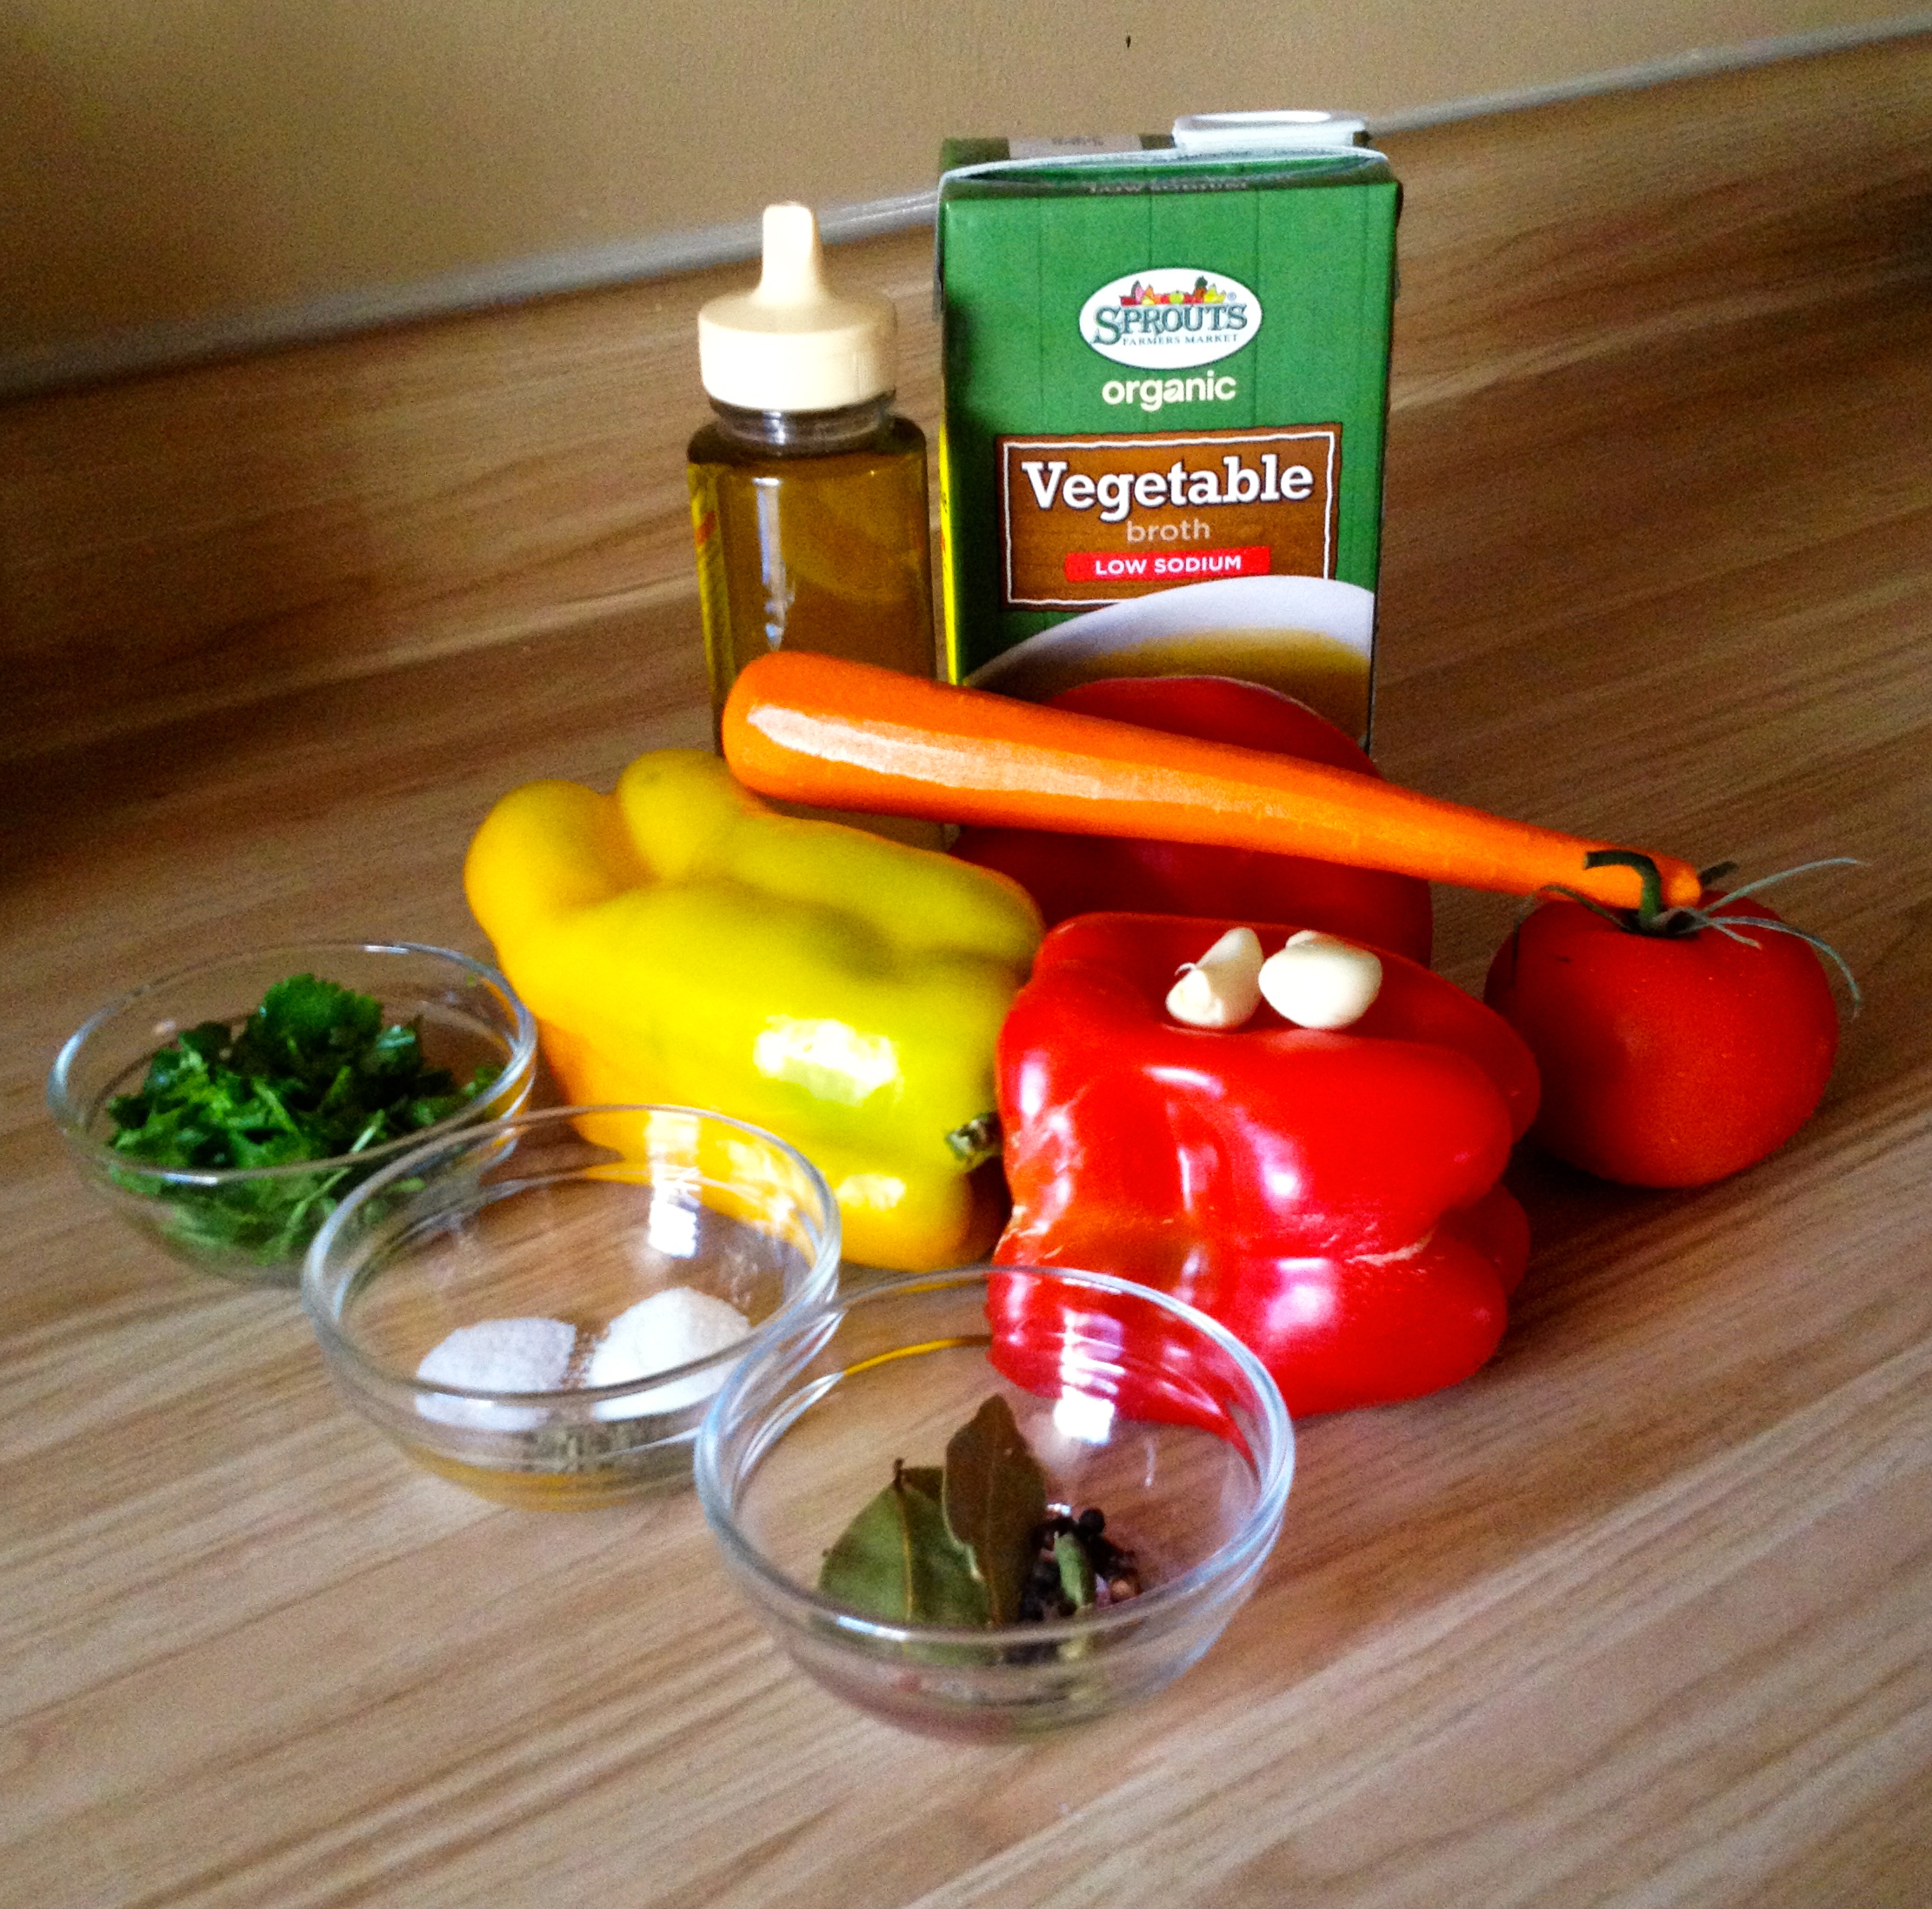
What you need :

IMG_5051

Sorry forgot to mention the Onion and if you are using a big size Tomato 1 is good else you can make it 2 🙂

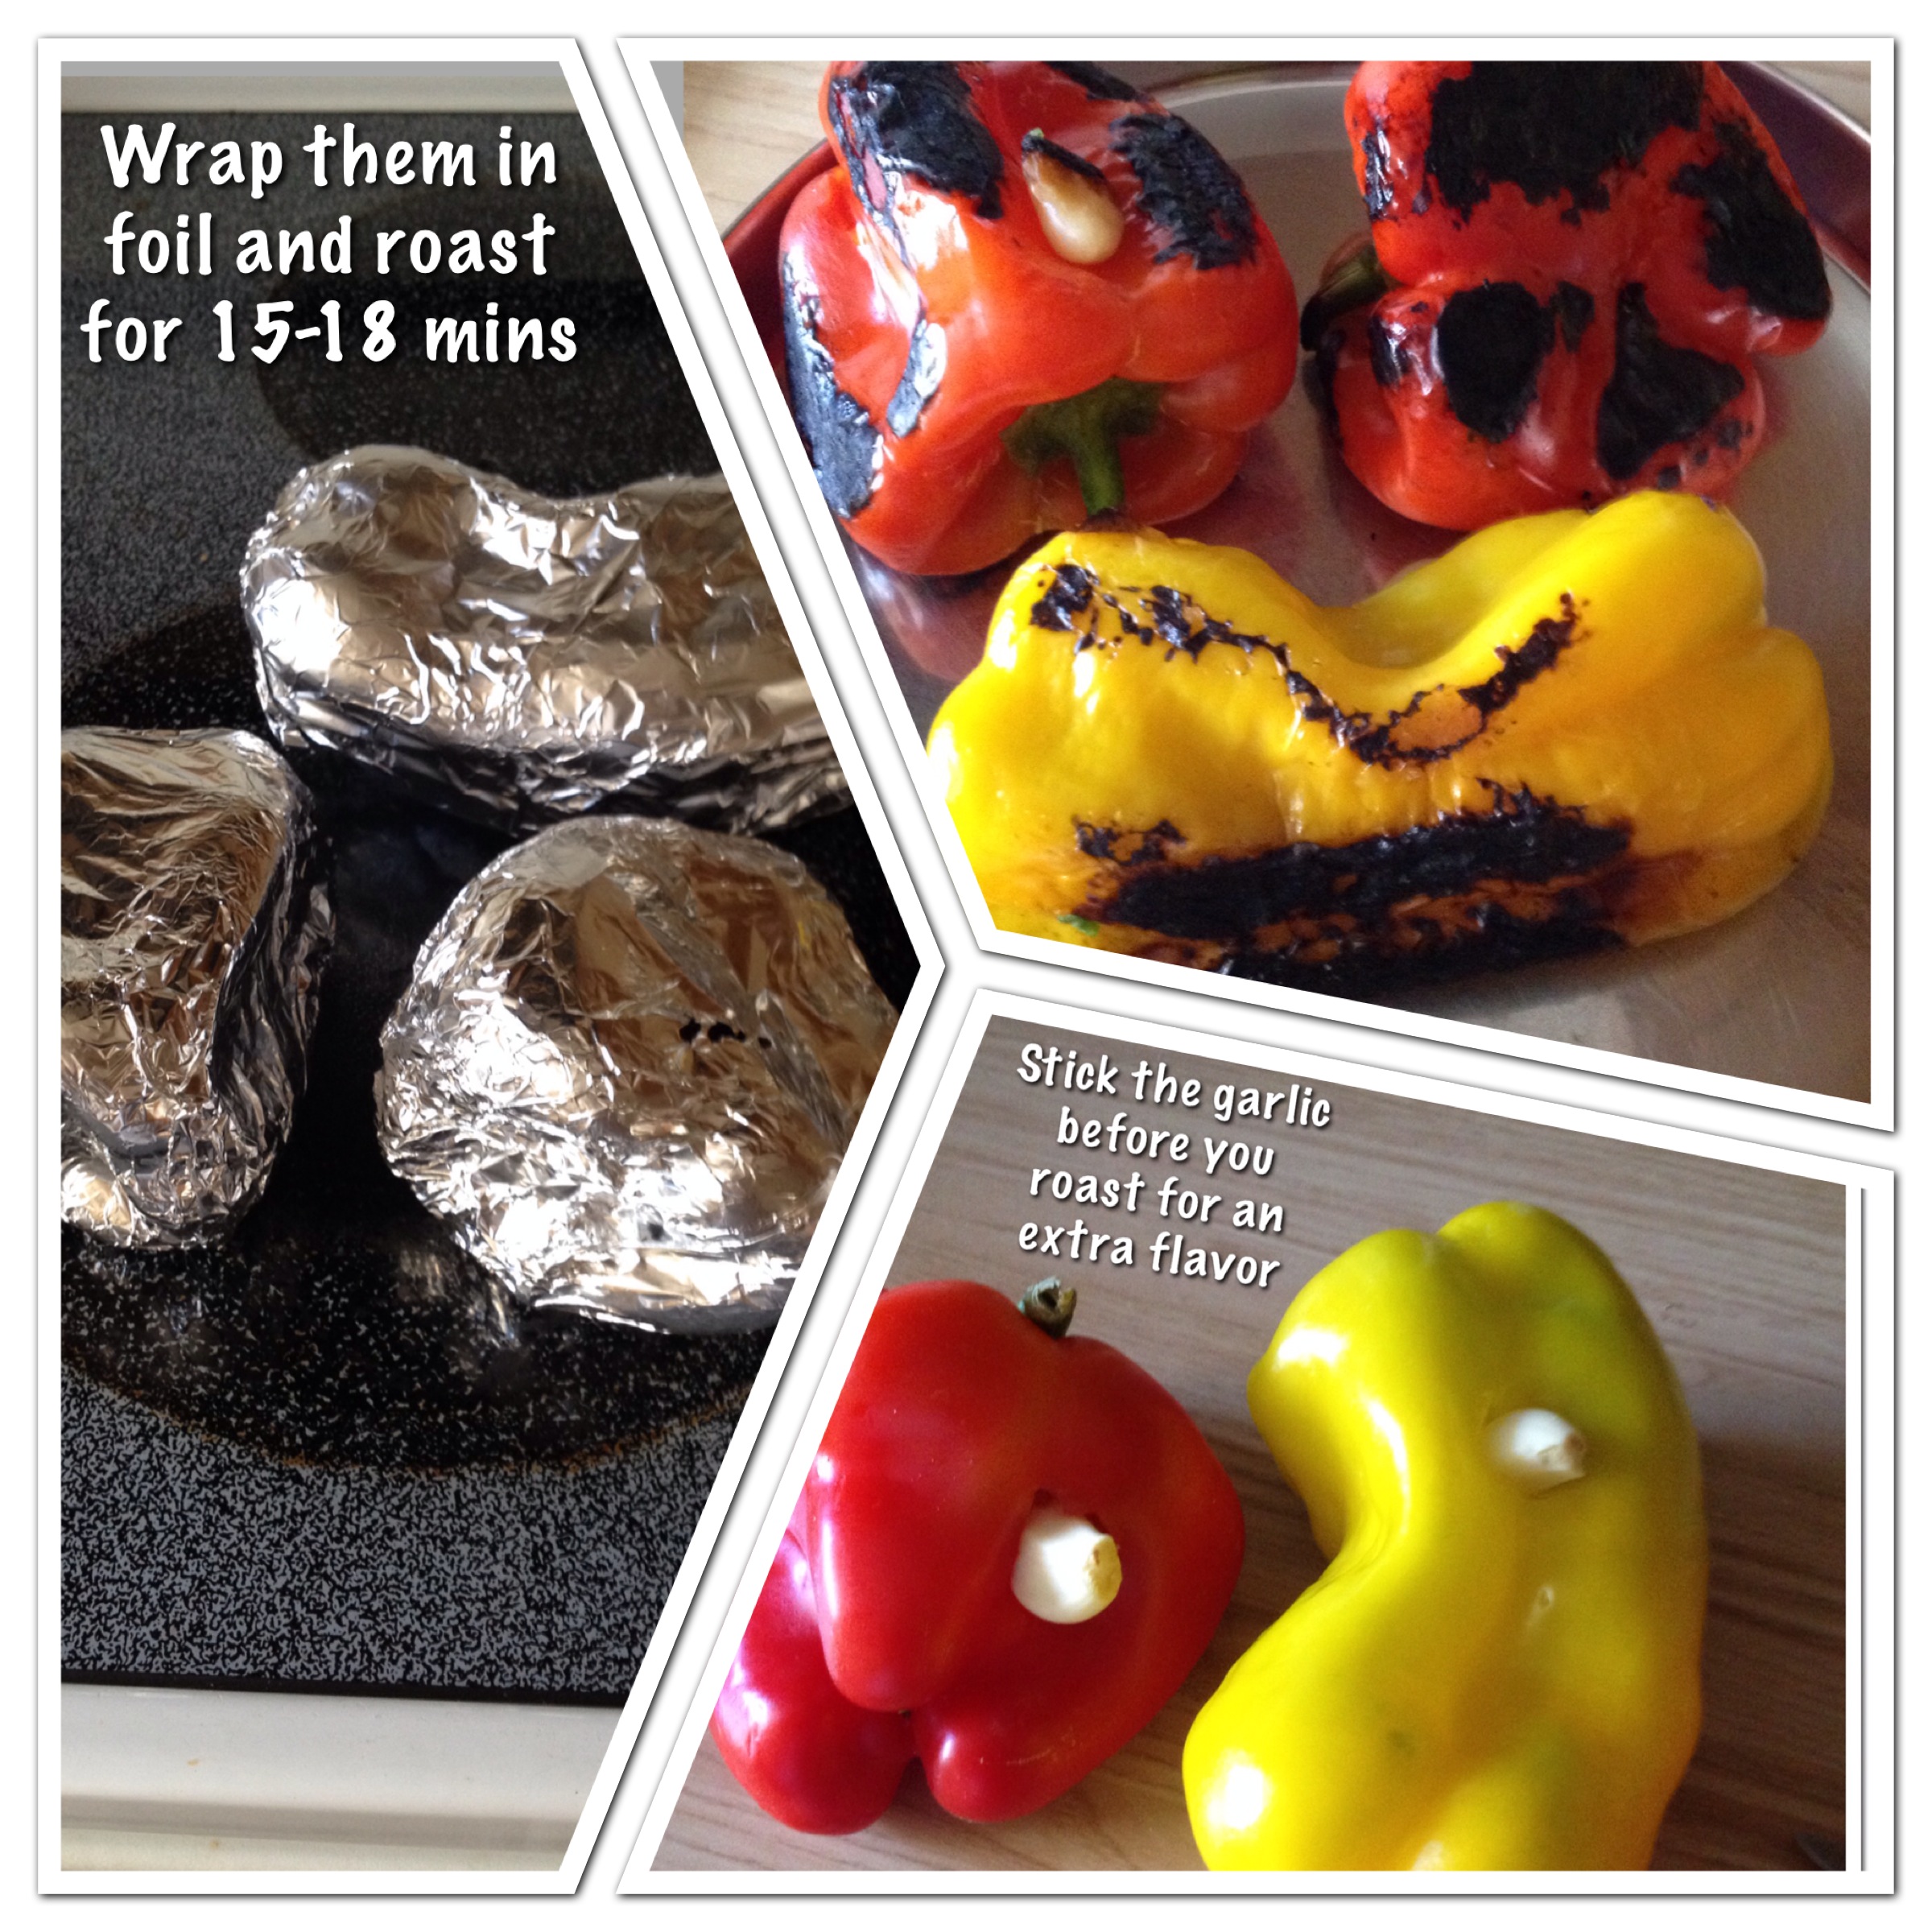
Step 1: To roast the peppers you can either do it on stove top or broil/bake in the oven. I tried both ways and stovetop taste little better. However, if you bake, it is effortless.

IMG_0514
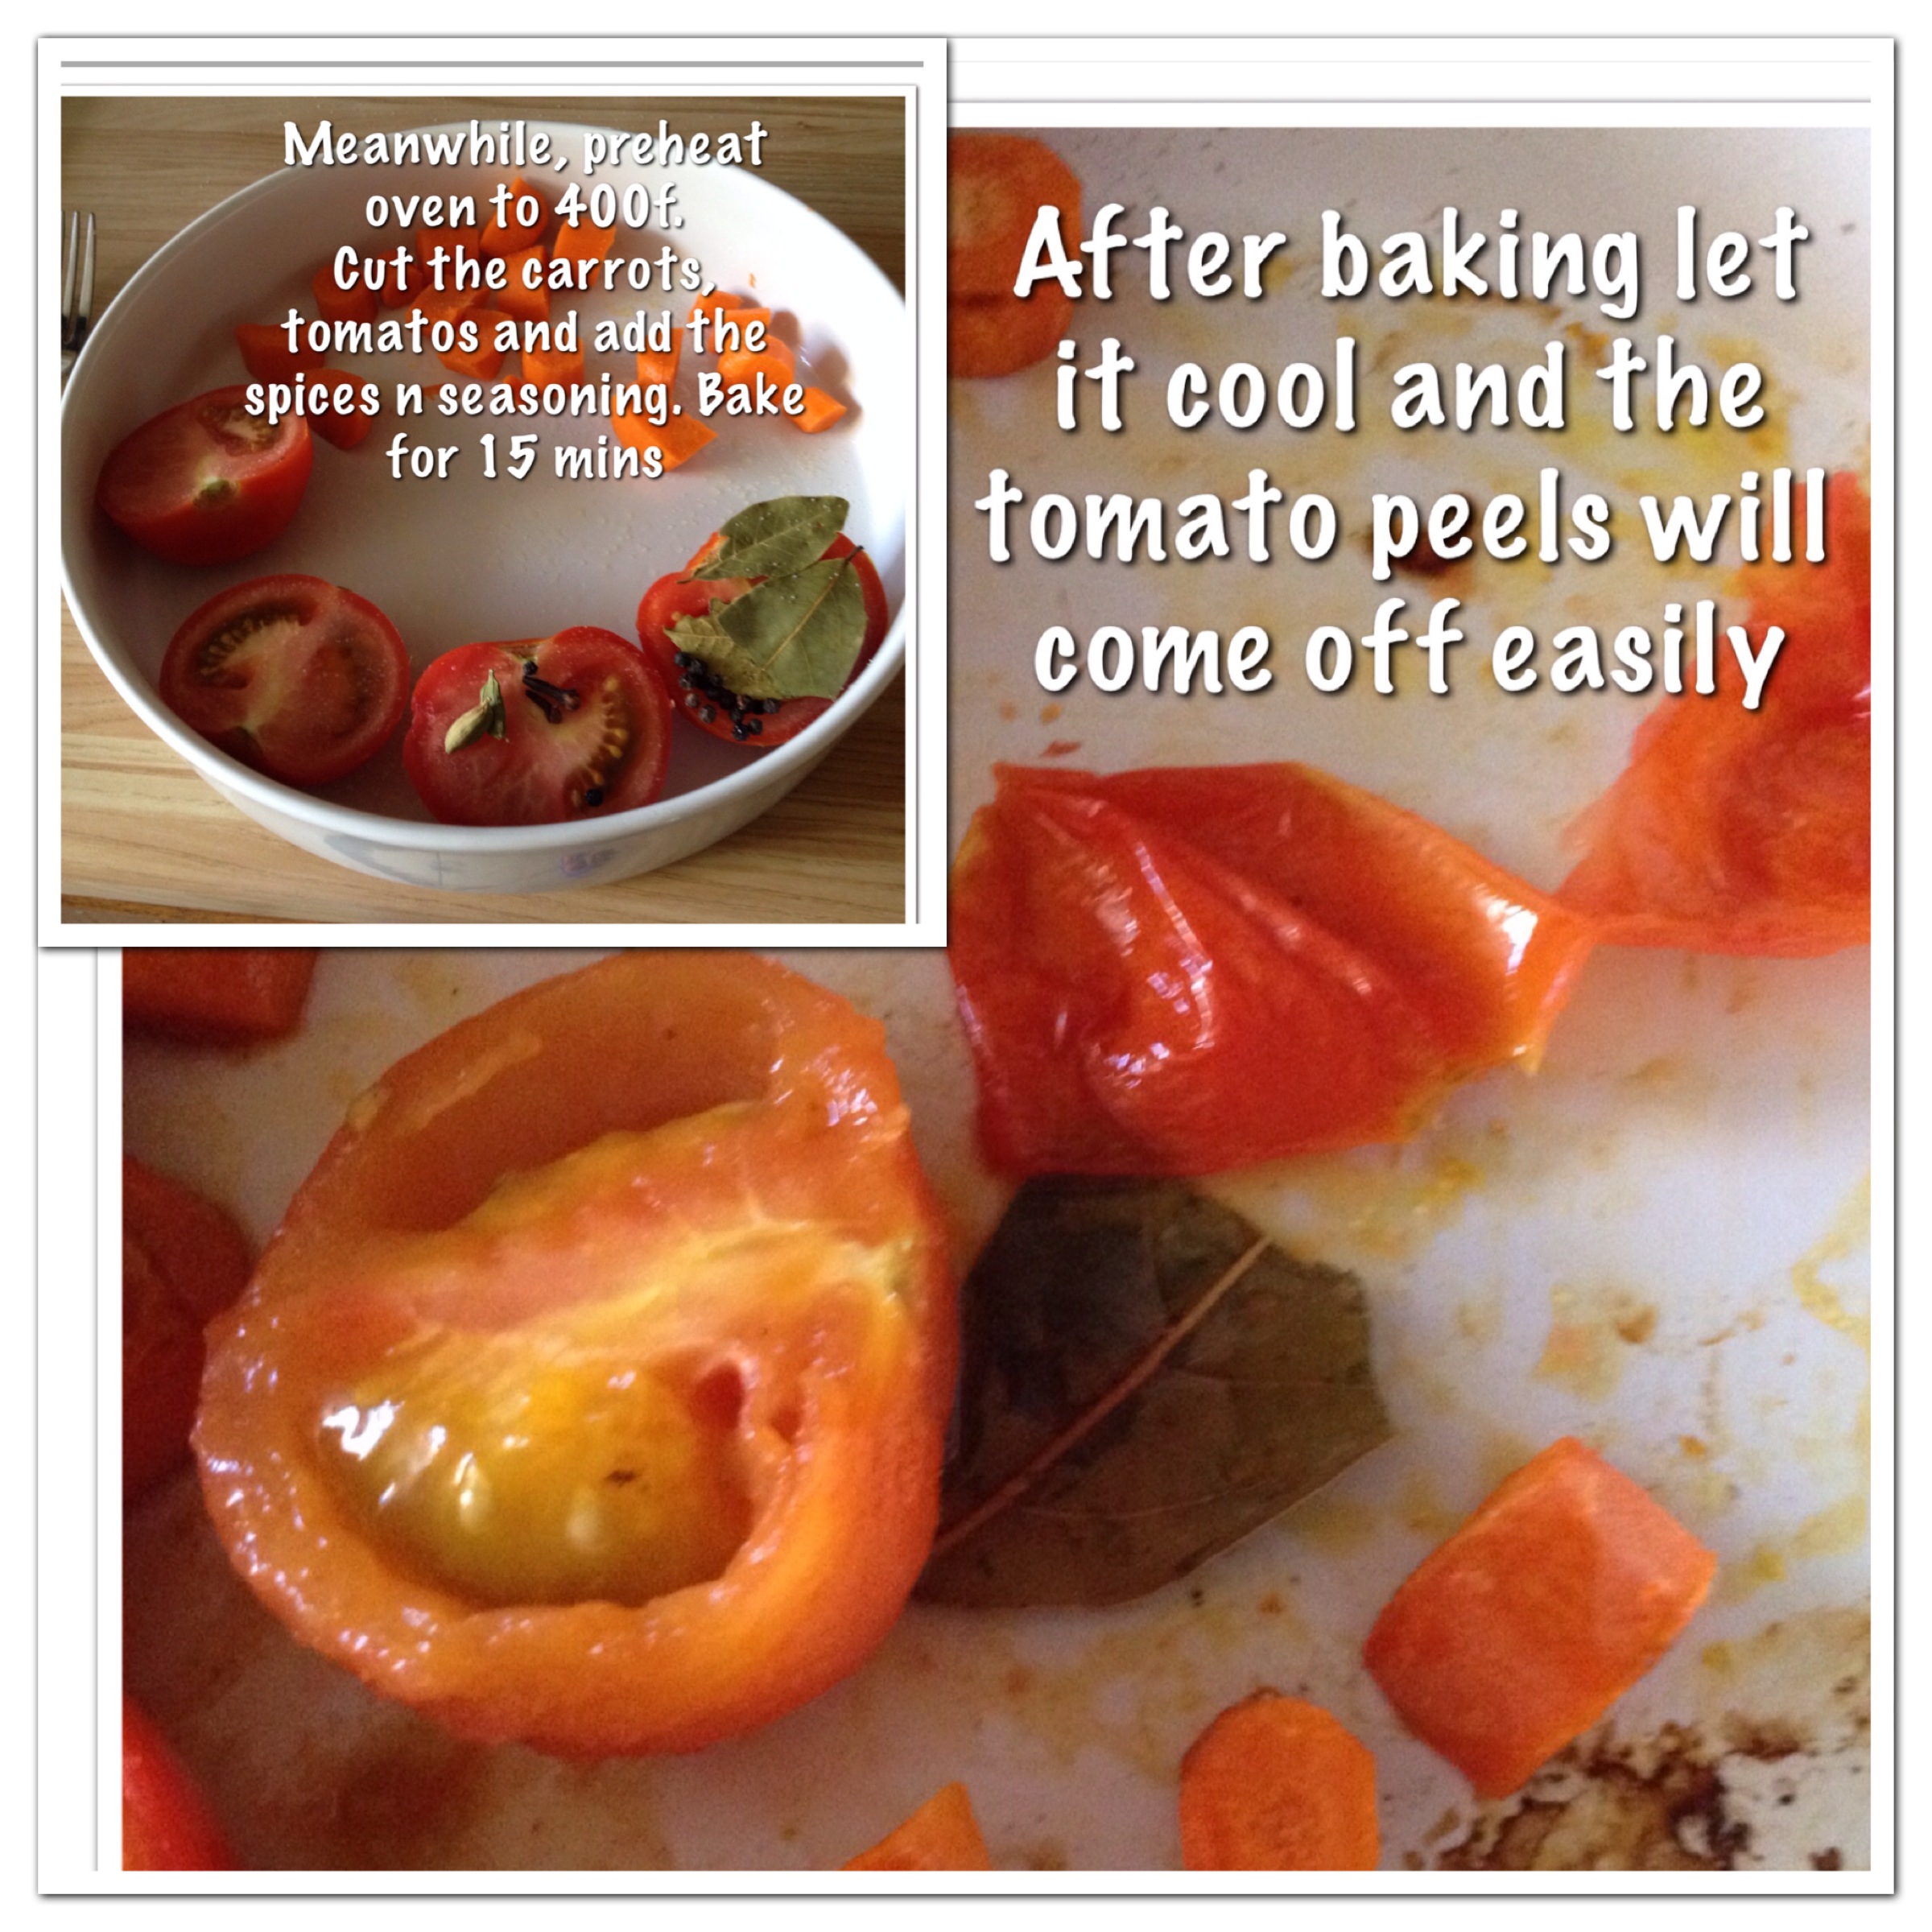
Step 2: Adding tomato enhances the flavor and also helps in balancing the spice.

IMG_0517

Step 3:  Cooking the soup

IMG_0518IMG_0520

Step 4: Blend and strain it

IMG_0521

Printable Recipe :

What you need:

Bell peppers -3( can be a mix of red, orange or yellow)

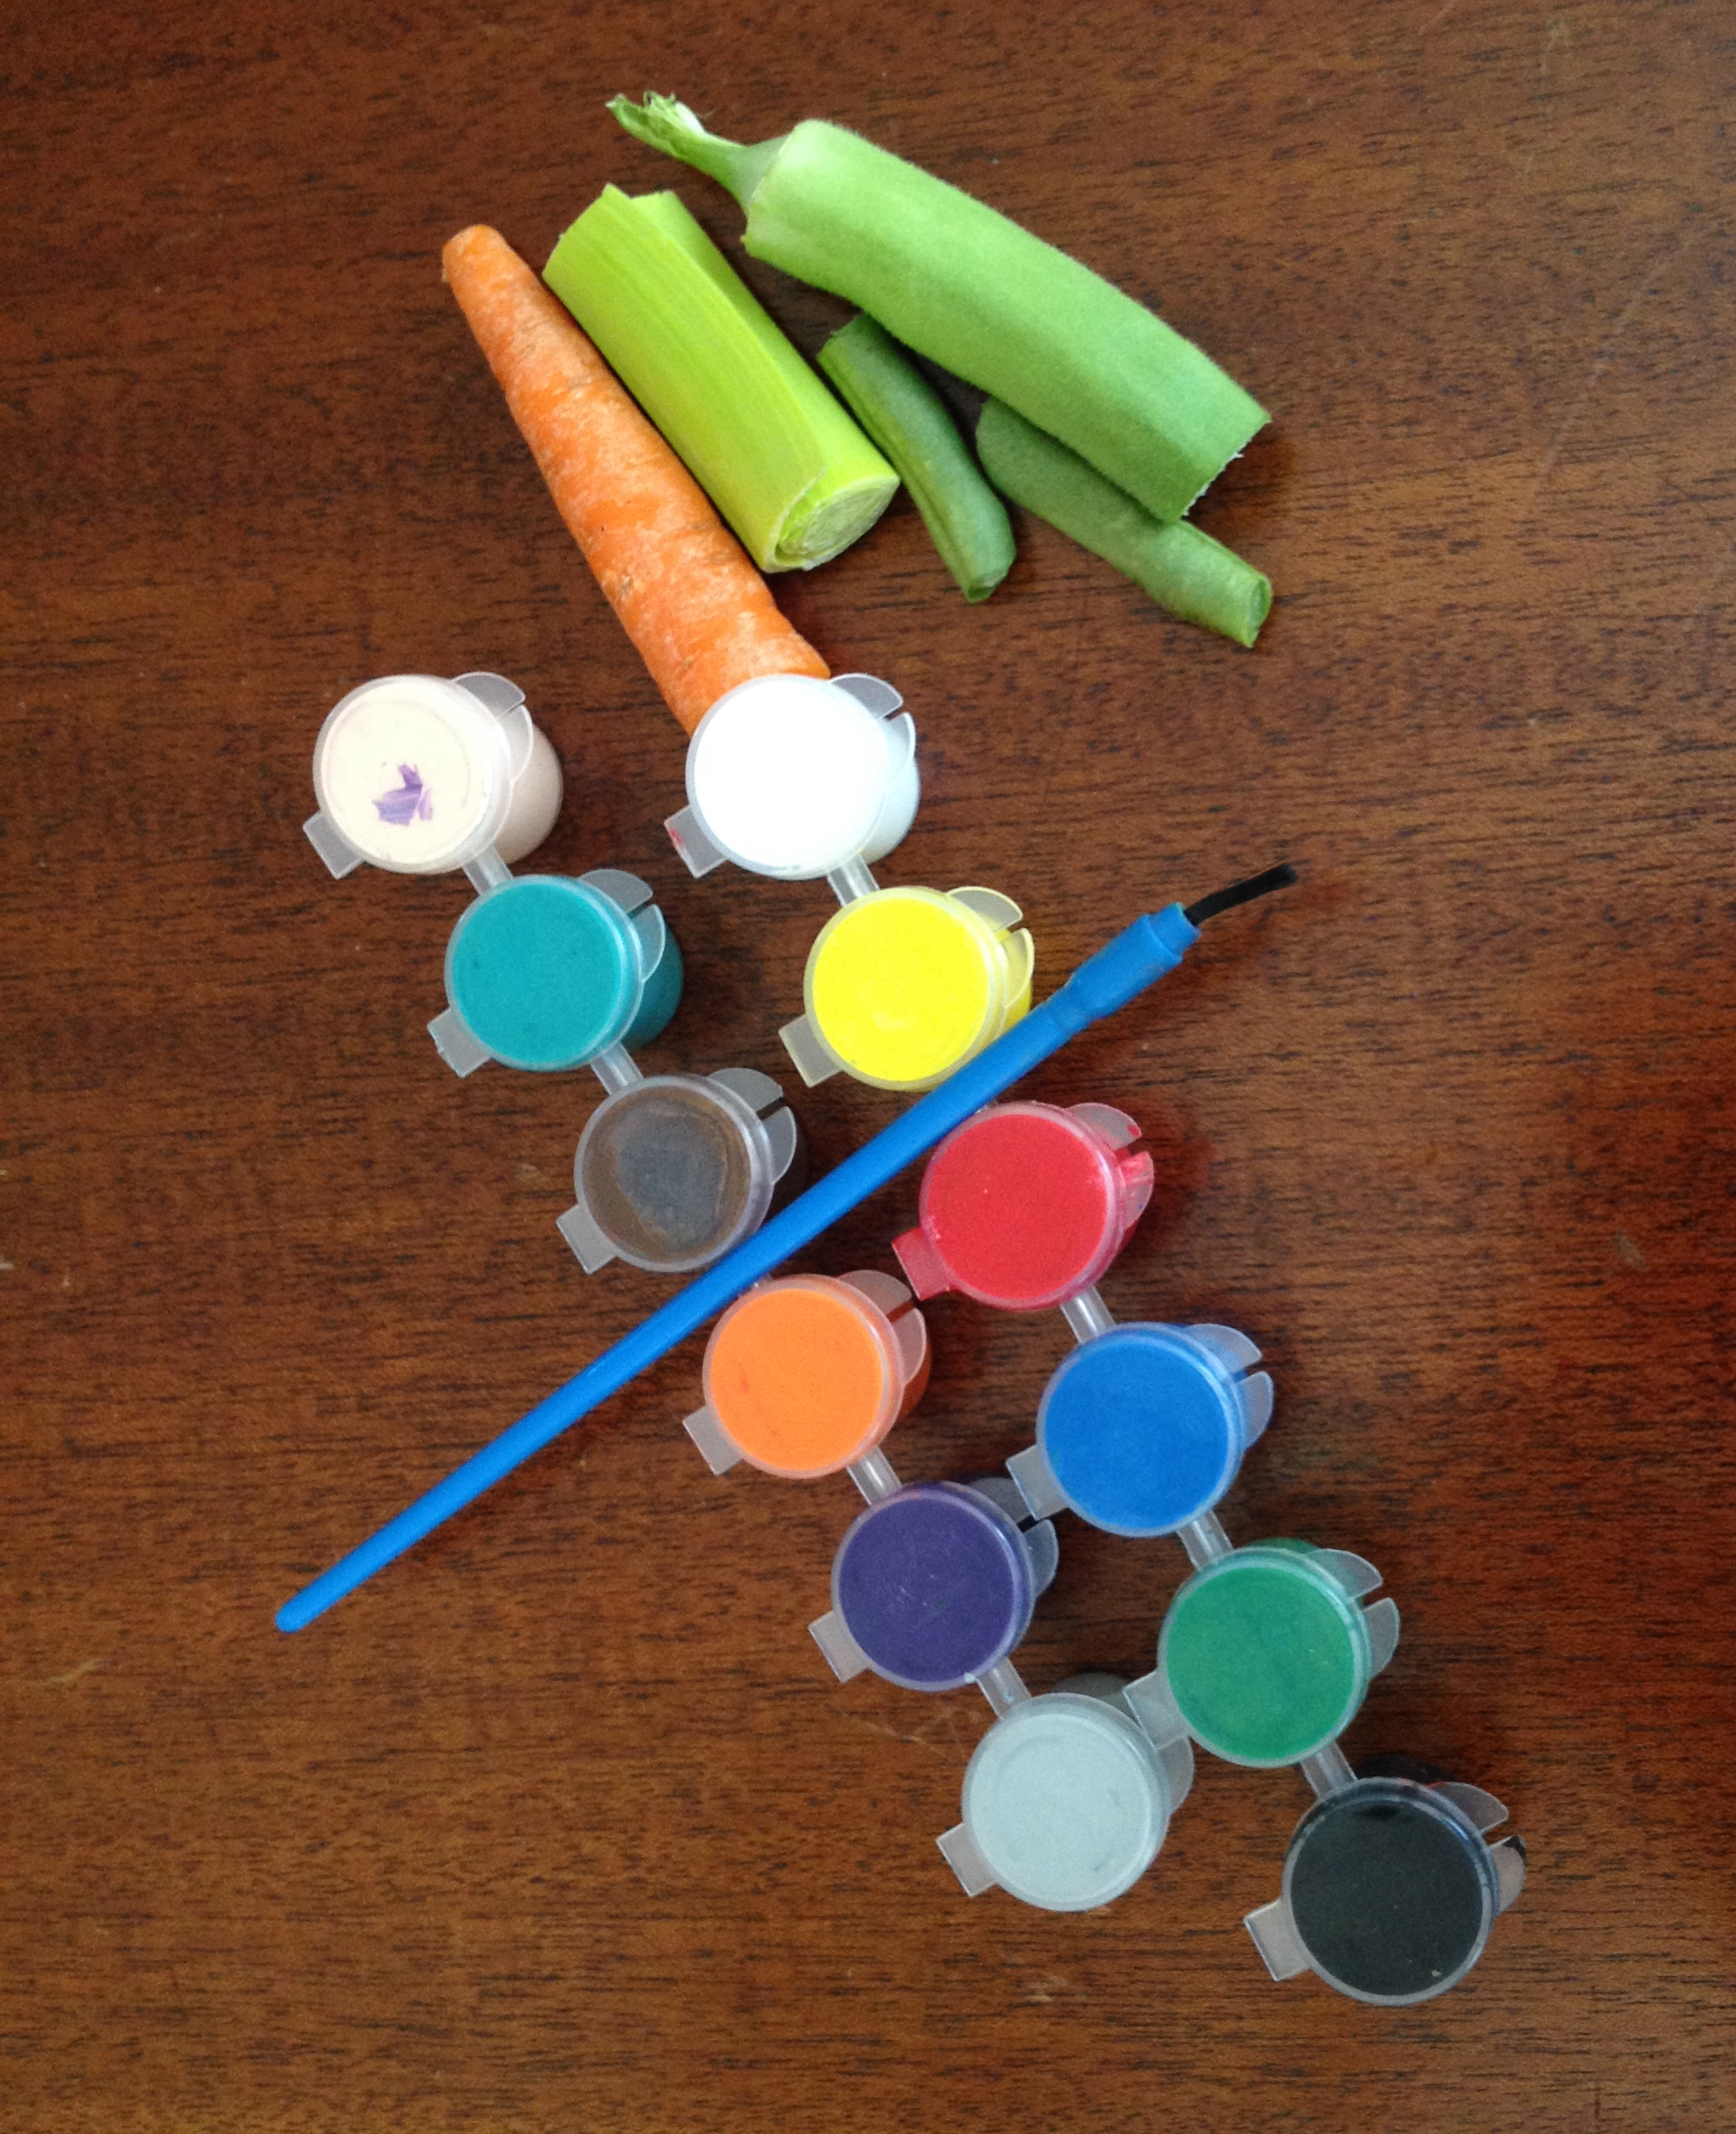
Carrot – 1 ( peeled)

Onion – 1(white/red/yellow)

Toamtos- 1 big or 2 small

Garlic – 2 cloves

Coriander – handful (chopped)

Oil – 1 tsp

Butter – 1tsp

Seasoning :

2 tsp of Salt(or as per taste)

1 tsp of Pepper

1 tsp of Sugar

Spices :

2 Bay leaves

2-3 Cloves

5 peppercorns

2 Cardamom(whole)

How you make:

Step 1 : Roasting peppers can be on stove top or in the oven. If using oven preheat to 500 F. Cut the peppers in to half lengthwise, take off the seeds, coat them with little oil and seasoning ( salt n pepper) and bake it for 15-25 mins( depending on how roasted you want). If roasting on stove top, wrap a layer of foil and keep turning until all sides are well roasted. It would take 15-18 mins.

Step2 : While the peppers are getting ready,  preheat oven into 400 F,  and spray the baking pan with oil. Add chopped carrots, spices and tomatoes. Bake for 15-20 mins. If you decide to use oven for roasting peppers too then first bake the tomato, carrot spice mix and then change the oven temp to 500 F and roast the peppers.

Step 3: Once the peppers are done take off the peel and clean burnt areas under running tap water.Chop them finely and keep ready. Also peel off the tomatoes and take off the  bay leaves and other spices( I prefer to keep) and keep it ready.

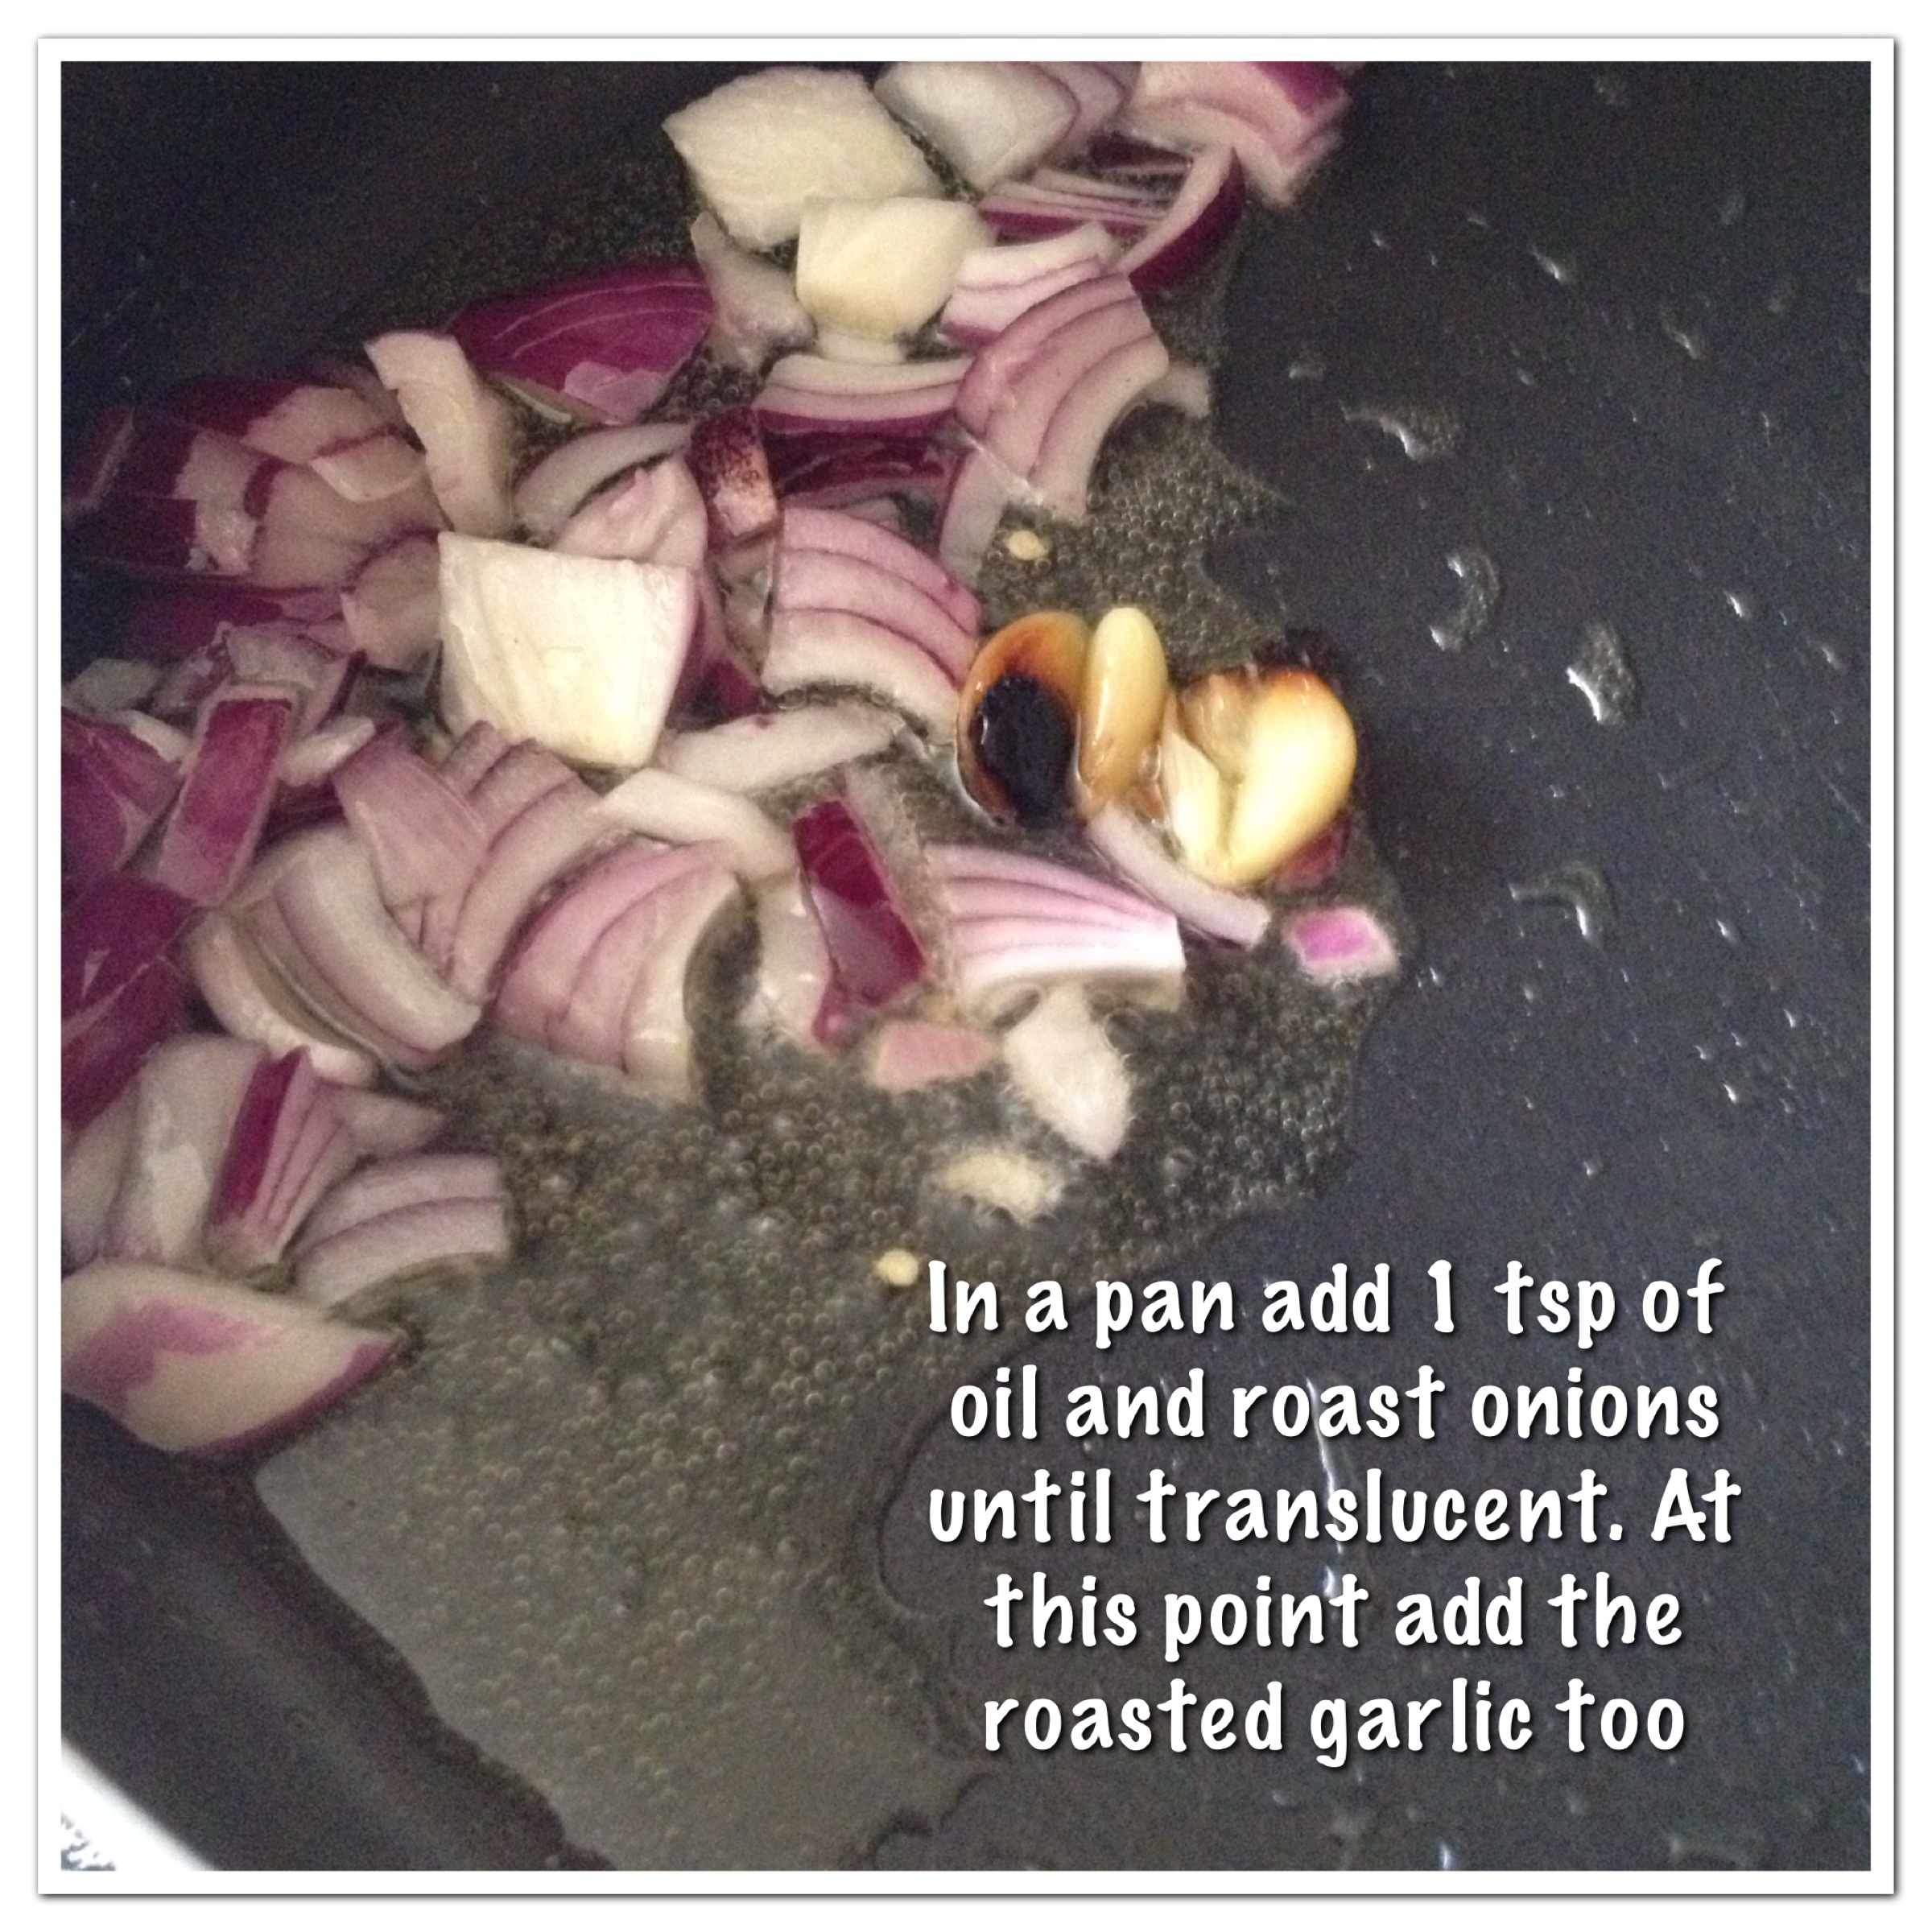
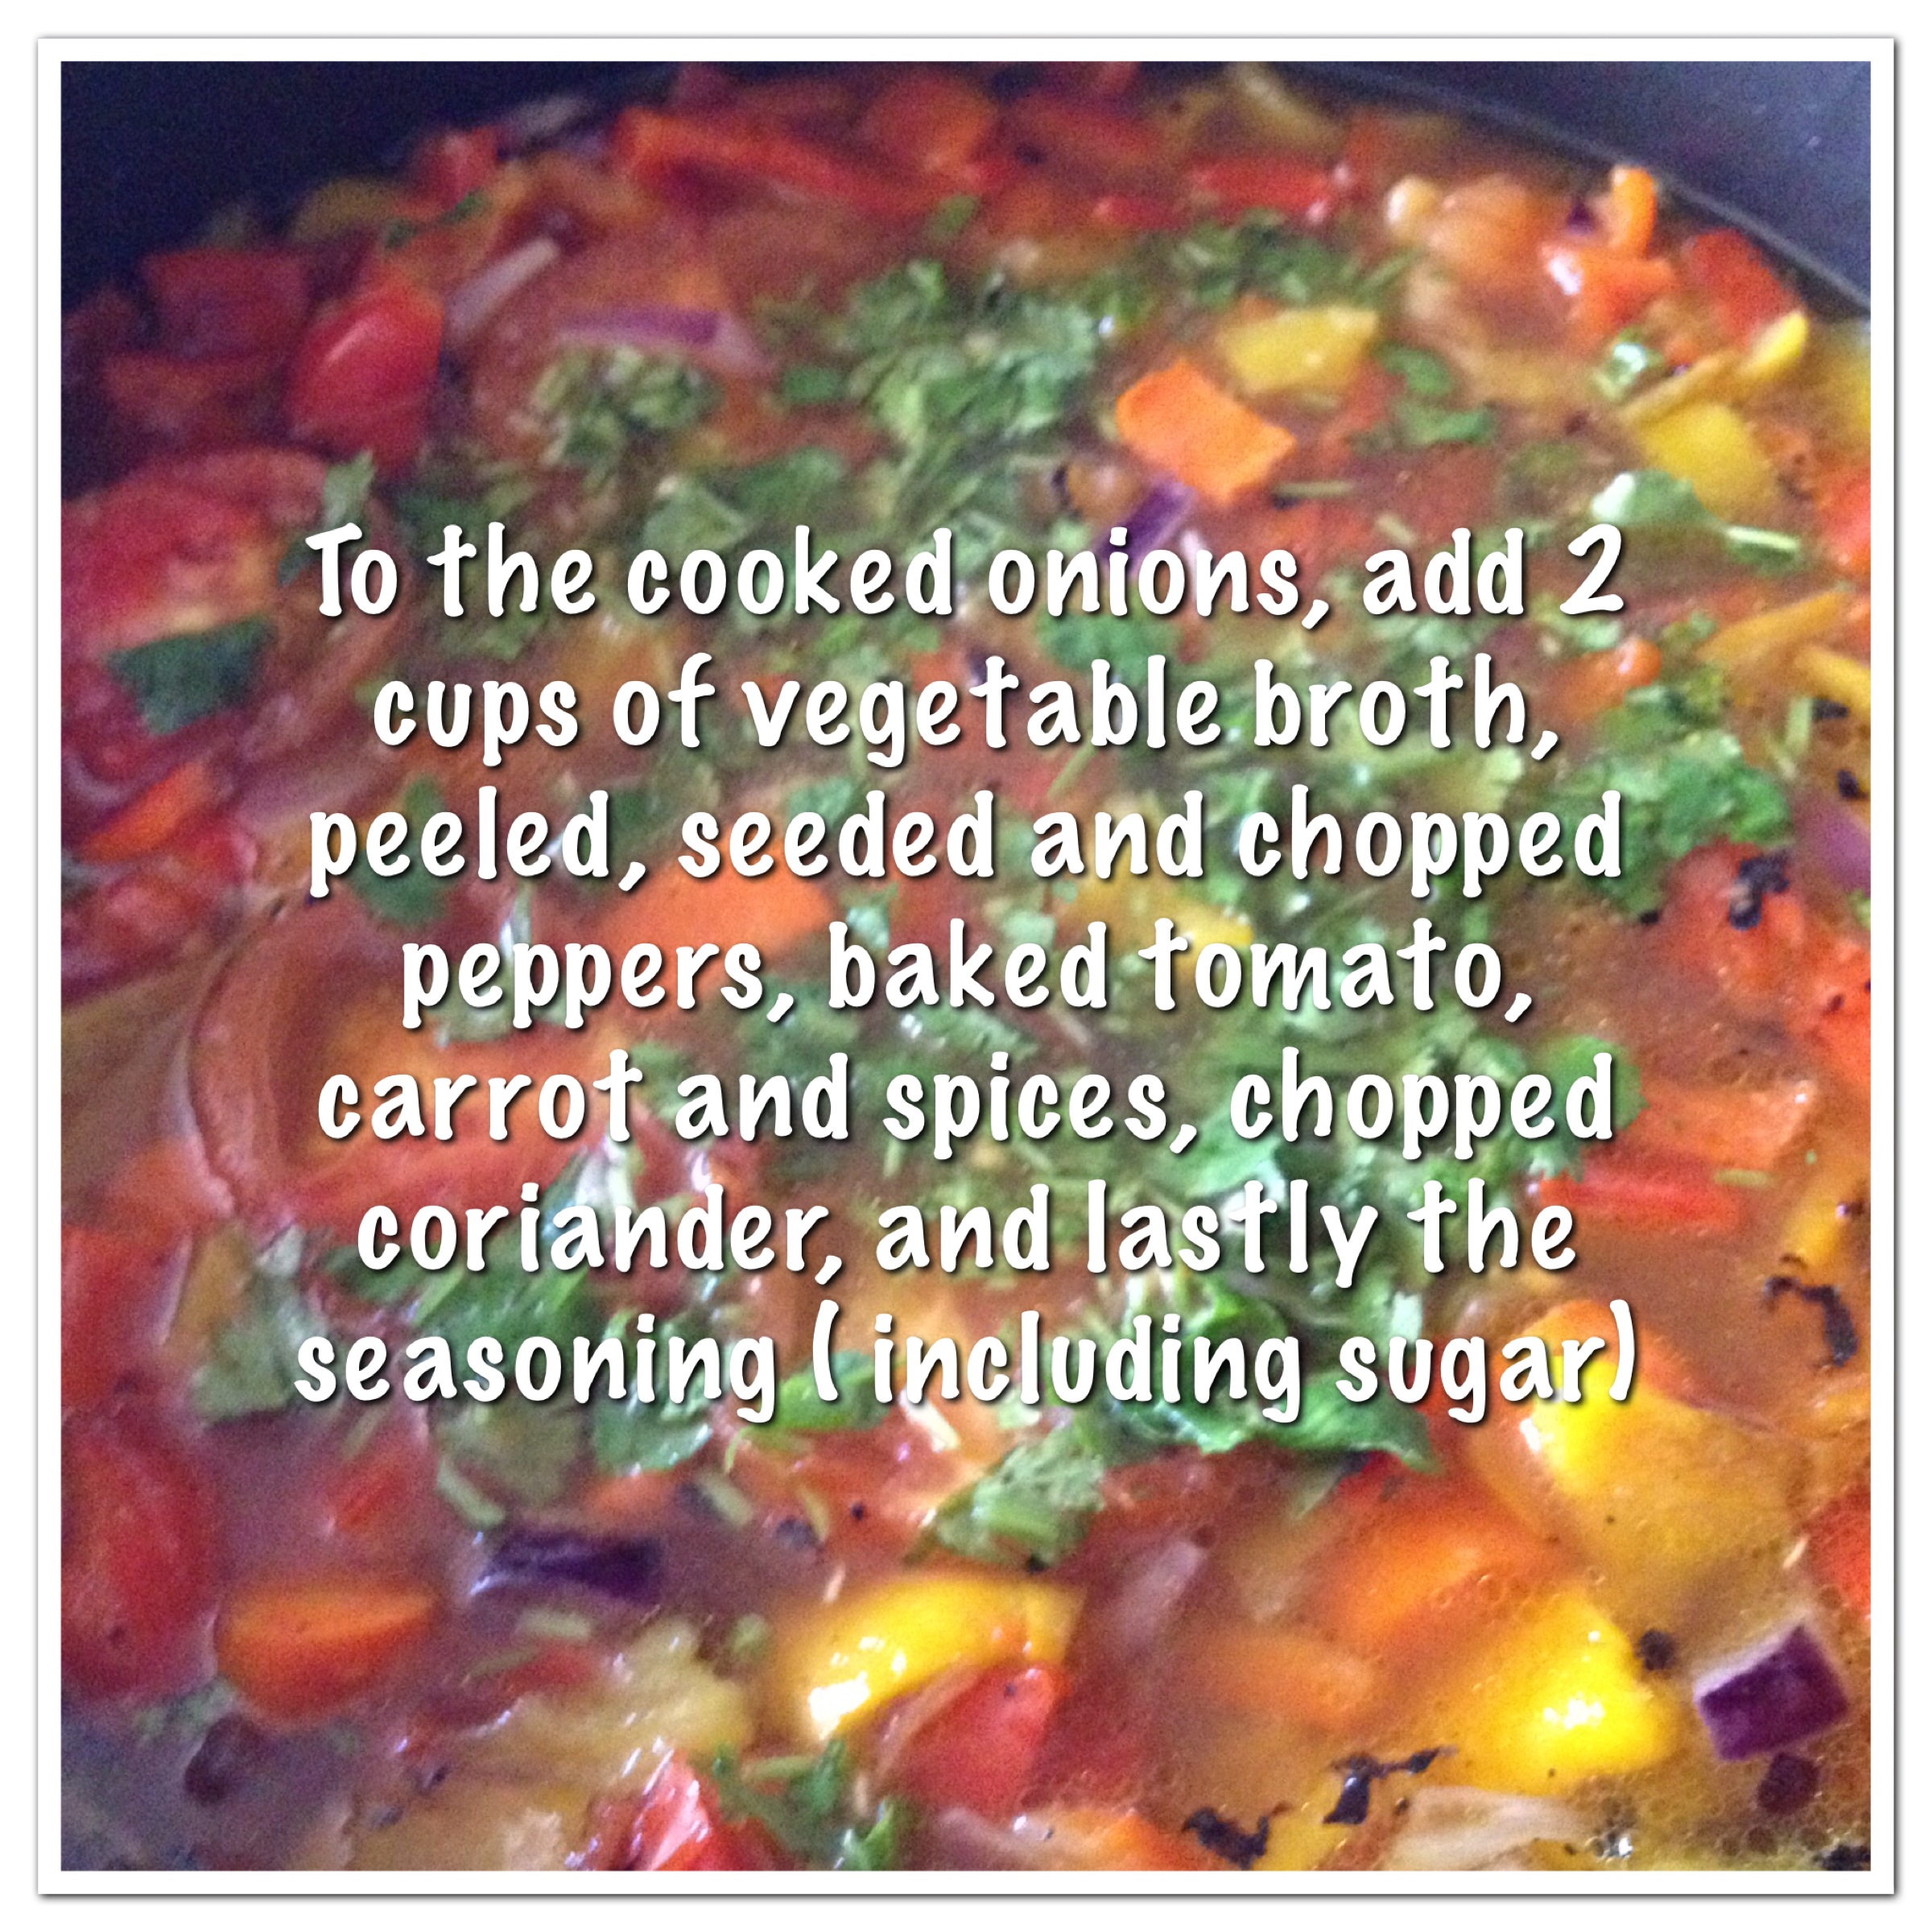
Step 4: In a medium sized pan, add 1 tsp of oil and cook onions, until translucent. To it add 2 cups of vegetable broth, chopped peppers, the tomato, carrots and spices, chopped coriander and the seasoning.

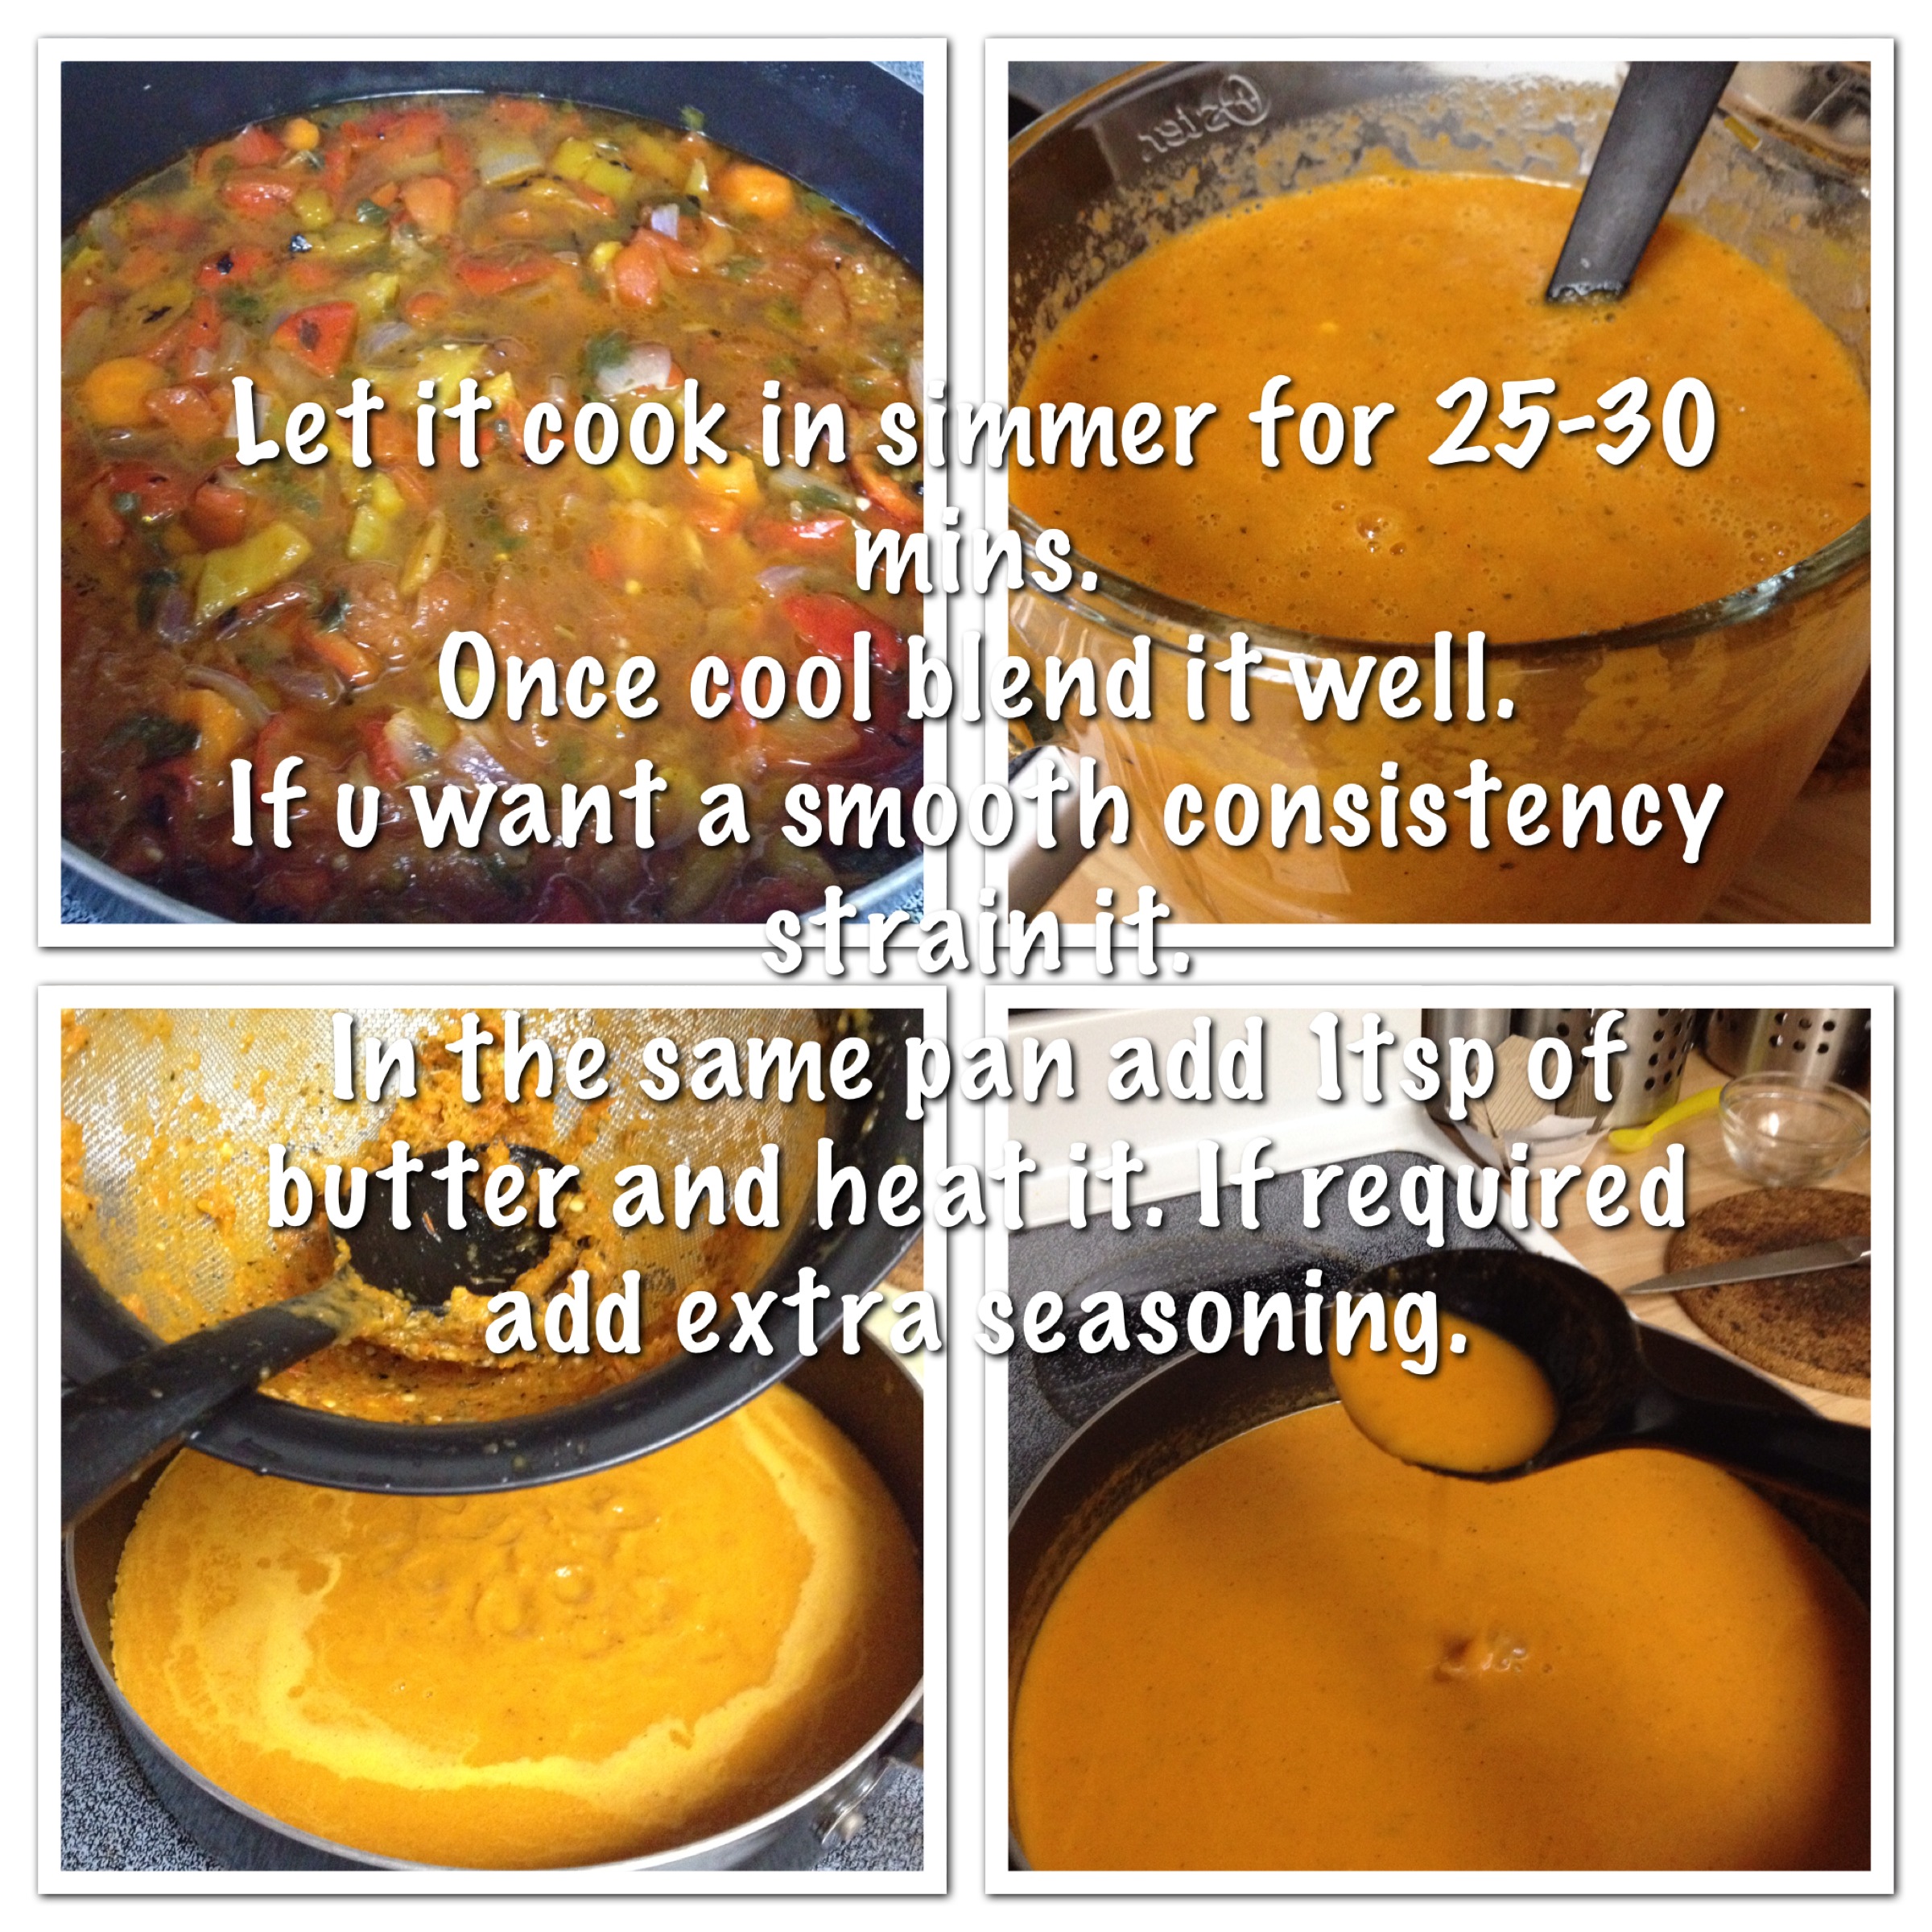
Step 5: Cook it on low-medium heat for  25-30 and once cool blend and strain.

Step 6 : In the same pan add 1 tsp of butter and heat the strained soup and you have a delicious and creamy soup to dig in. BEfore serving you can add some cheese, chopped mint or basil for an extra flavor. However, jus the soup itself is delicious and has lot of flavors.

If you are looking for something light and refreshing for dinner, this is a great recipe to try 🙂

IMG_0522

Tip of the week!!

Love for fresh flowers cannot be replaced by fake one’s. Unfortunately, fresh one’s cannot be used for more than a day or two.But fake flowers can be a great idea to quickly brighten any place. The best thing is you can have the colors that can be matched to any setting 🙂

Today, I am going to share 3 ways to DIY fake flowers and I absolutely love them.

IMG_05081. Indian festival season is fast approaching and I was excited to decorate our prayer room with some fake Dhalias and found it on youtube and here is the link : https://www.youtube.com/watch?v=EfHaH3Mr0U0

2. Tissue paper flowers are the best way to decor your wall, they are light weight so you can jus stick them with some double sided tape and they stay well.The link is : https://www.youtube.com/watch?v=cNxHycEylx4

3. Plastic spoon flowers are best to use as floating flowers with some colored stone/pebbles or sand. Here is the link to make plastic spoon flowers :https://www.youtube.com/watch?v=2zpiD3ODg3k

Hope you enjoy making these, and I will share more in my future posts 🙂

Happy Thursday!!

Dining Room Decor!!

Couple of weeks ago I was searching for some wall decals @ ebay and surprised when I saw the below metal wall art priced so high. Ofcourse, it is Pottern Barn 😉

Screen Shot 2014-07-21 at 5.50.36 PM

So I couldn’t wait to make something similar and mine costed $3(some stuff already on hand) and it looks like this:

IMG_5026

Isn’t it great!!

Intially, thought it can be stenciled and started looking on interest and found many pins. I looked at few tutorials but they are done with wood and you need something like Jigsaw to cut the curvy shapes.

That’s when I started looking at options that can replace wood as I don’t have sufficient tools. The thought of using a foam sheet was exciting but wasn’t sure of the look. However, I got 3 sheets of foam @ Hobby lobby and gave it a try. I was really impressed by the way it turned out.

And now my dining room looks perfect with those fancy yet simple wall decor.

IMG_0500

All you need is:

3 Foam sheets(99c each)

Large print out of the image

Xacto or any other sharp knife

Pen

Self healing mat or any hard surface area to cut the image

Since i couldn’t print an A3 image using the Poster printing option in PDF printed the image in 4 A4 sheets.

Trace the image on the foam sheet and it easily gets on . Cut it with a sharp knife.  Make sure you use a self healing mat or any wood base where  you don’t mind the cut marks.

IMG_0501

I have cut all three shapes, but wasn’t completely happy with the look, because the surface was quite pale. To get a shine, I rubbed little baby oil with cotton and it looked perfect. Unless you look closely you can never make out.

IMG_0503

They don’t look perfect but good enough to add on your walls and brag about it 🙂

And the foam cut-outs won’t go waste. You can use them to decorate you kitchen 😉

IMG_5030

Happy week!!

Cooking Without Limits

Food Photography & Recipes

Travelling Krishnaite

Shekhar Srivastava's Blog

Live-😊-Life..

"It has everything in little as a HAPPY package!!"

DesiCrafts

A blog Dedicated to Indian handicrafts, Fabrics and Supplies

Fulgorine

My adventures with art and polymer clay

The Beaded Bazaar

Polymer clay creations

Learn Polymer Clay

Inspiring you to explore your creativity and get down to work! A great collection of Free Polymer Clay tutorials

Wear the Ducky Tie

A Sewing Blog

sewmanju

Make your own style

SEW KATIE DID

because thread is the best glue.

The Crafty Coup

Finally, you're here! Let's make something!

The Daily Post

The Art and Craft of Blogging

WordPress.com News

The latest news on WordPress.com and the WordPress community.