Home Exterior Paint Reveal…

I am very excited to share pictures of our newly painted exterior and share some tips we learned along the way.

IMG_1081

Choosing paints can be hard, jus not hard, stressful too….We knew that earth tones are something we like. And for the main door and  backyard door something that is bright. So, we narrowed our search to Classics and Then,Now, Forever section of Dunn Edwards color Catalogue.

IMG_1082
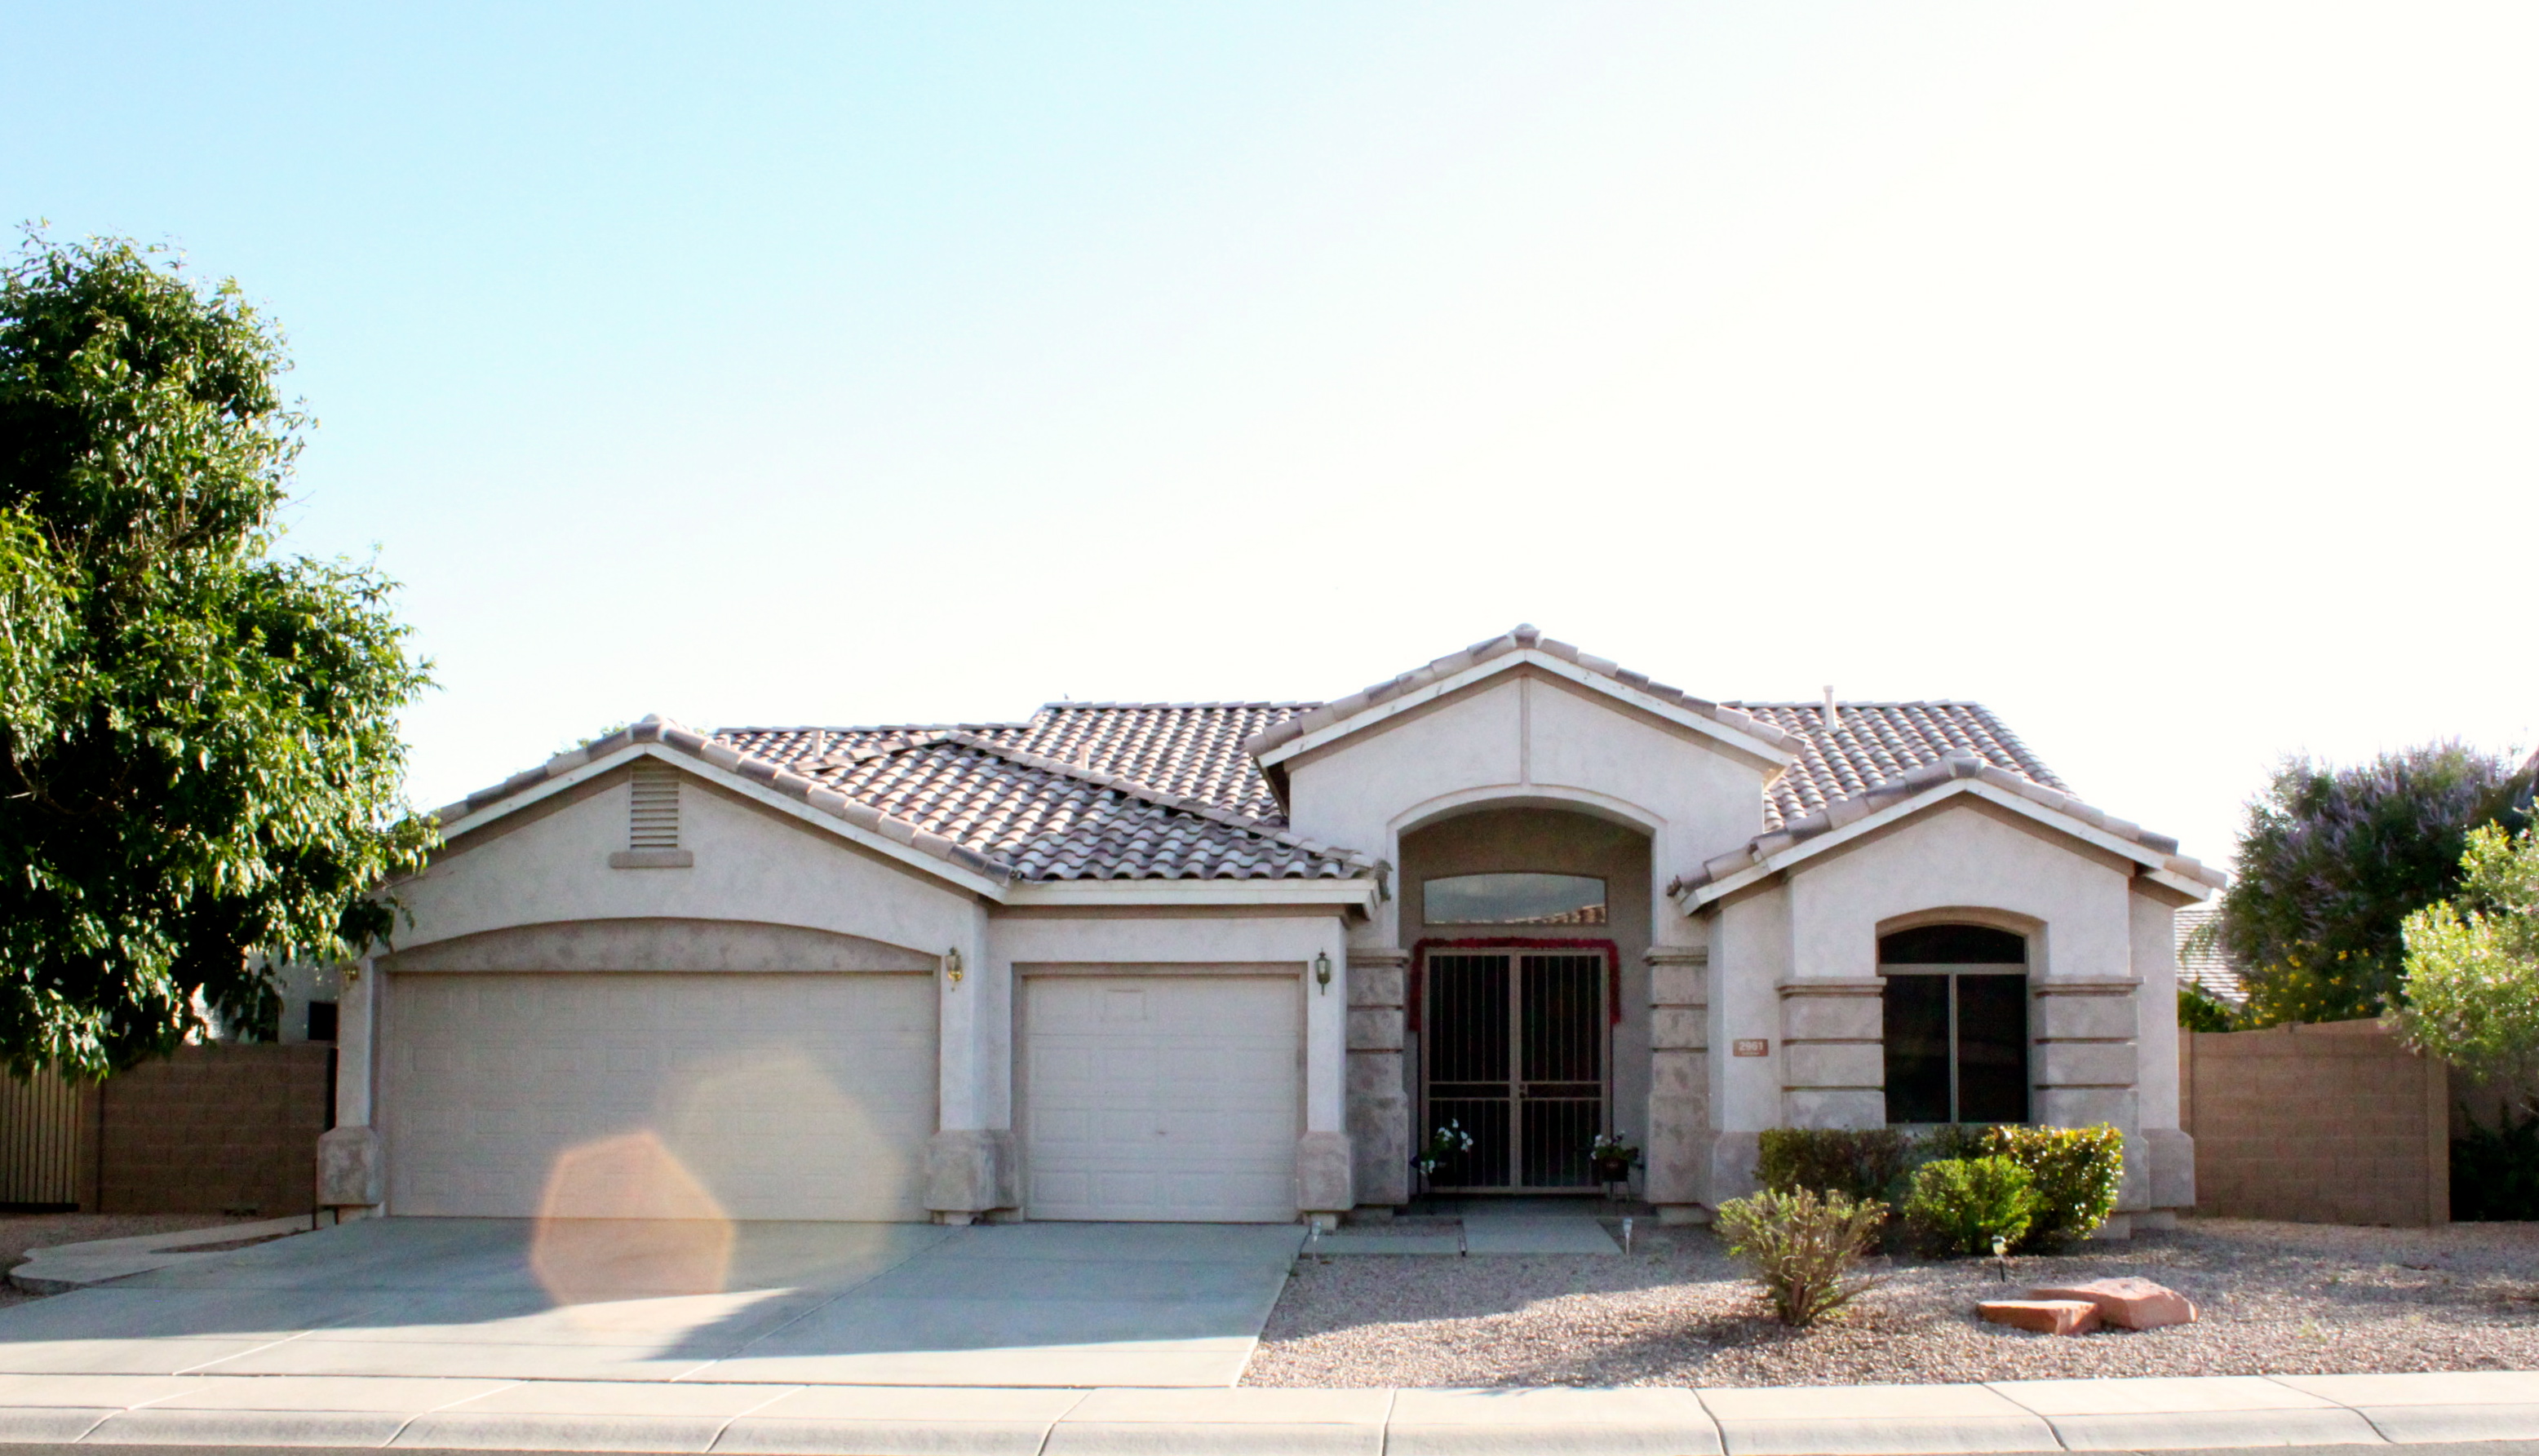
Here is before and after picture:-)

 IMG_1221

IMG_1256

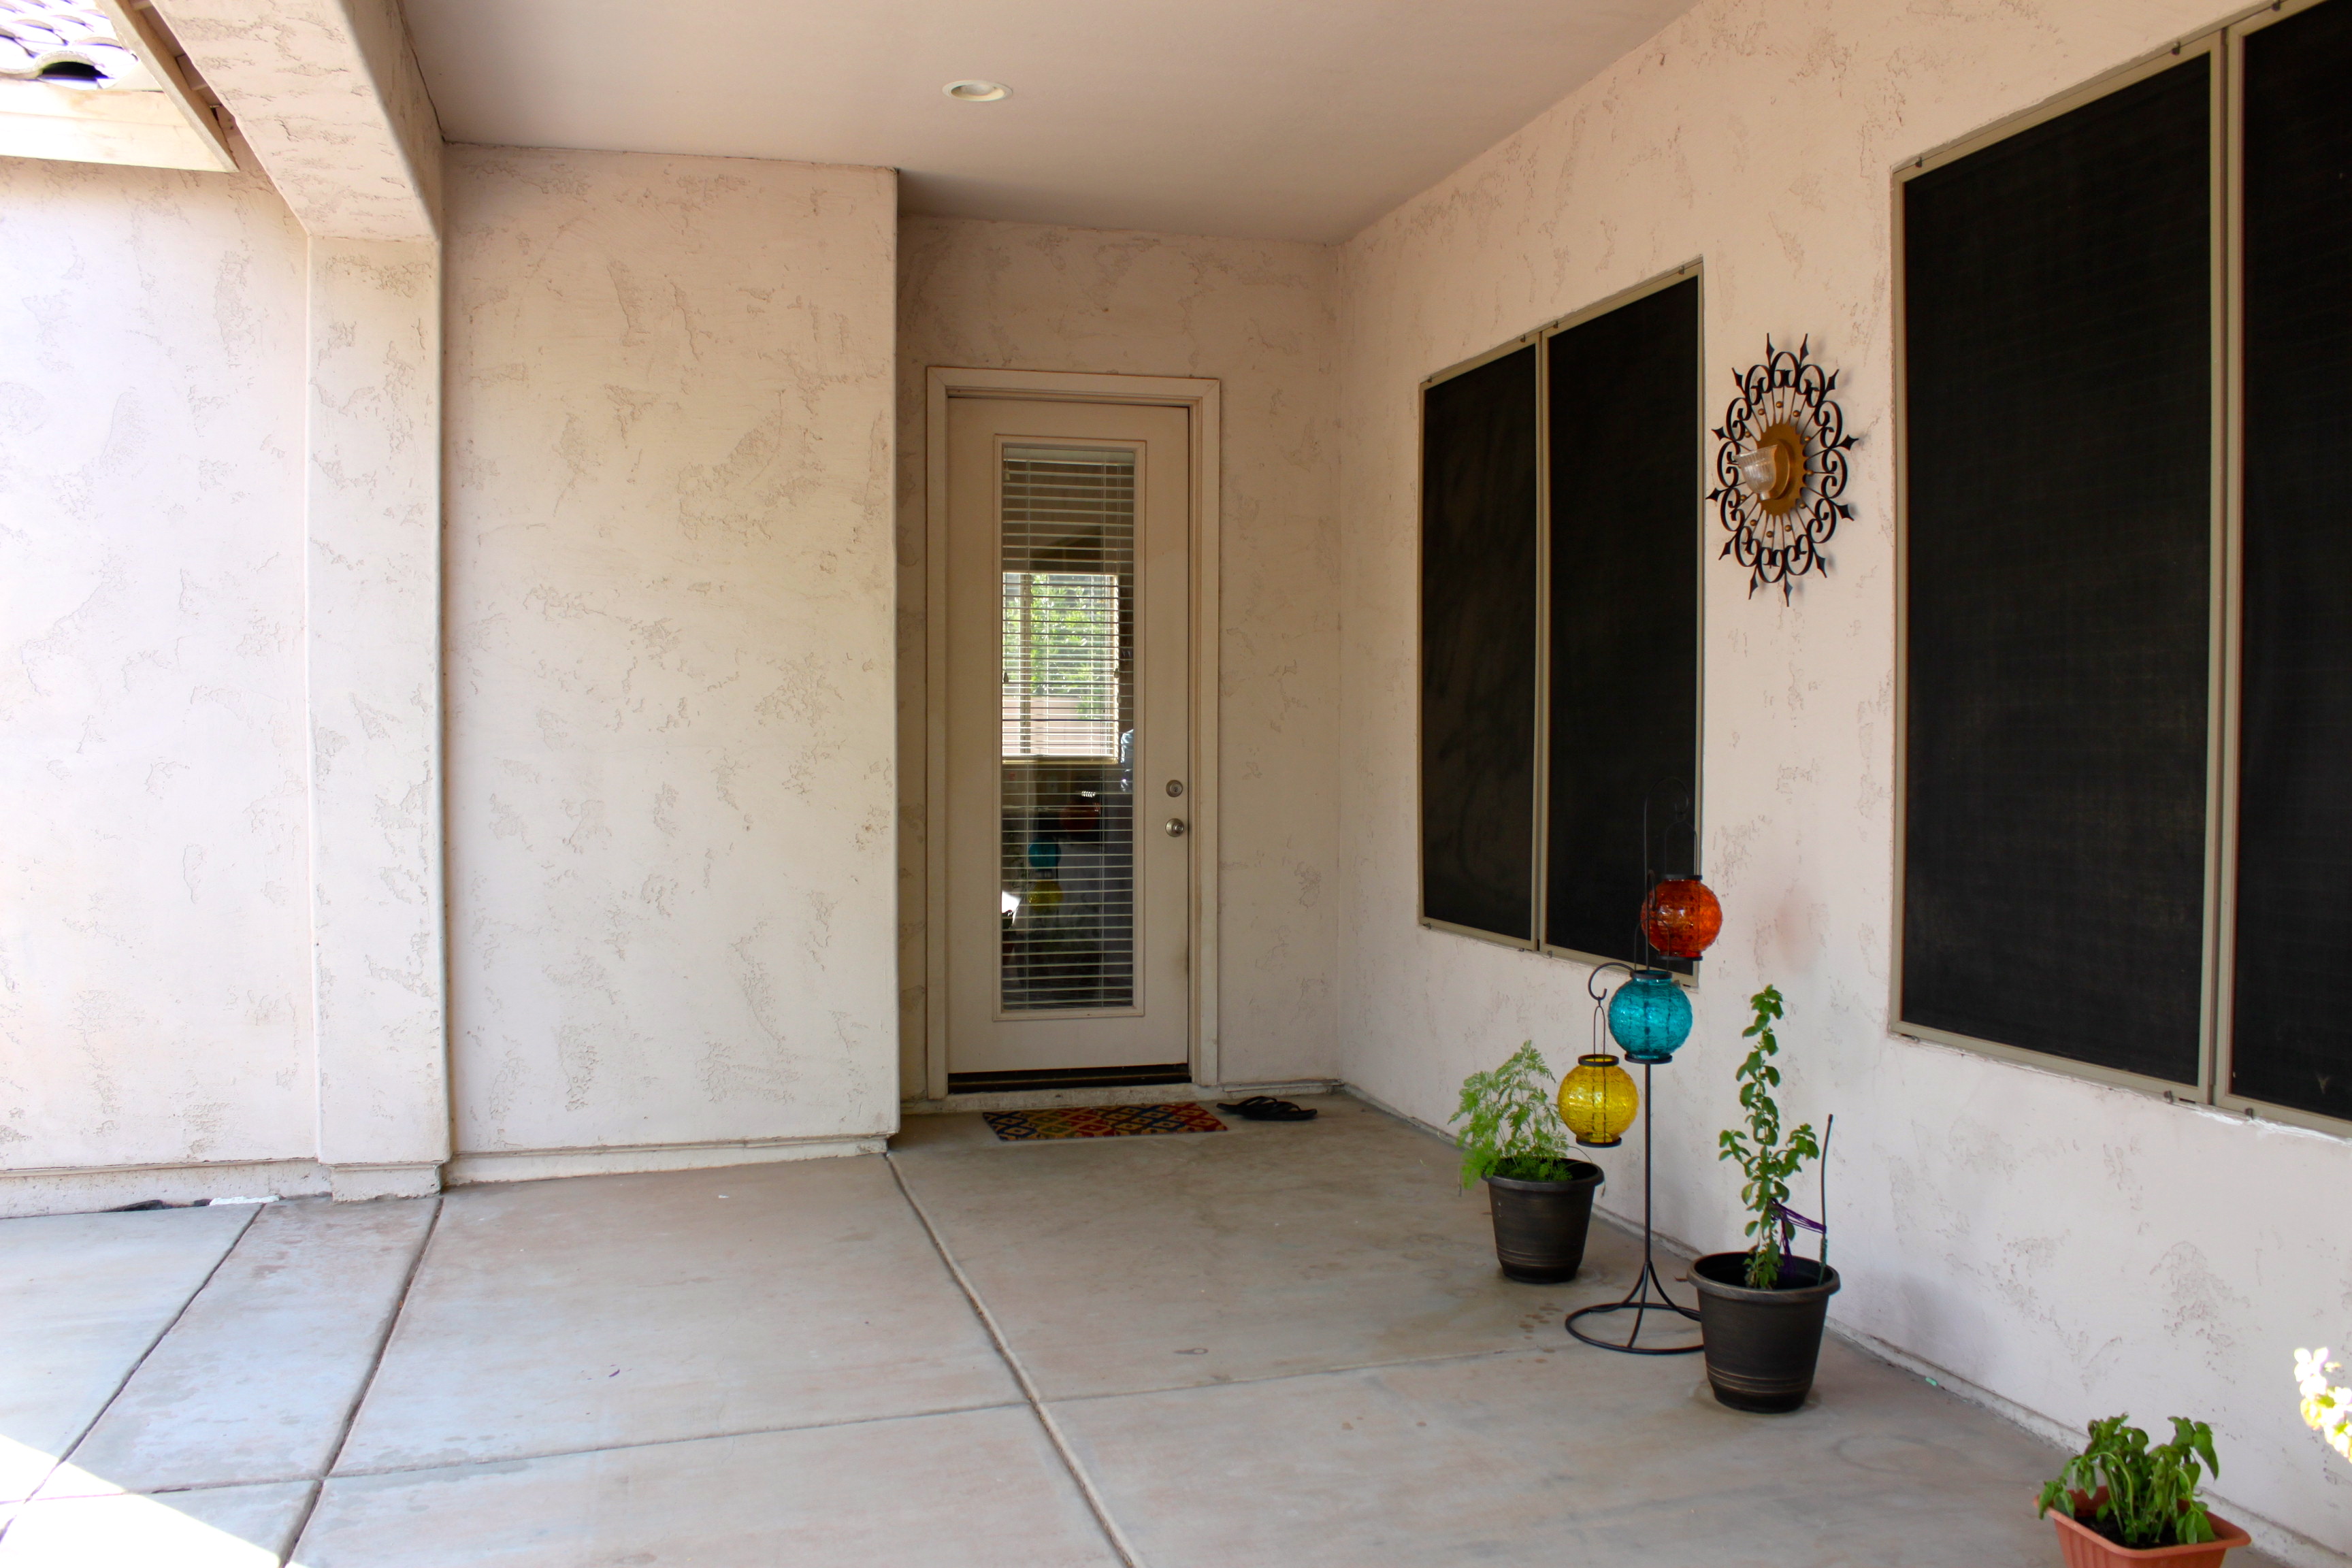
I was very keen on trying something new for our patio …Here is before pic

IMG_1212 IMG_1213

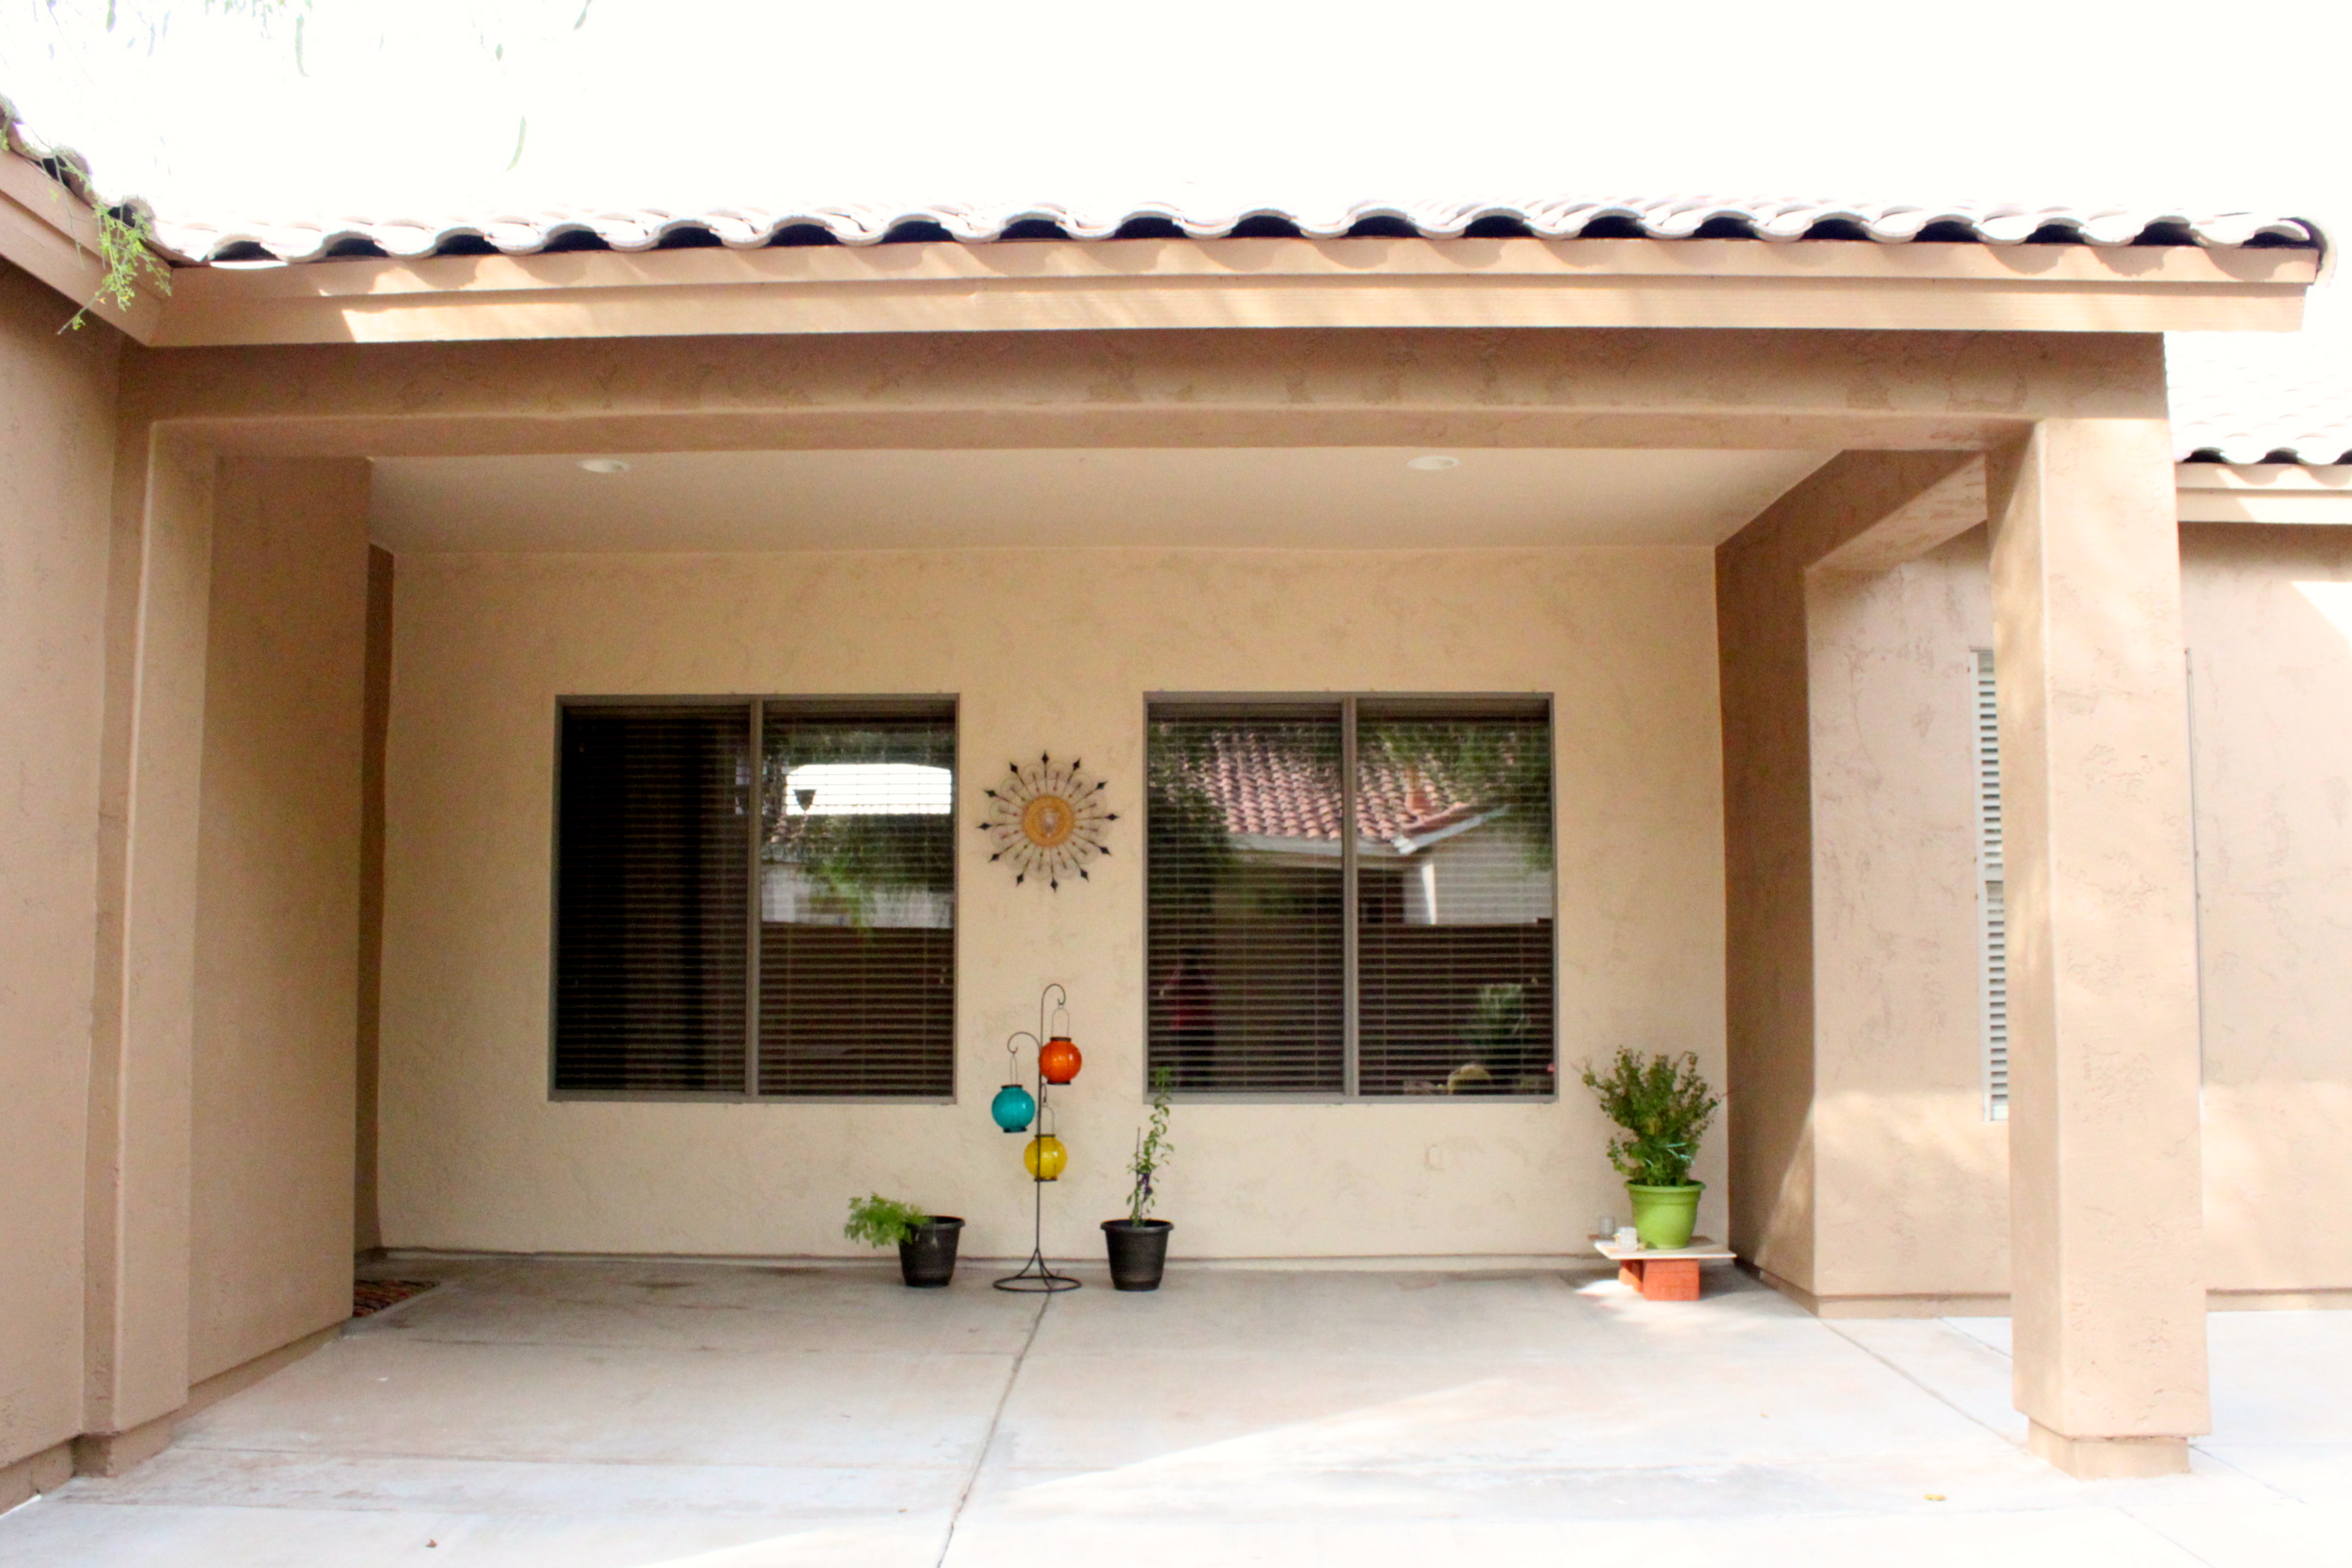
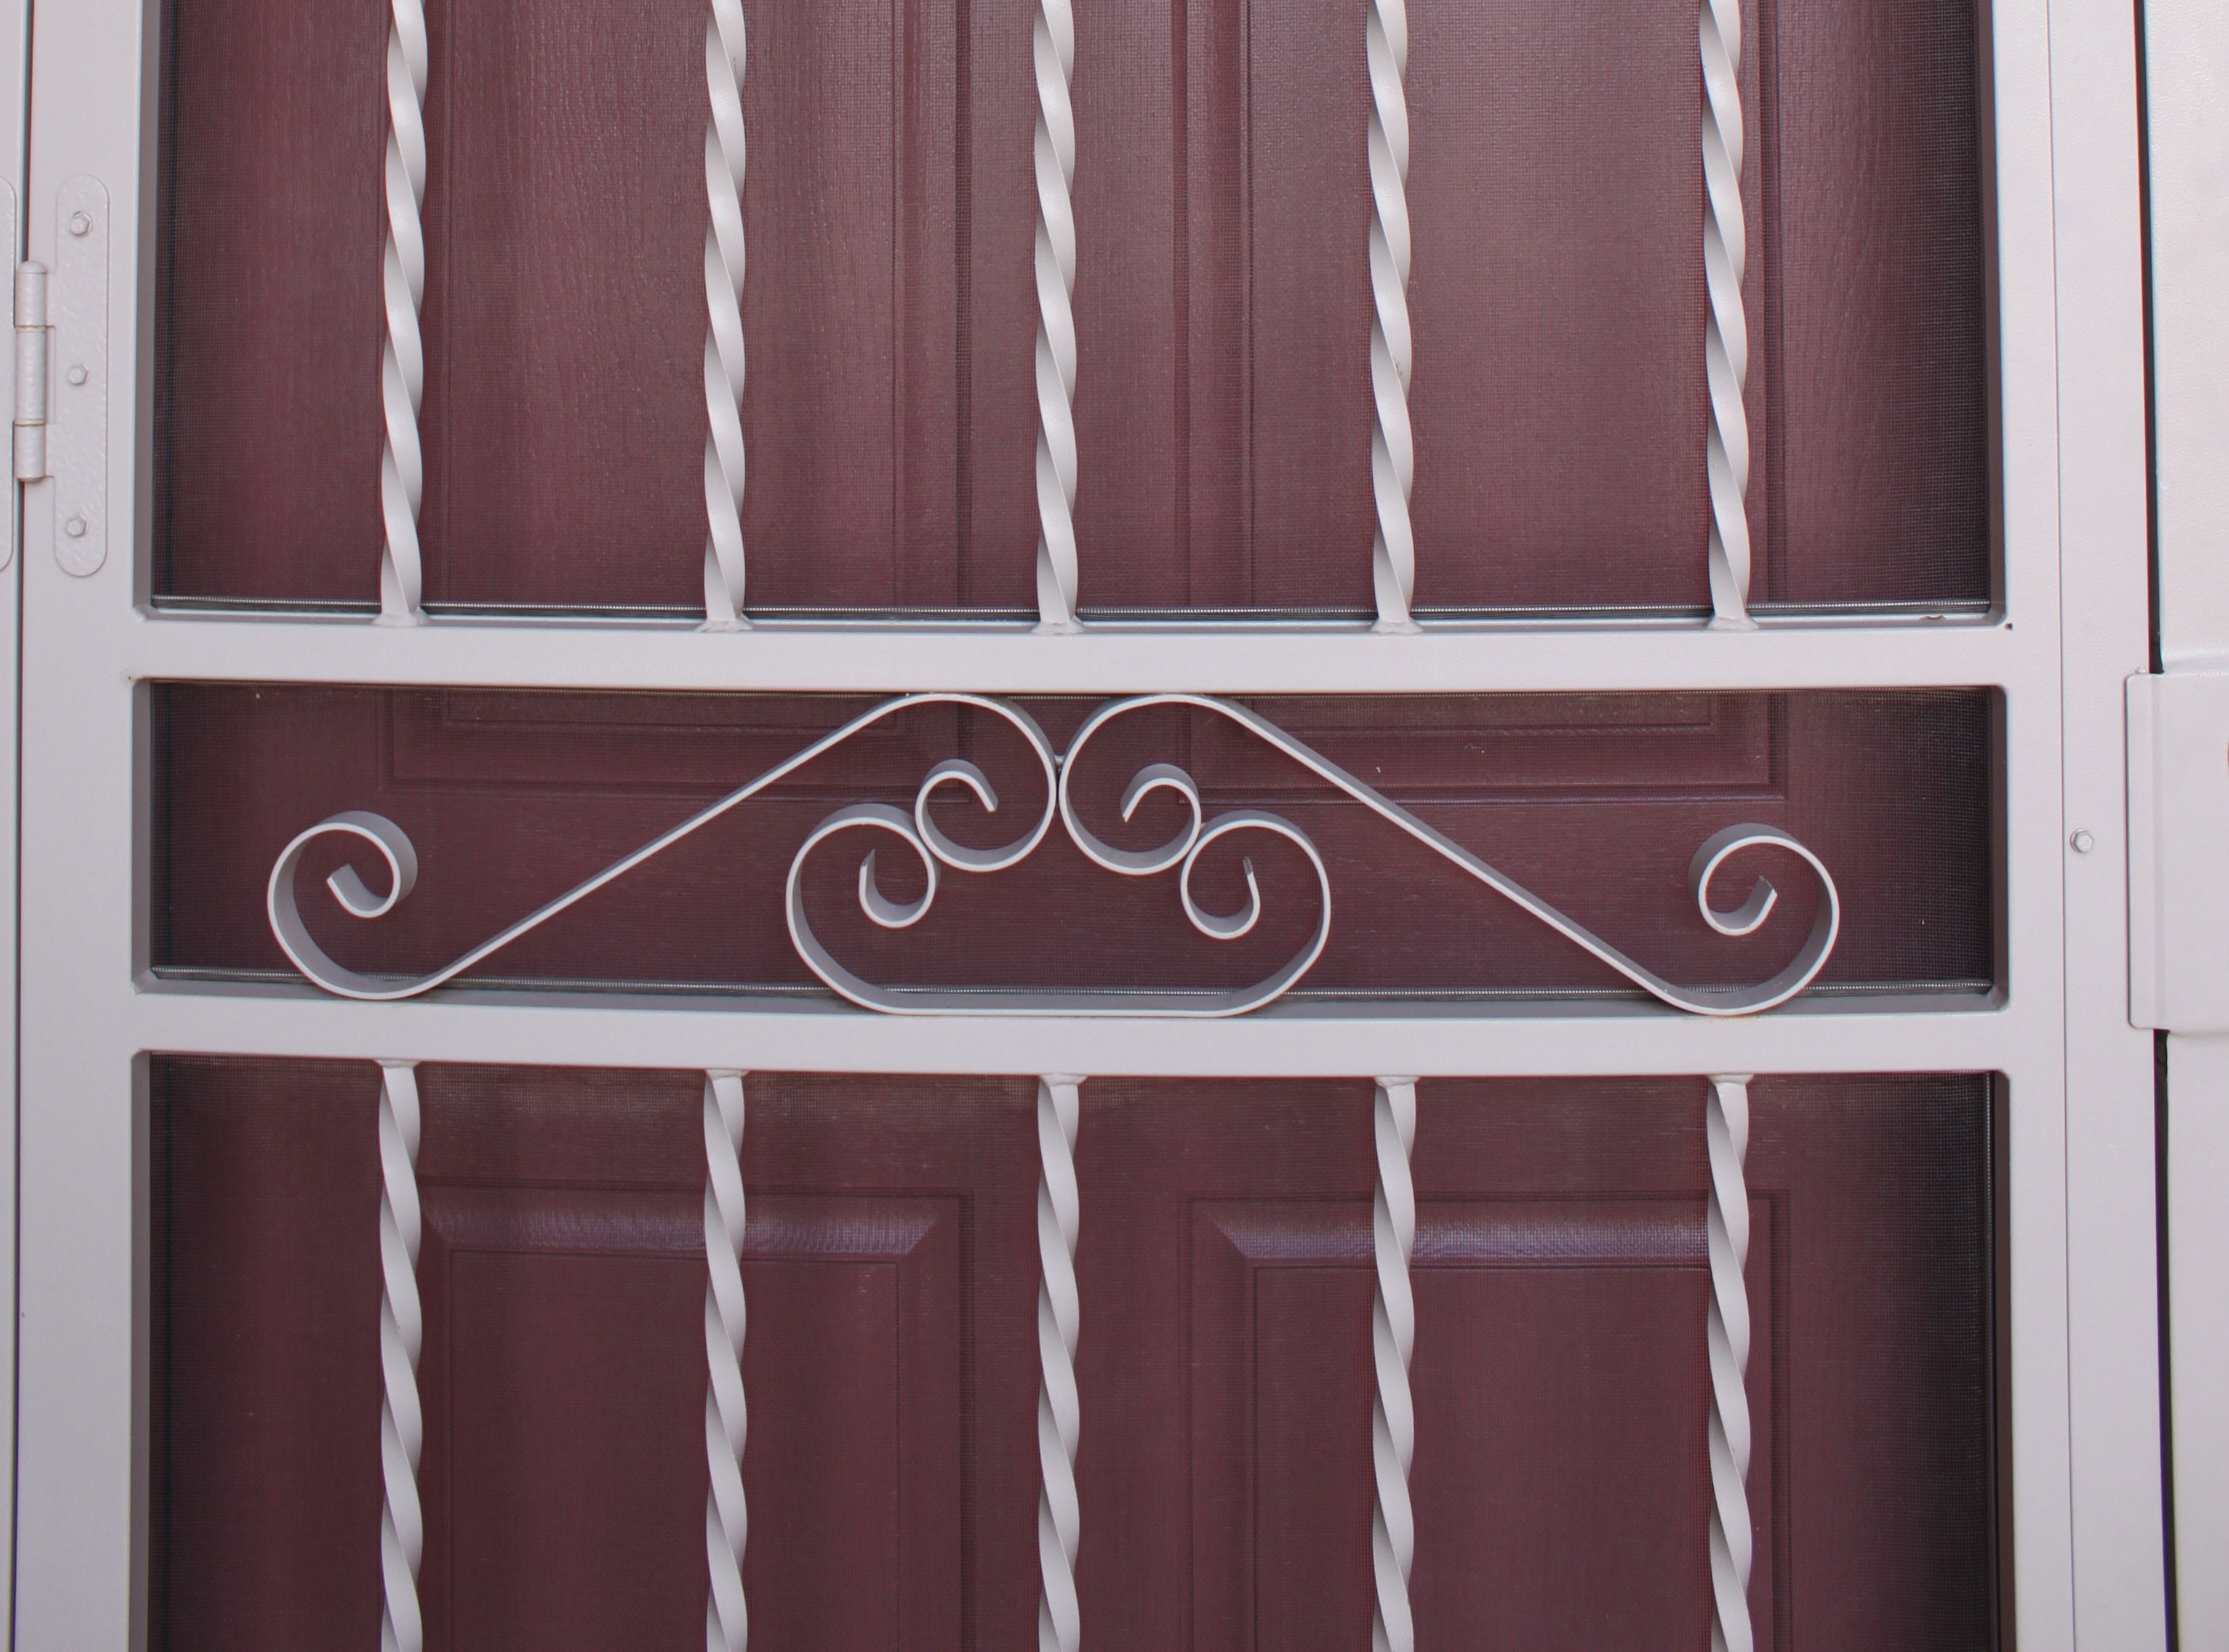
After the accent wall and a new door color 🙂

IMG_1242 IMG_1245

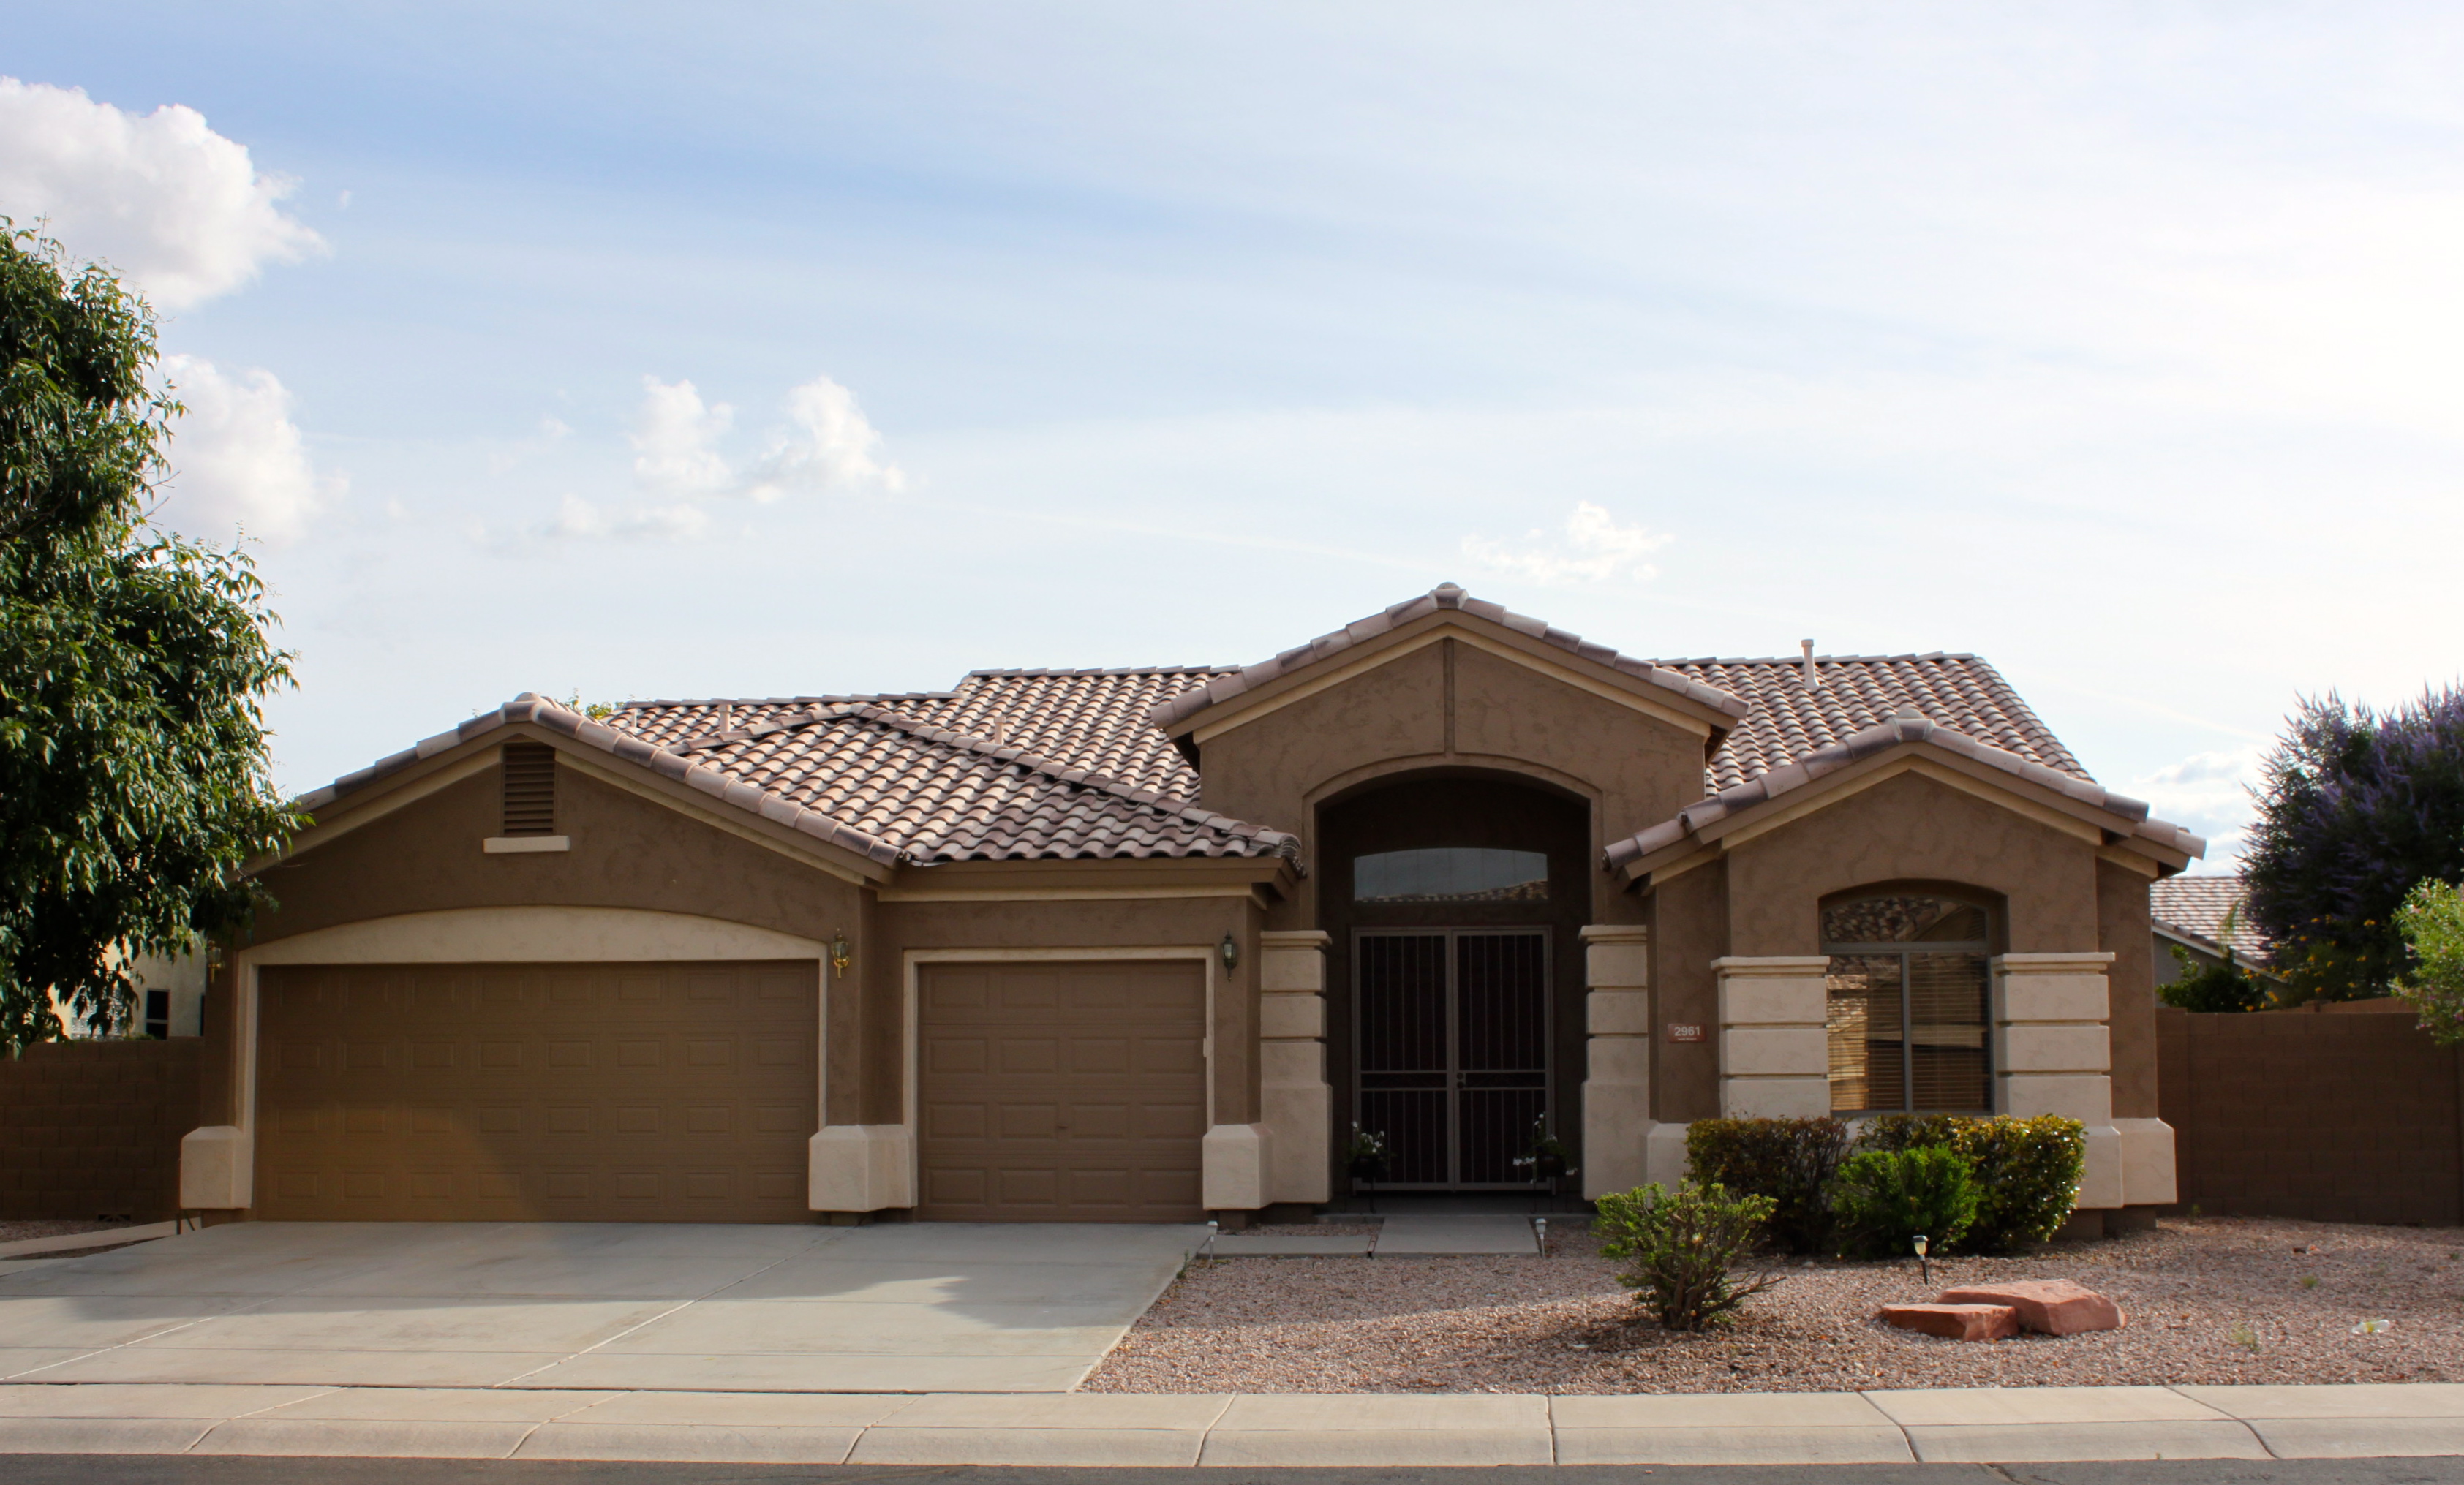
And the front elevation with new door color
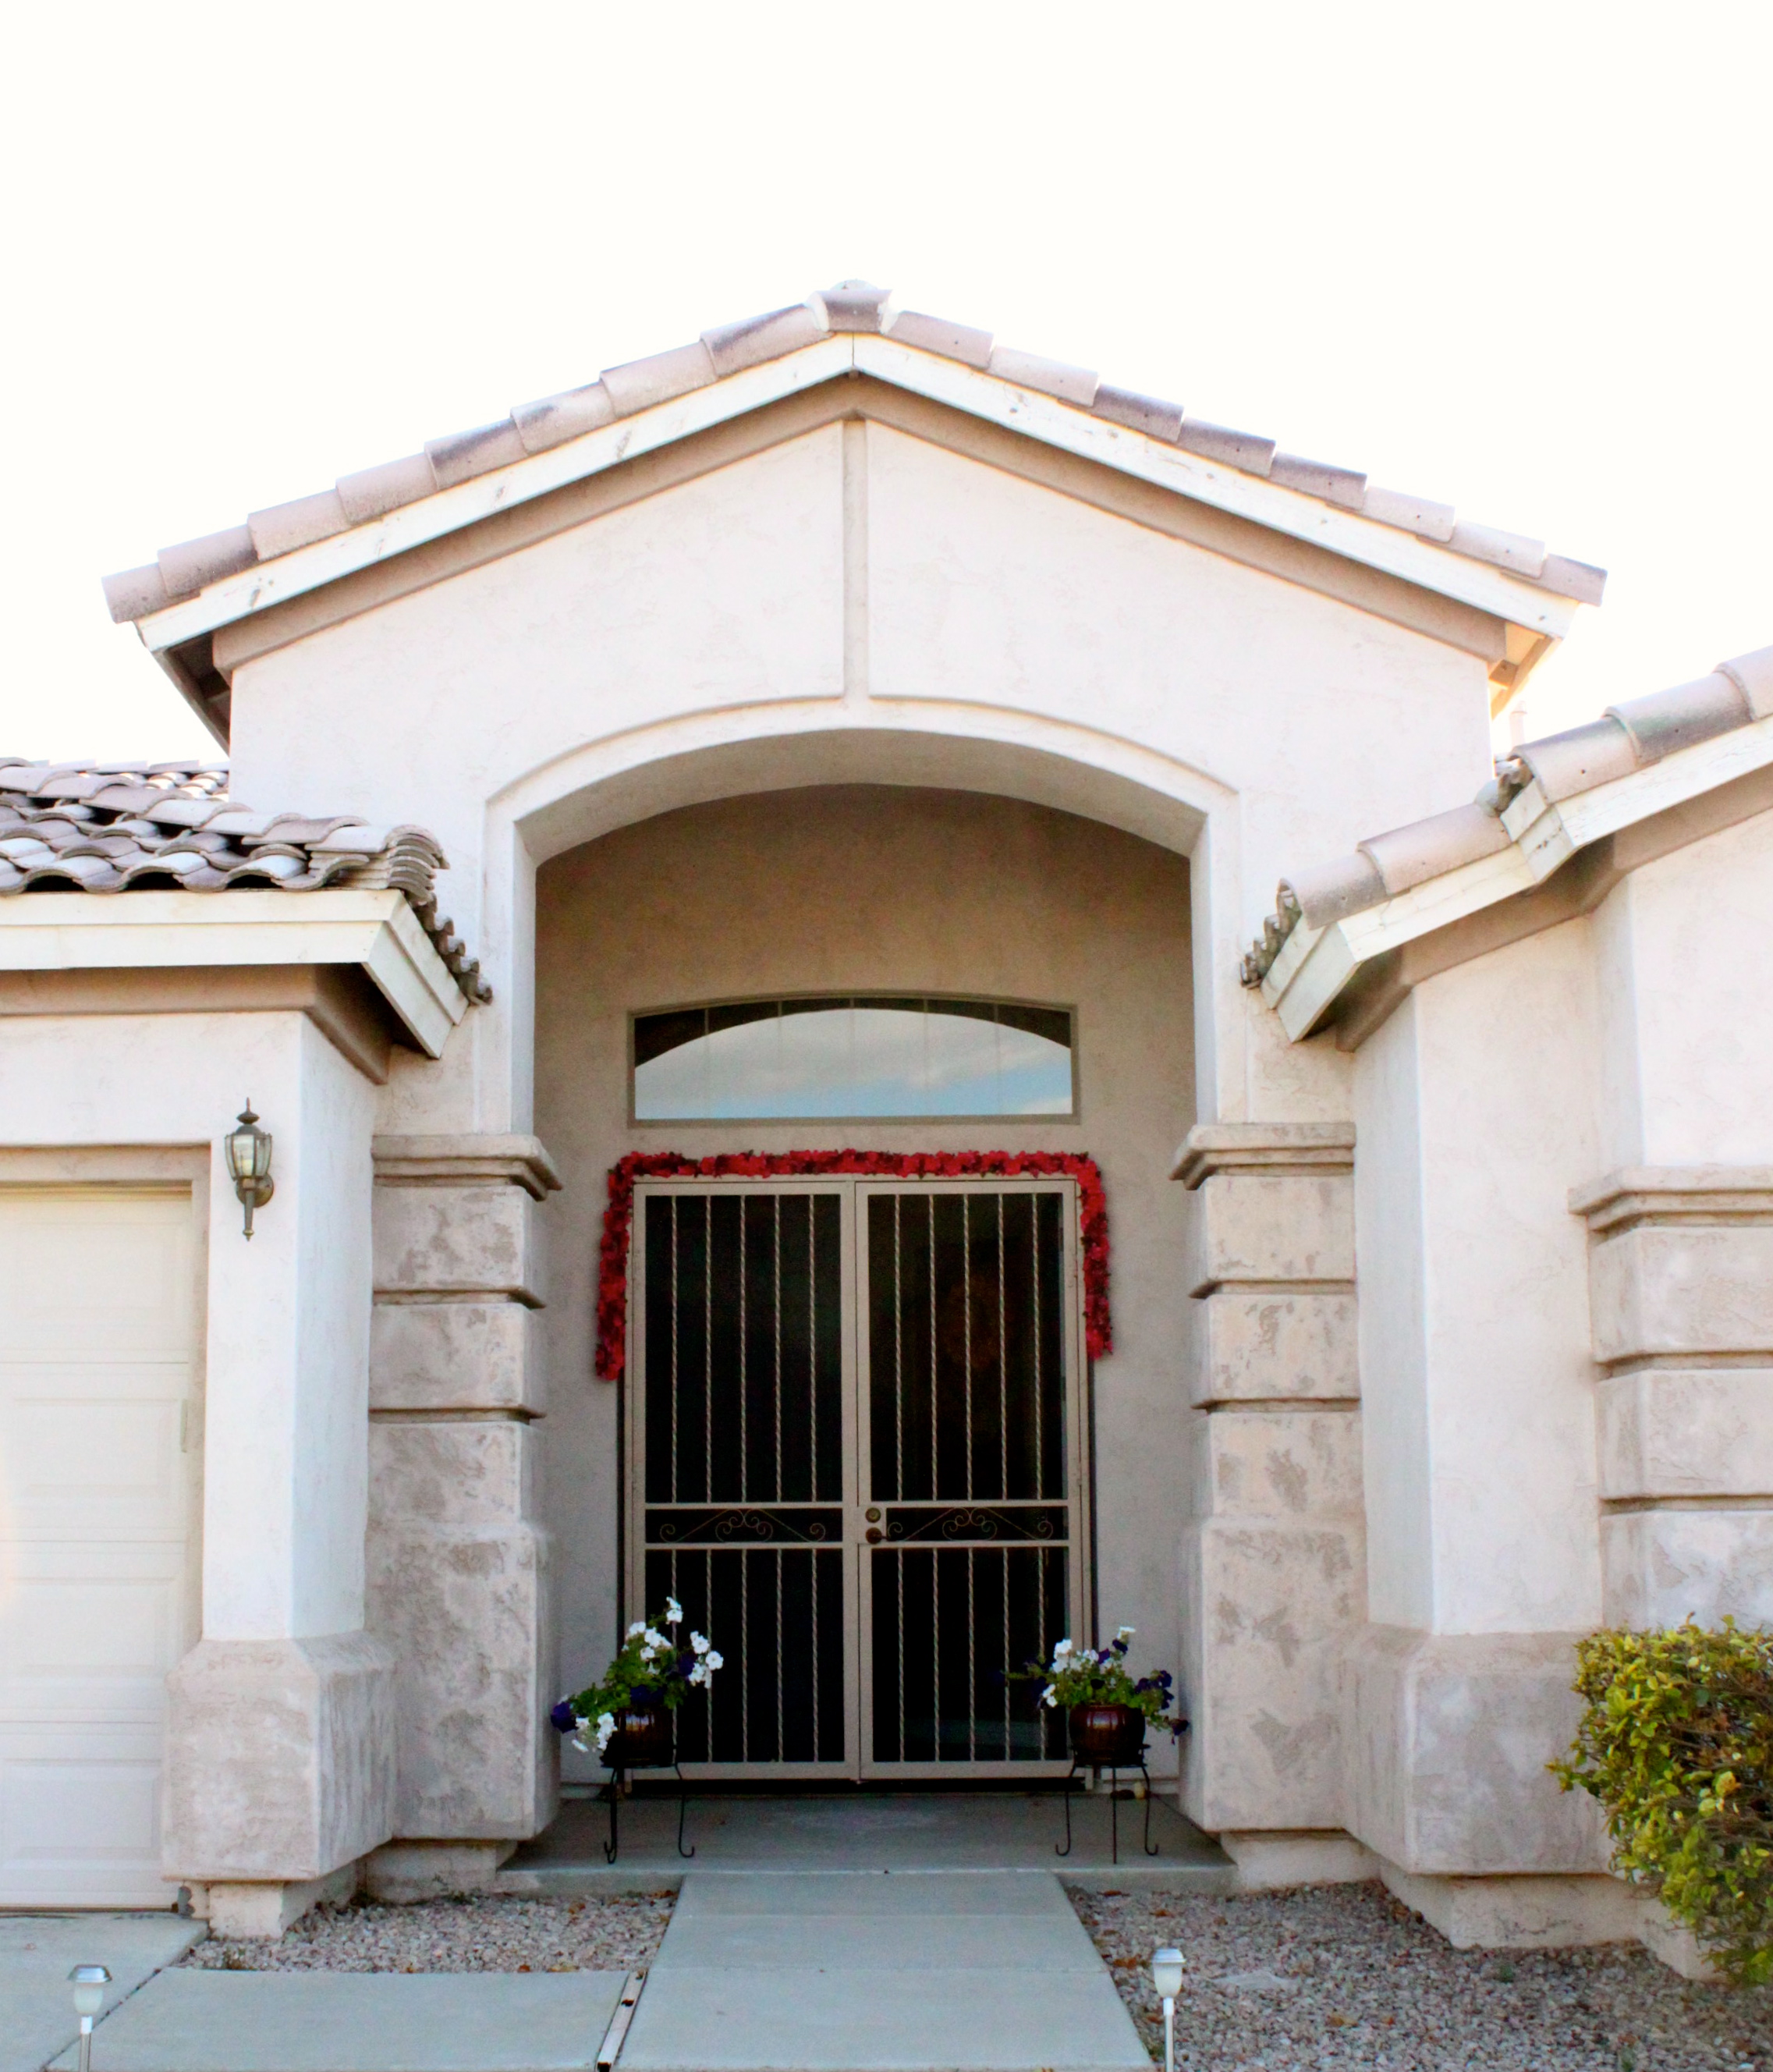
IMG_1219 IMG_1222

After

IMG_1254 IMG_1253

We didn’t choose absolutely different colors, little details made all the difference. One trick that worked perfect is the bold front door, accent wall, dark body color and light pop outs. It surely looks new and bright 🙂

Tip 1: Search online or drive around neighborhood to understand the trend. There are so many houses out there and there is no need to stress out about colors. After some online search and walking around neighborhood we found the house to imitate.

Tip 2: Be kind to neighboring properties. Chose colors that won’t match or clash with the immediate neighbors.

Tip 3: Picking a trim color is just as important as picking the base color of the house. You need to decide what you want your trim to do…blend or highlight/pop.

Tip 4: When comes to picking the color for main door, choose something that best compliments the exterior paint, roof tile and interior paint or at least the entryway foyer. A natural flow of colors is important. And most important the color should be warm and welcome your guests.

Tip 5:If you choose too bold color like our first one (Bonfire Flame) don’t panic, rush to the store and get a new paint..;-)

FullSizeRenderFullSizeRender_1

Tip 6: Keep the number of colors less (2-3 colors) and follow your gut. Exterior painting is a big and long-term job so be sure of the colors you choose and never go for something that isn’t 100% right.

Tip 7: Choose a good quality paint. Again, it is a big decision and you don’t want to see it fade prematurely.

The colors we used are Dunn Edwards

Mesa Tan – DEC718 (Body, Garage Door, Facia)

Verona Beach – De6135 (Trims, Patio and porch roof, Patio Accent wall)

Mesa Red  –   DET430 (Front and Patio Doors)

I am very happy that our decisions turned right and looks amazing. I hope these tips help you choose a right paint and improve the curb appeal of your home.

Cheers!

Earring Hoops!!

If you are looking to craft some stylish earrings, these lovely DIY earring hoops will make you happy 🙂 They are not only easy but fun and floral, perfect for spring/summer!

IMG_0909

All you need is polymer clay, blossom plunge cutter and some earring hoops.

IMG_1051

Roll and fold multiple times until you get the desired gradient shade or use pasta machine

IMG_0863

Next use a button/stamp like here (my previous tutorial) for texture. Using the plunge cutter, make 2 flower sizes. Bake as per package instructions for about 15 minutes. Once cool paint the pieces( I used metallic) and clean up with damp paper towel.

IMG_0866IMG_0869

Add a thin coat of Sculpey gloss and let it dry.

IMG_0870

Slide on the flowers and the flattened bead cap to the hoops and the earrings are ready to wear 🙂

IMG_1054

Hope you enjoyed this super easy and quick tutorial on making some fancy earrings.

Marbled Plant Pot…

I have been seeing the nail polish marbling trend all over Pinterest and couldn’t wait to try my hands 🙂 This technique is just not for nails and was so inspired by this gorgeous post.

IMG_1151

I absolutely love the patterns and the blue nail polish looks like a bird. I couldn’t resist to highlight with a metallic sharpie marker.. 😉

IMG_1148

Well, this project might sound easy, hmm… yes, to some extent because it can be done with few materials (already on hand) and super inexpensive. However, the trick is the temp of water!

You’ll need:

Plant pot from IKEA – 49 cents

Nail polish

Toothpick/Needle

Disposable container

Water – warm or room temperature ( cold doesn’t work)

Step 1: Fill the container with water half way

Image

Step 2: Pour in the nail polish, let it spread on top of water and use a toothpick to blend the colors or give a nice texture.

Image 1

Step 3: Dip the plant pot and hold it for couple of seconds, take it out and  leave it to dry.

Image 3

Isn’t that easy and quick?

It gives a fresh look to my kitchen sink window bay and I could wash dishes all day long 😉 hehe..you know what I mean😛

IMG_1144

Happy Monday!!

100th Blog Post!

Reaching a milestone in anything is super exciting and you are reading

IMG_0970

Yayyy!!! I actually kept up with this blog and have made it this far! And throughly enjoyed blogging over the past 15 months and learnt more than I ever thought!

Every little achievement in life has to be celebrated, hehe…so I made a delicious smoothie (Strawberry, Bannan, Stevia leaves n Coconut Milk) for breakfast 😉 and going to enjoy rest of the day!

IMG_0979Slurppp….

A Big Thank you to all who have been following my blog and Facebook page, like my posts and take time to post a comment and appreciate my work 😀

Happy Thursday!

Handmade Mother’s Day Gift!

I’ve been brainstorming ways to show off my jewelry, specially when I have to take pictures for my blog and came up with my own display stand.

IMG_1119

Then, I thought Mother’s Day is just around the corner, and this can be an awesome gift to make with kids for their mom or Grandmother.  This cute jewelry stand is easy, quick and costs less than a $1.

Why wait, gather material and craft with your kids or inspire older ones to make one for mom/themselves 😉

IMG_0930

Craft sticks – plain or painted – 12 sticks

Elmer’s or any Craft glue

Hot Glue Gun – older kids/Adults

To make the stand use small dots of glue –  glue 2 sticks in “V” shape and let it dry.

IMG_0931

While it is drying make a grid like shown below. The grid helps to hang/display jewelry.

IMG_0934

Glue a base stick to the bottom of both V shaped pieces

IMG_0932

Lastly, glue the front piece to the stand like show below.

IMG_0936

And…. Tadahhh…..

IMG_0938

My favorite thing about crafting with these sticks is endless possibilities and they are super inexpensive.

What is your favorite with these fun sticks??

Stamped Earrings!

Inspired from one of the tutorials posted @ polymer clay group on Facebook, I have been busy stamping up some clay earrings. This time not stamps but metal filigree buttons.  They have a great texture and comes in beautiful designs and multiple shapes, and here is how they look 😀

IMG_0891

So, want to make your own?

Gather the material and get started –

Polymer clay – colors of your choice

Rolling pin

Metal buttons – Mine from here 

Rice/Corn Flour

Acrylic paint and Brush

Wet tissue/wet piece of cotton

Toothpick/Needle

Basic Jewelry supplies

Charms that match the jewelry – mine are Charms

Step 1: Take equal amounts of polymer clay in colors of your choice and knead it well called “conditioning”. There are lots of different oven baked clays out there. My favorite is Sculpey though, any other brand works fine.

IMG_0811Step 2 : Roll them and fold multiple times until you get the desired gradient shade.

IMG_0814Step 3: Add some flour to avoid sticking. Take the metal filigree buttons and press it into the clay until you get the desired texture. I didn’t want to have the whole texture so pressed it halfway.

IMG_0816Step 4: Cut the clay into the shape you want and remove the excess. To make the pieces thick i add another layer behind the cut pieces. Use a toothpick to poke a hole in the center top and bottom jus enough to add a jump ring.

IMG_0818IMG_0821Step 5: Bake the pieces as per the package instructions ( mine for 275 F for 20 minutes) and let it cool completely.

Unfortunately, my pieces were burnt but never mind, I still like the color 😉

Now we paint and leave it for couple of seconds.

IMG_0822Step 6: Dip a paper towel or cotton in water and gently clean up the surface. Make sure you don’t wipe into the design.

IMG_0823Step 7: To give it a finished look paint a thin coat of Sculpey gloss and let it dry.  Two coats is usually enough. Then, turn them into earrings by adding the ear wires and the acrylic petal charm to the bottom of earrings.

IMG_0825IMG_0828

And Tadahhh….

IMG_0929

Don’t you love the texture and the paint in it which creates a completely new look. It is my new favorite and can’t wait to make more 🙂

Happy Monday!

Custom Cork Trivets!

Do you remember my IKEA cork coasters that got a new look 😉

Well, this time it is cork trivets.

After my first wood burning project – Name plate, I started looking for more and thought  why not use the tool to give few trivets a little personality. Plain looking is not bad but adding a little character would be more fun!

IMG_0847

And here are the custom cork trivets!

Gather the material – trivets, wood burning tool, sharpie markers and some patterns.

Step 1 : Draw a pattern of your choice on to the trivet. The marker you use to draw design does create a colored border. If you are using a printout, trace it on using a carbon or transfer paper.

Step 2: Preheat the tool and burn through the design on the cork.

IMG_0192

Isn’t that cool, they are very handy in my kitchen and also look cute on table while the food is still cooking 🙂

What’s next to burn…….?? 😛

Easy pillow/cushion/seat cover

My kitchen barstools needed makeover for a long time.

They  were given to us by a friend and I have been using IKEA chair cushions. In our new home, those red chair seats weren’t blending well the rest of the room 😦

Last week, with the perfect fabric on hand, I couldn’t wait to make some quick and simple cushion covers.

IMG_0845 IMG_0846

I found the  fabric @ HobbyLobby on clearance for $10 p.yard – originally priced $35 p.yard. It absolutely matches the rest of the room – family room furniture, kitchen cabinets and the countertops too 😀

Here is a tutorial on how easy it is to make them 🙂

When you shop, buy good fabric for its strength and stain resistance. If you are using a cotton fabric, pre-washing is preferred.

Step 1: Measure the cushion/seat length, width and depth. The chair seats are from IKEA so I used the measurements described on their site.

Step 2:Next you’ll want to lay out your cushion so that folded over, the fabric covers the cushion from top to bottom. Add 2-3 inches both height and length.

IMG_0648

Step 3: Lay fabric front over fabric back, right sides together. Pin edges. Sew it together using one-inch seam allowance on three sides.  Once done, turn it right side up and  should look like a market bag with one side open.

IMG_0652

Step 4: Insert the pillow to make sure it fits well. I like it to be snuggy.

IMG_0653

 Step 5: Fold it like an envelope.

IMG_0655

Step 6: Add velcro to both the ends.

IMG_0660

Step 7: Hand sew or hem ties at two ends of the seat.

IMG_0680

And Tadahhh the covers for the seats are ready!

IMG_0836

That was pretty easy right?

Cheers!

Spring Jewelry

I have been crazy busy all of last 2 weeks on some home improvement projects and cannot wait to be done with that. I shall share pictures soon 🙂

Well, with these projects on hand, I am seriously slacking and decided to have a post ready and here it is!FullSizeRender_3

This beautiful spring floral necklace is  made out of polymer clay. Clay flowers are fun because of its flexibility and beautiful colors. They can be made handmade or use some tools as silicone molds or fondant plunge cutter.

Ready to make some??

Supplies :

Polymer clay

Rolling pin

Toothpick

Plunge Cutters

Chain (2 foot for necklace and bracelet)

Jewelry Pliers

Jump rings

Earring Posts

E6000 Glue

Gather supplies and start by rolling out clay with acrylic rolling pin and use the plunge cutter to make flowers.

  IMG_0766

The smallest plunge cutter is ideal for necklace and bracelet flowers and the next size for earrings. IMG_0769

To create holes for jump rings, use a skewer/toothpick and gently poke a hole for all the flowers. IMG_0770 Once done bake as per your package instructions. I baked mine(Sculpey) for 7 minutes @ 270 F and let them cool.

Add the pieces to the chain using jump rings and the necklace is ready.

For earrings add flat pad earring post with E6000.FullSizeRender_2


Cheers!

Cooking Without Limits

Food Photography & Recipes

Travelling Krishnaite

Shekhar Srivastava's Blog

Live-😊-Life..

"It has everything in little as a HAPPY package!!"

DesiCrafts

A blog Dedicated to Indian handicrafts, Fabrics and Supplies

Fulgorine

My adventures with art and polymer clay

The Beaded Bazaar

Polymer clay creations

Learn Polymer Clay

Inspiring you to explore your creativity and get down to work! A great collection of Free Polymer Clay tutorials

Wear the Ducky Tie

A Sewing Blog

sewmanju

Make your own style

SEW KATIE DID

because thread is the best glue.

The Crafty Coup

Finally, you're here! Let's make something!

The Daily Post

The Art and Craft of Blogging

WordPress.com News

The latest news on WordPress.com and the WordPress community.