Sugar Cast Goodies

I ewed and awed when I first saw Julia M Usher’s youtube video on sugar cast containers. She makes really amazing cast sugar pieces and transform them into gorgeous containers with fondant and royal icing. I couldn’t wait to make some, but was waiting for right occasion.

Well, we have a similar traditional food art in Southern India- Panchadara Chilakalu aka Sugar parrots.

Screen Shot 2015-03-02 at 9.07.41 AM

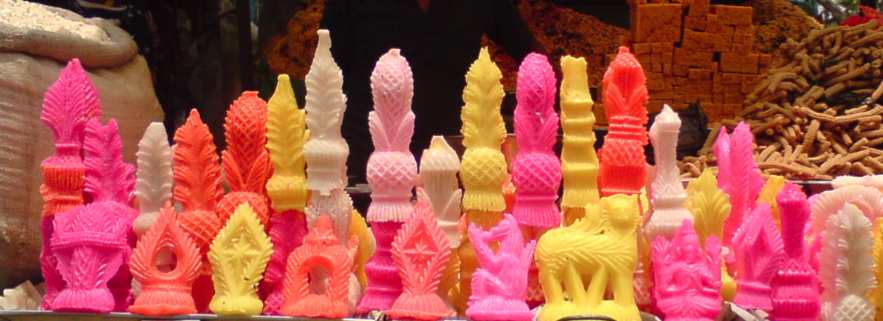
They are sugar candy molded into different shapes like parrots, peacocks, swans and gopuram. A thick sugar syrup is poured into wooden molds to form these shapes. These sugar parrots are usually made during weddings and festivals like Diwali and Sankranthi.

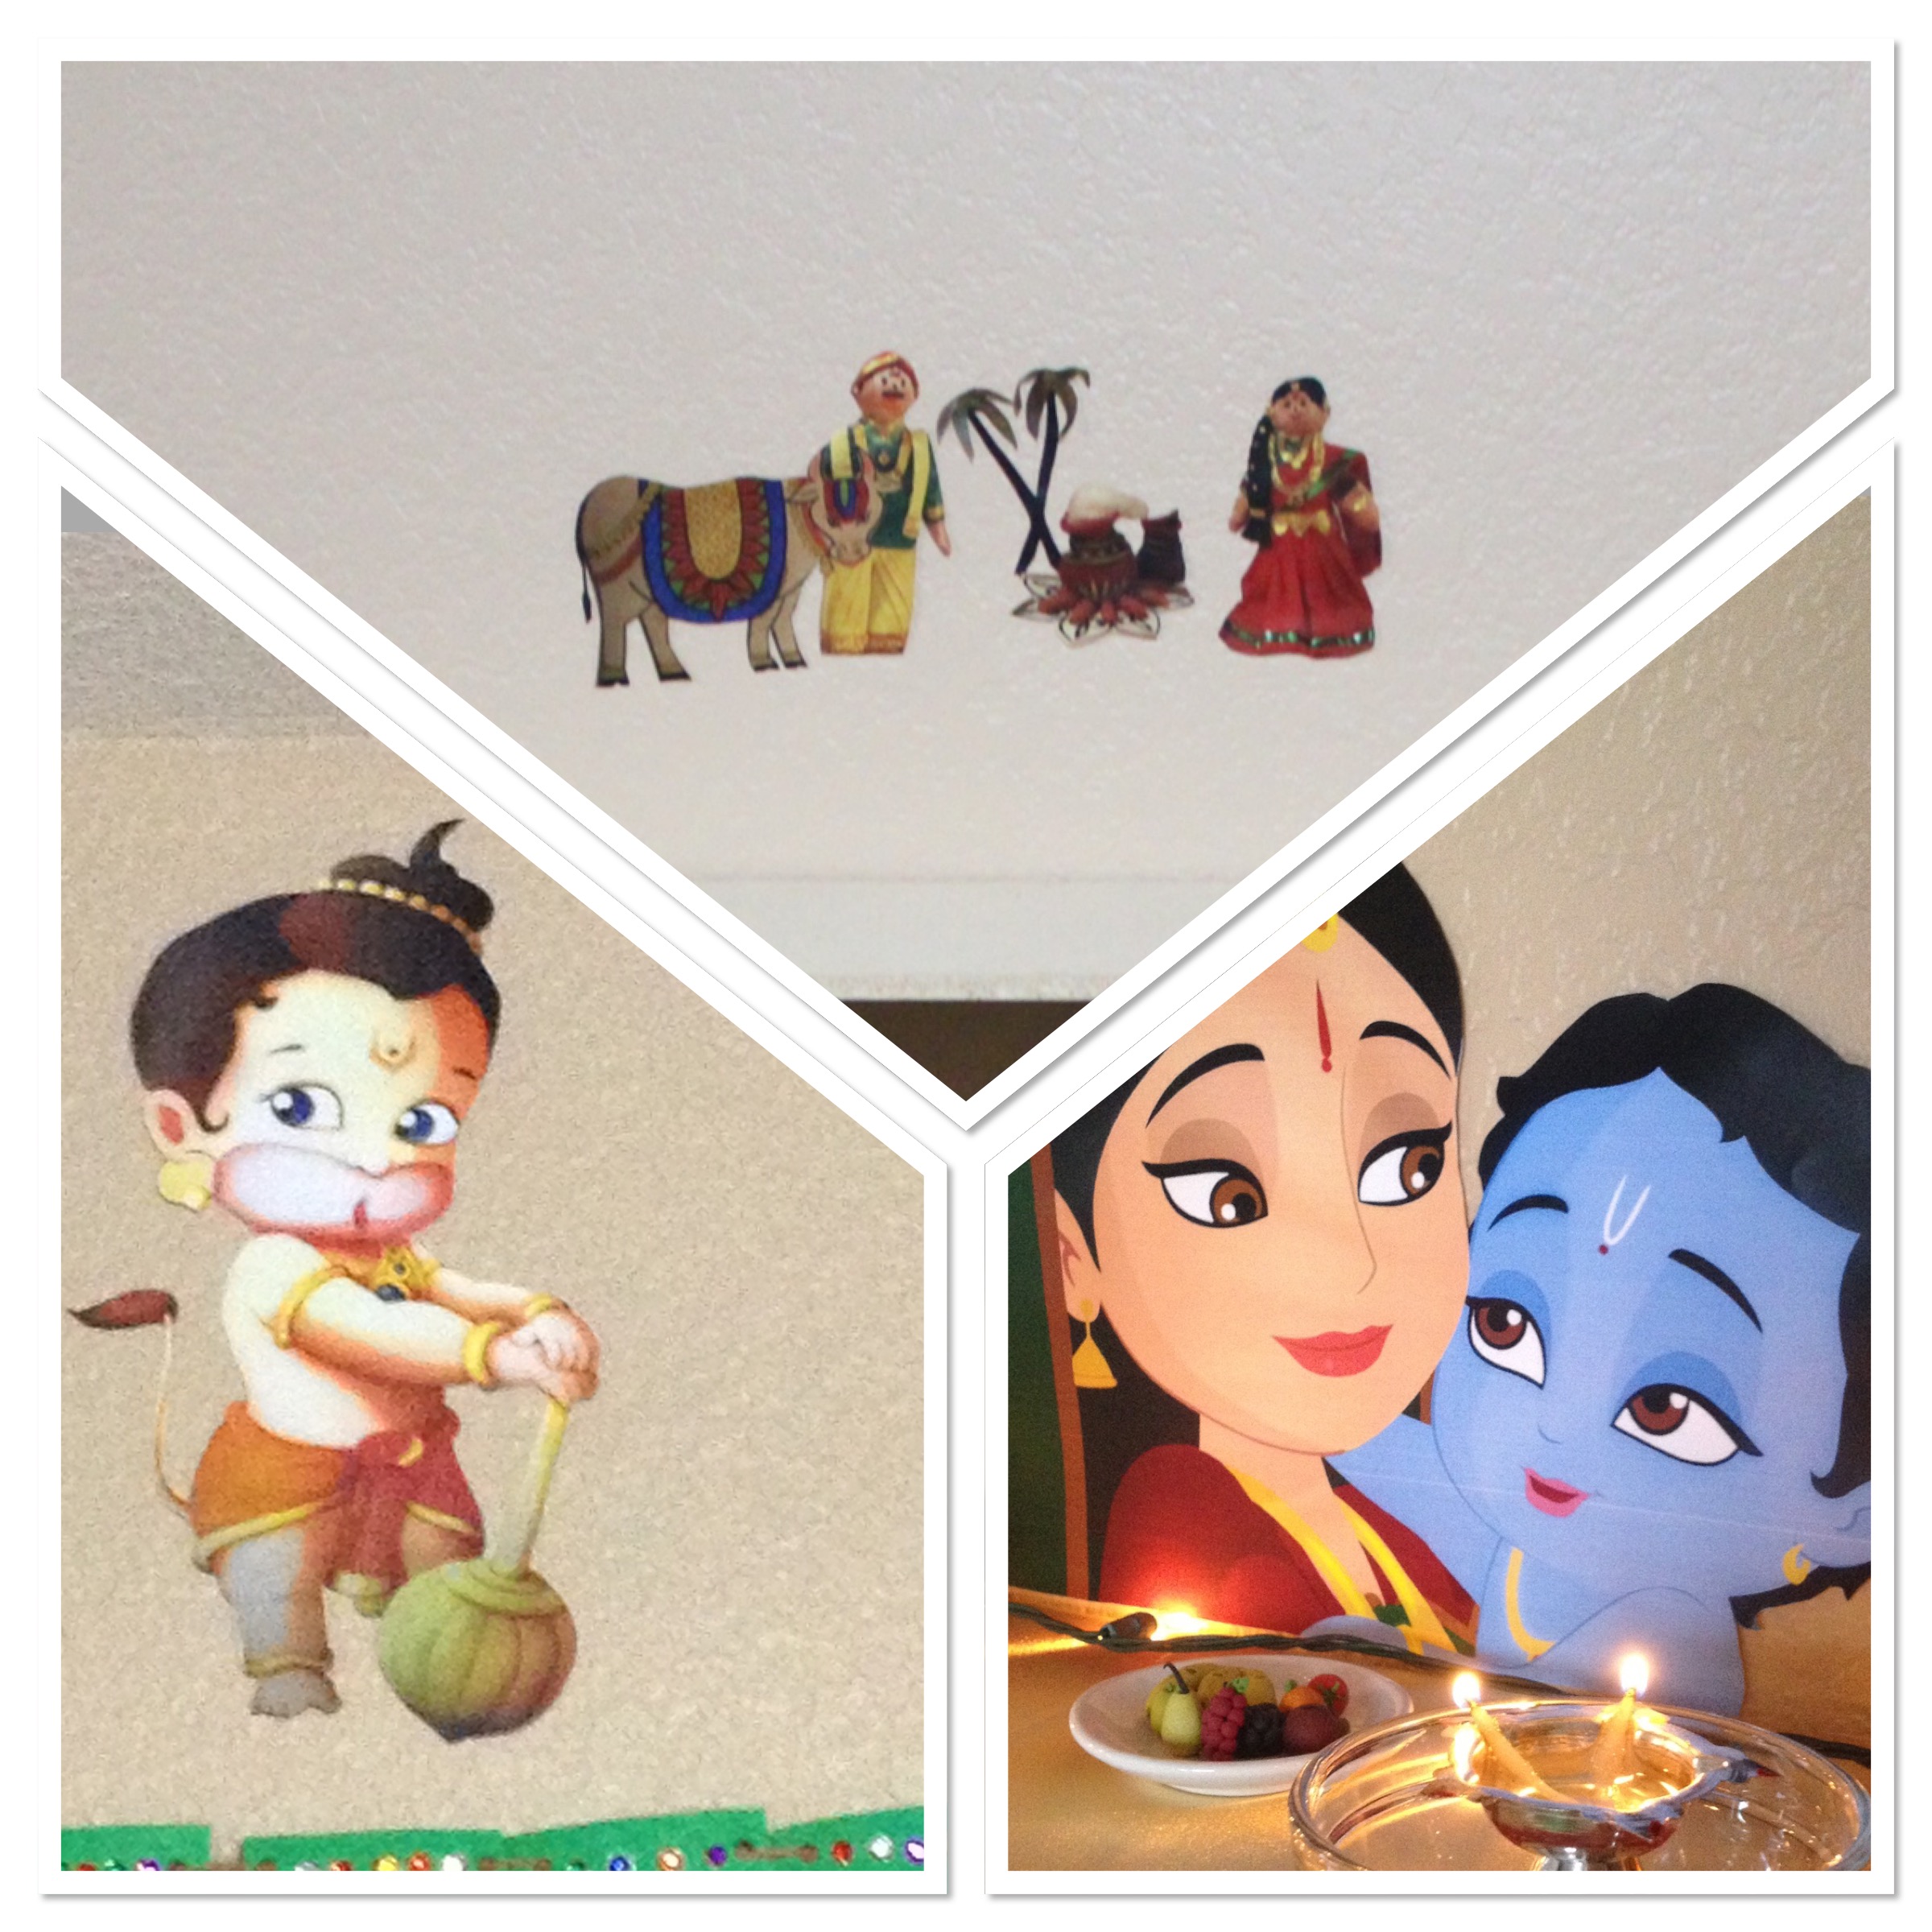
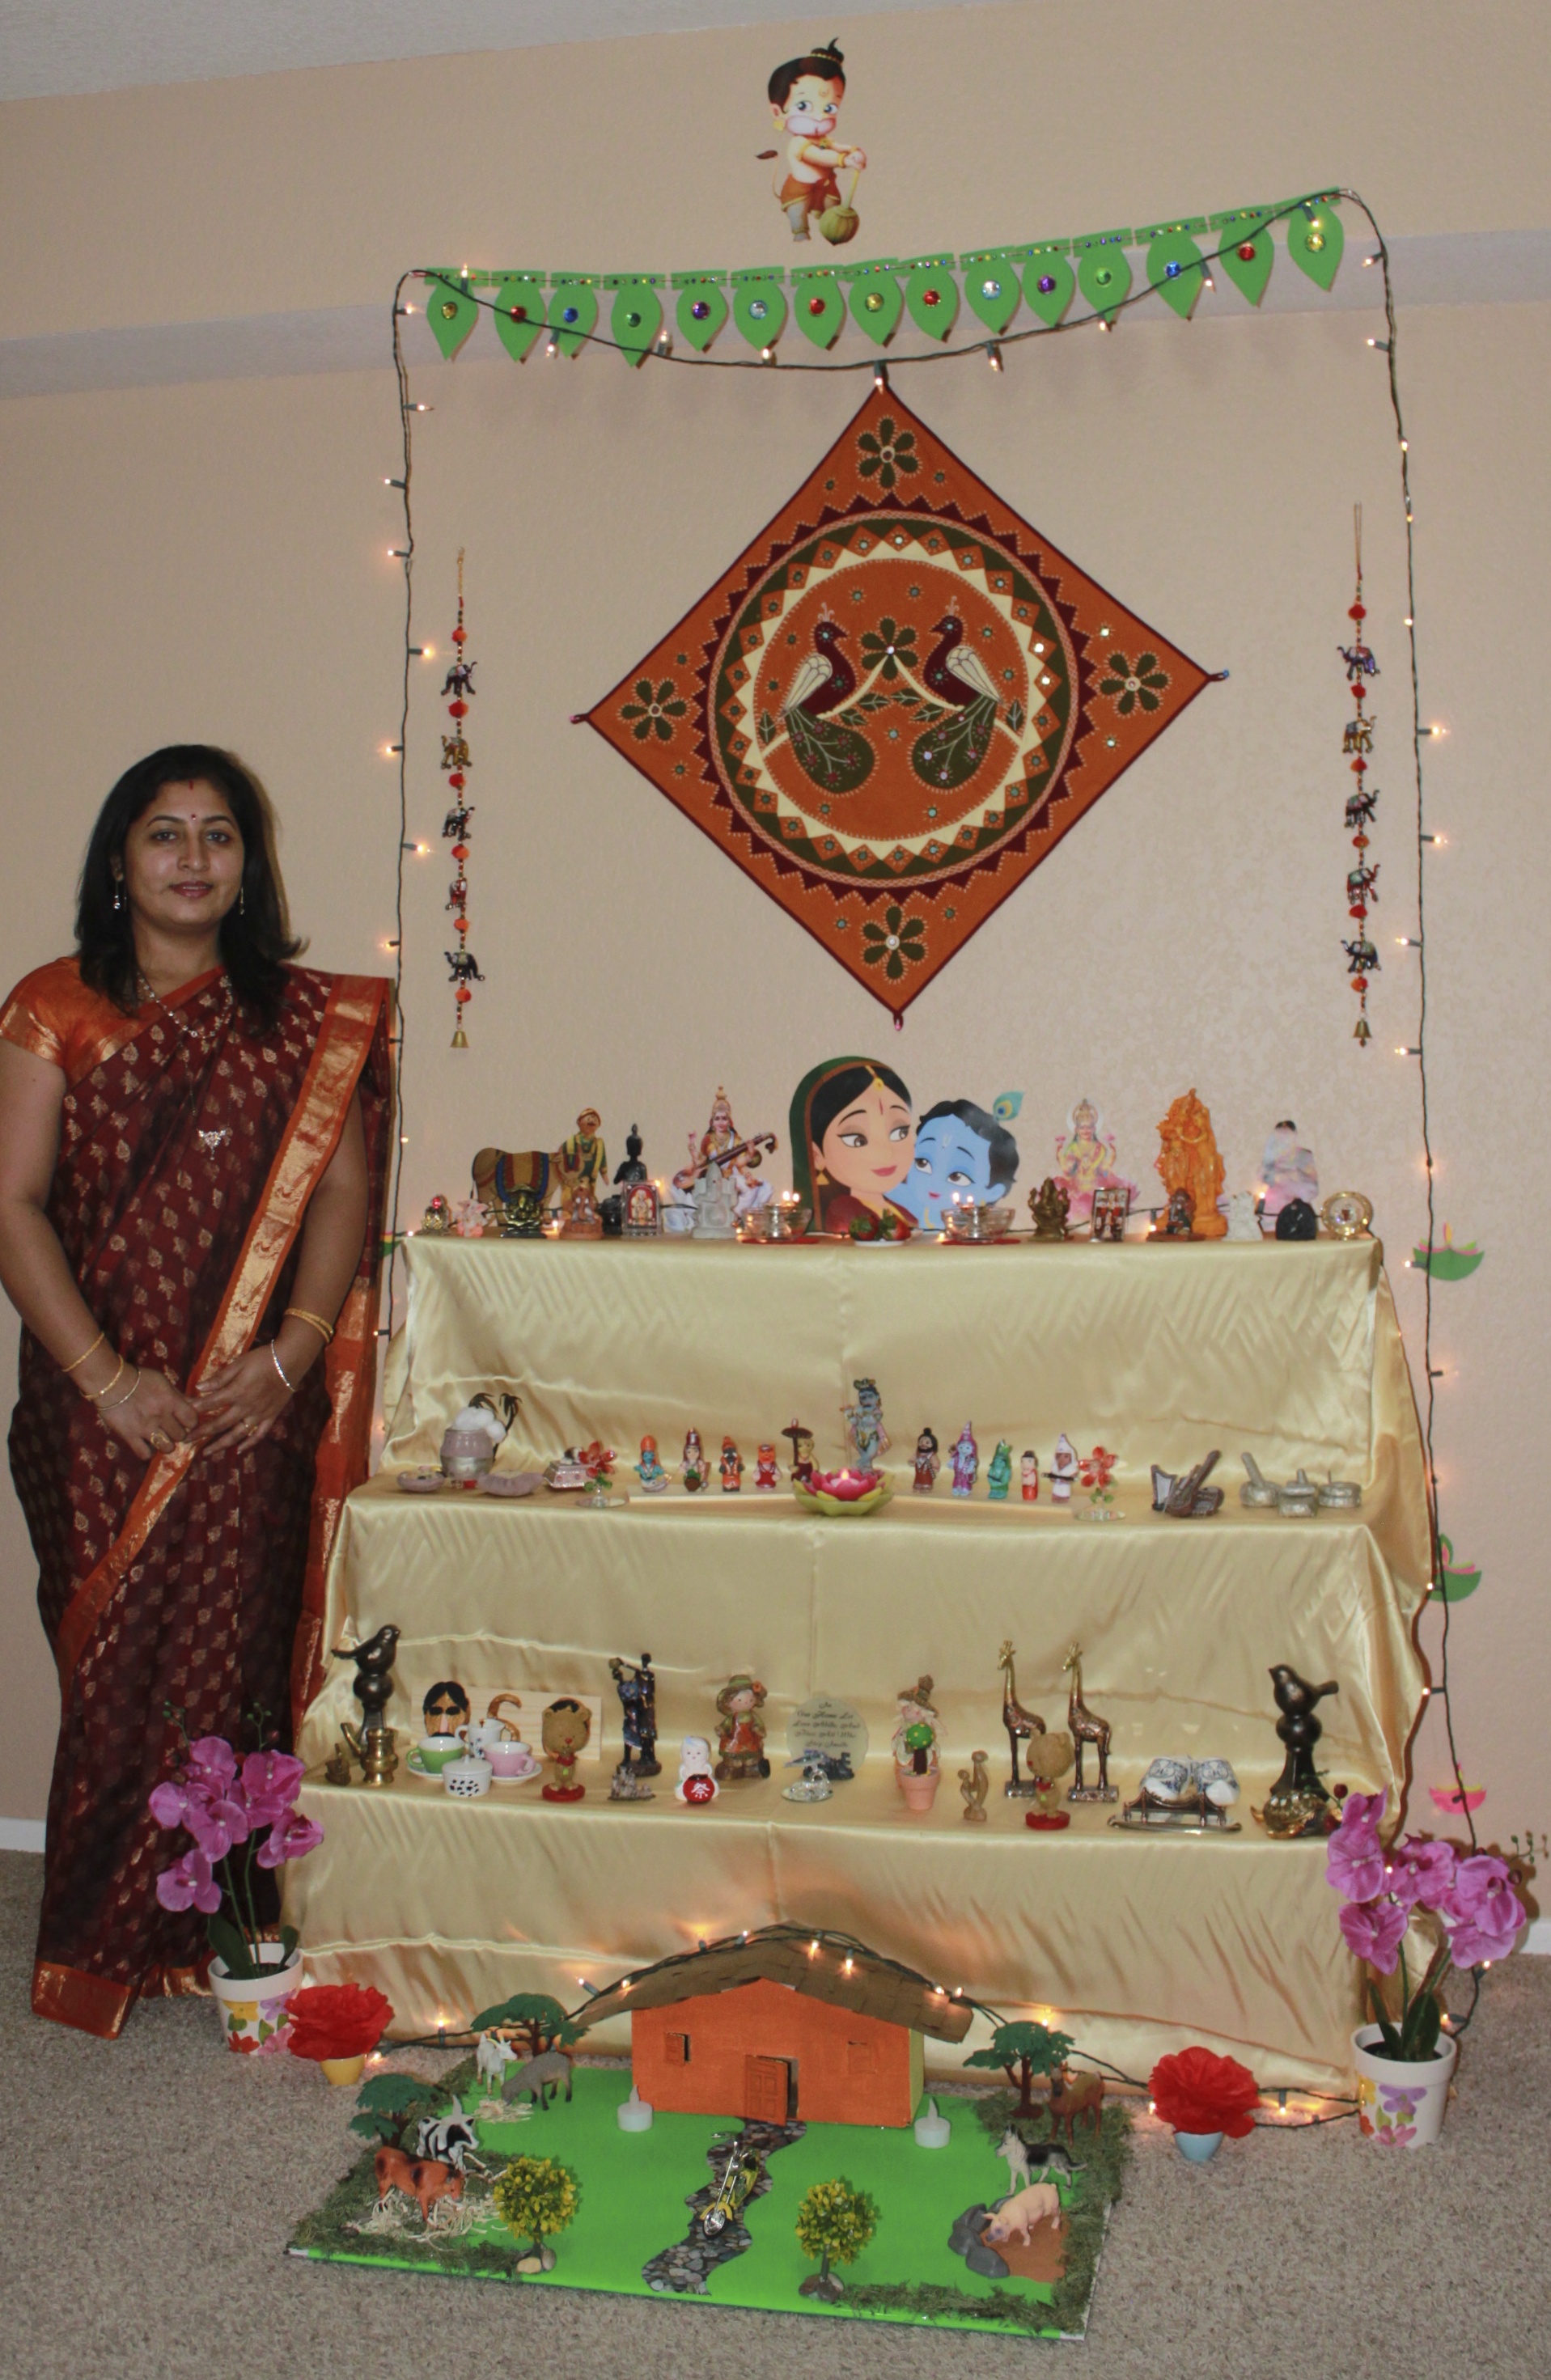
So, this year for my doll display during Sankranthi I made sugar conch shells as goodies for friends.

Image

Aren’t they beautiful!! And the best part is you don’t have to make sugar syrup or need heavy wood molds.

I followed Julia’s video and with few supplies I was able to make them in less than 10 minutes. And the drying time varies from 2-3 hours depending on the weather conditions.

I picked the shells soap making mold @ HobbyLobby and the other supplies are:
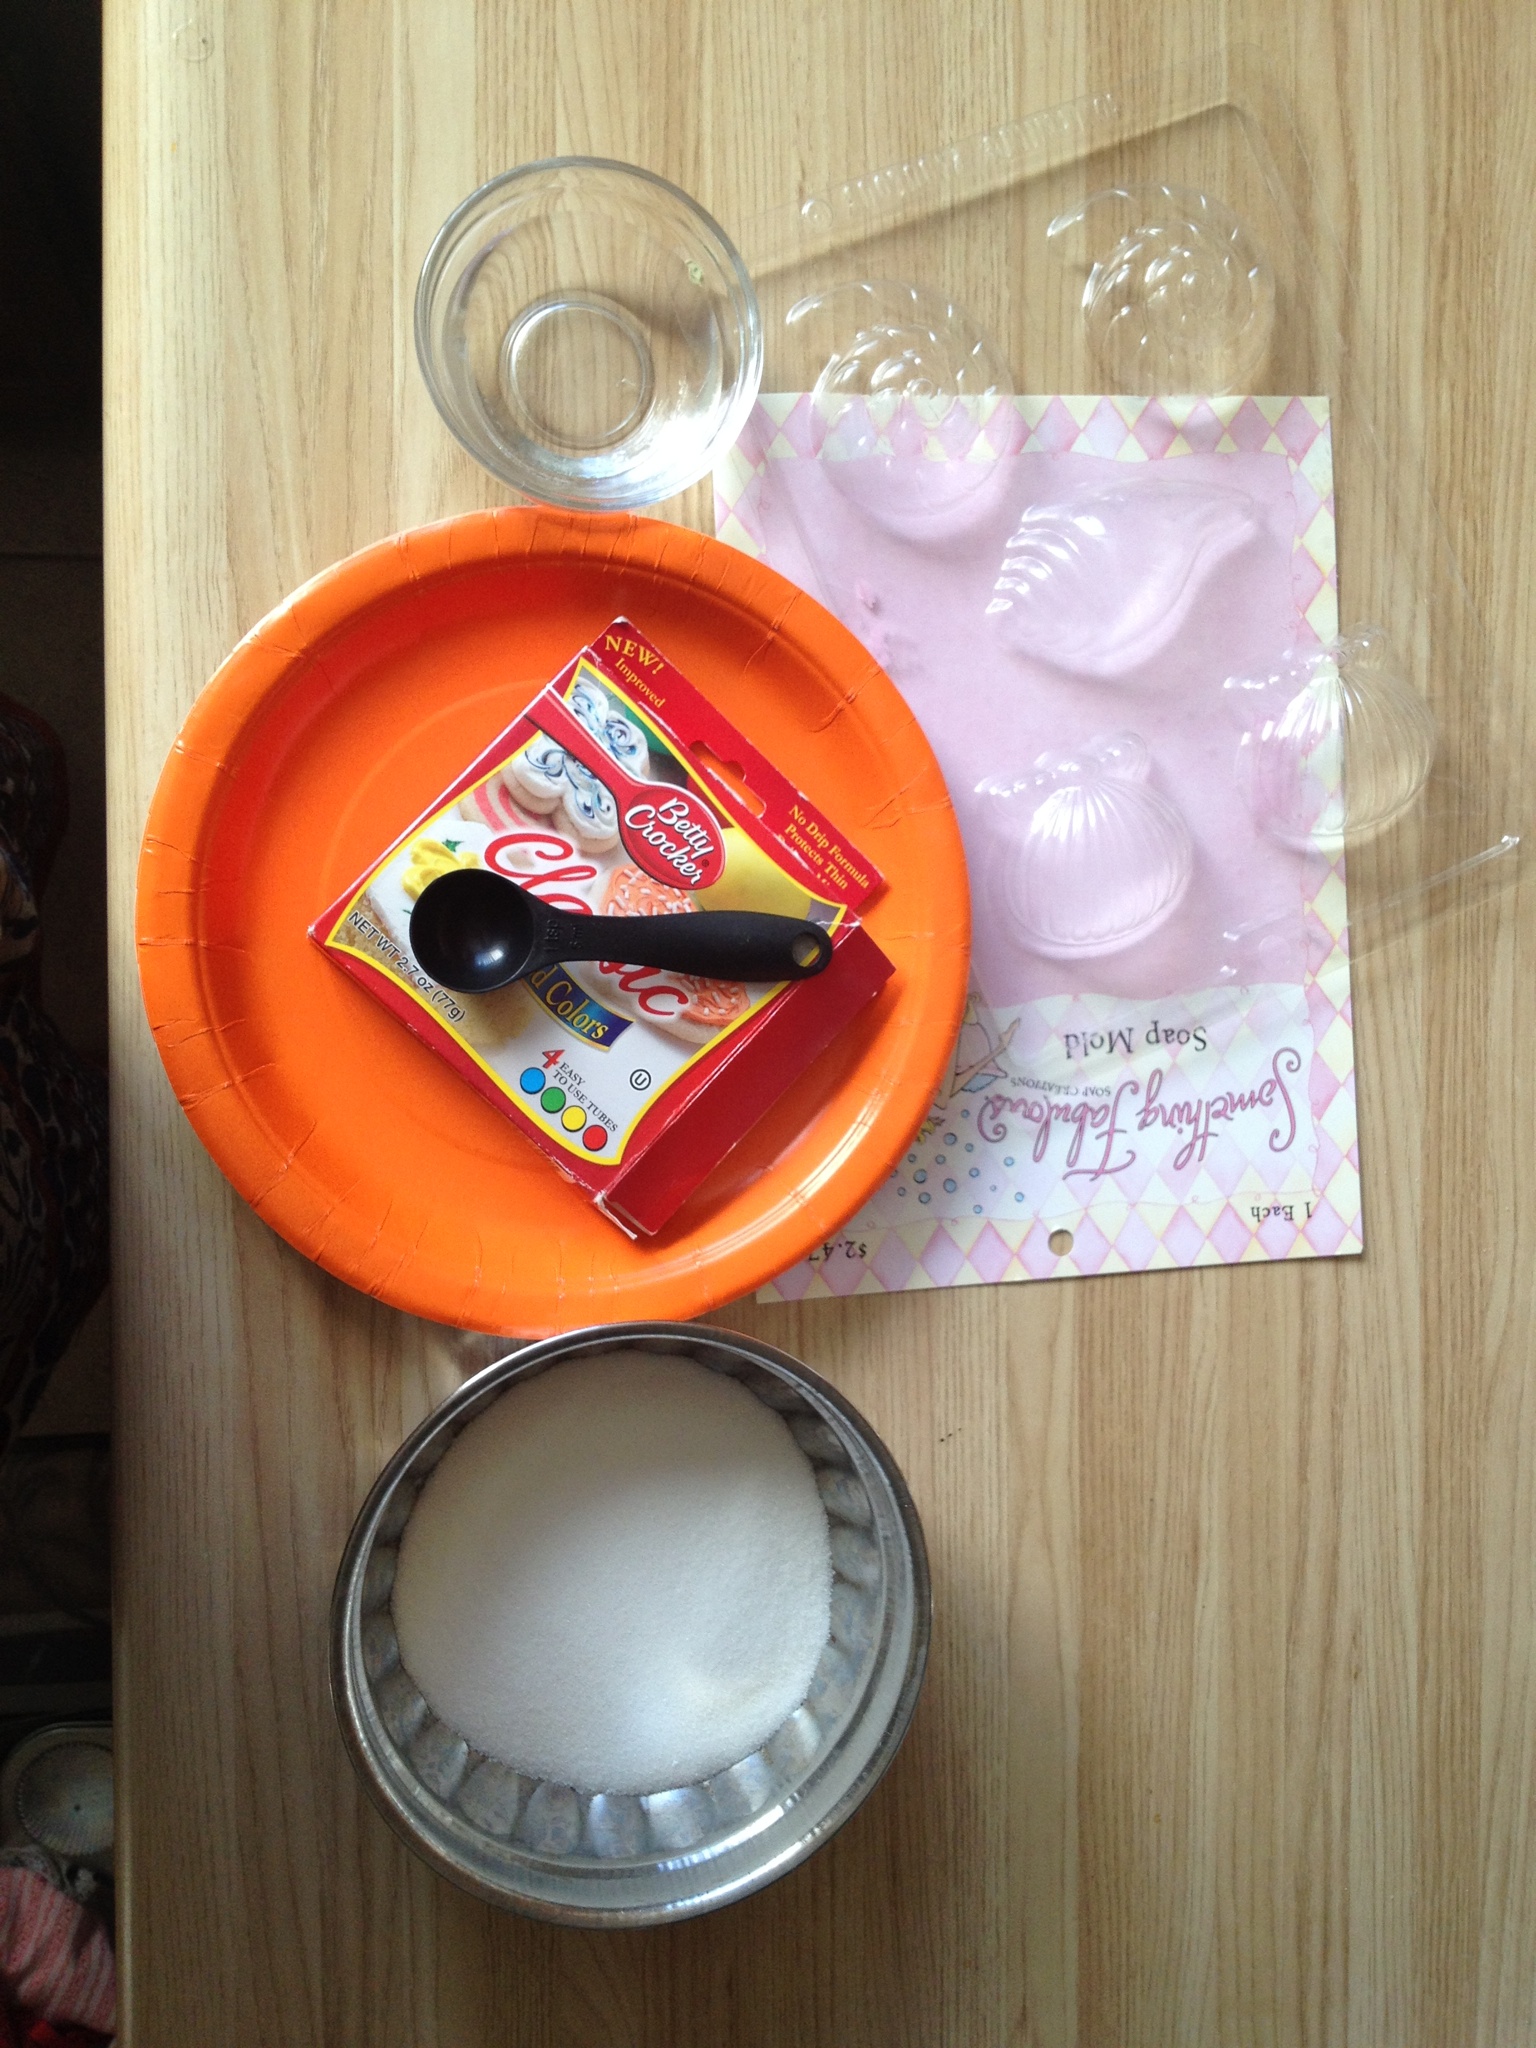
IMG_0778

Paper Plate 

Measuring spoon

1 cup Sugar – makes 5

Food color of  your choice 

Water in a  small cup


Step 1 : Cut the edges of the paper plate and make sure it is flat

IMG_0779

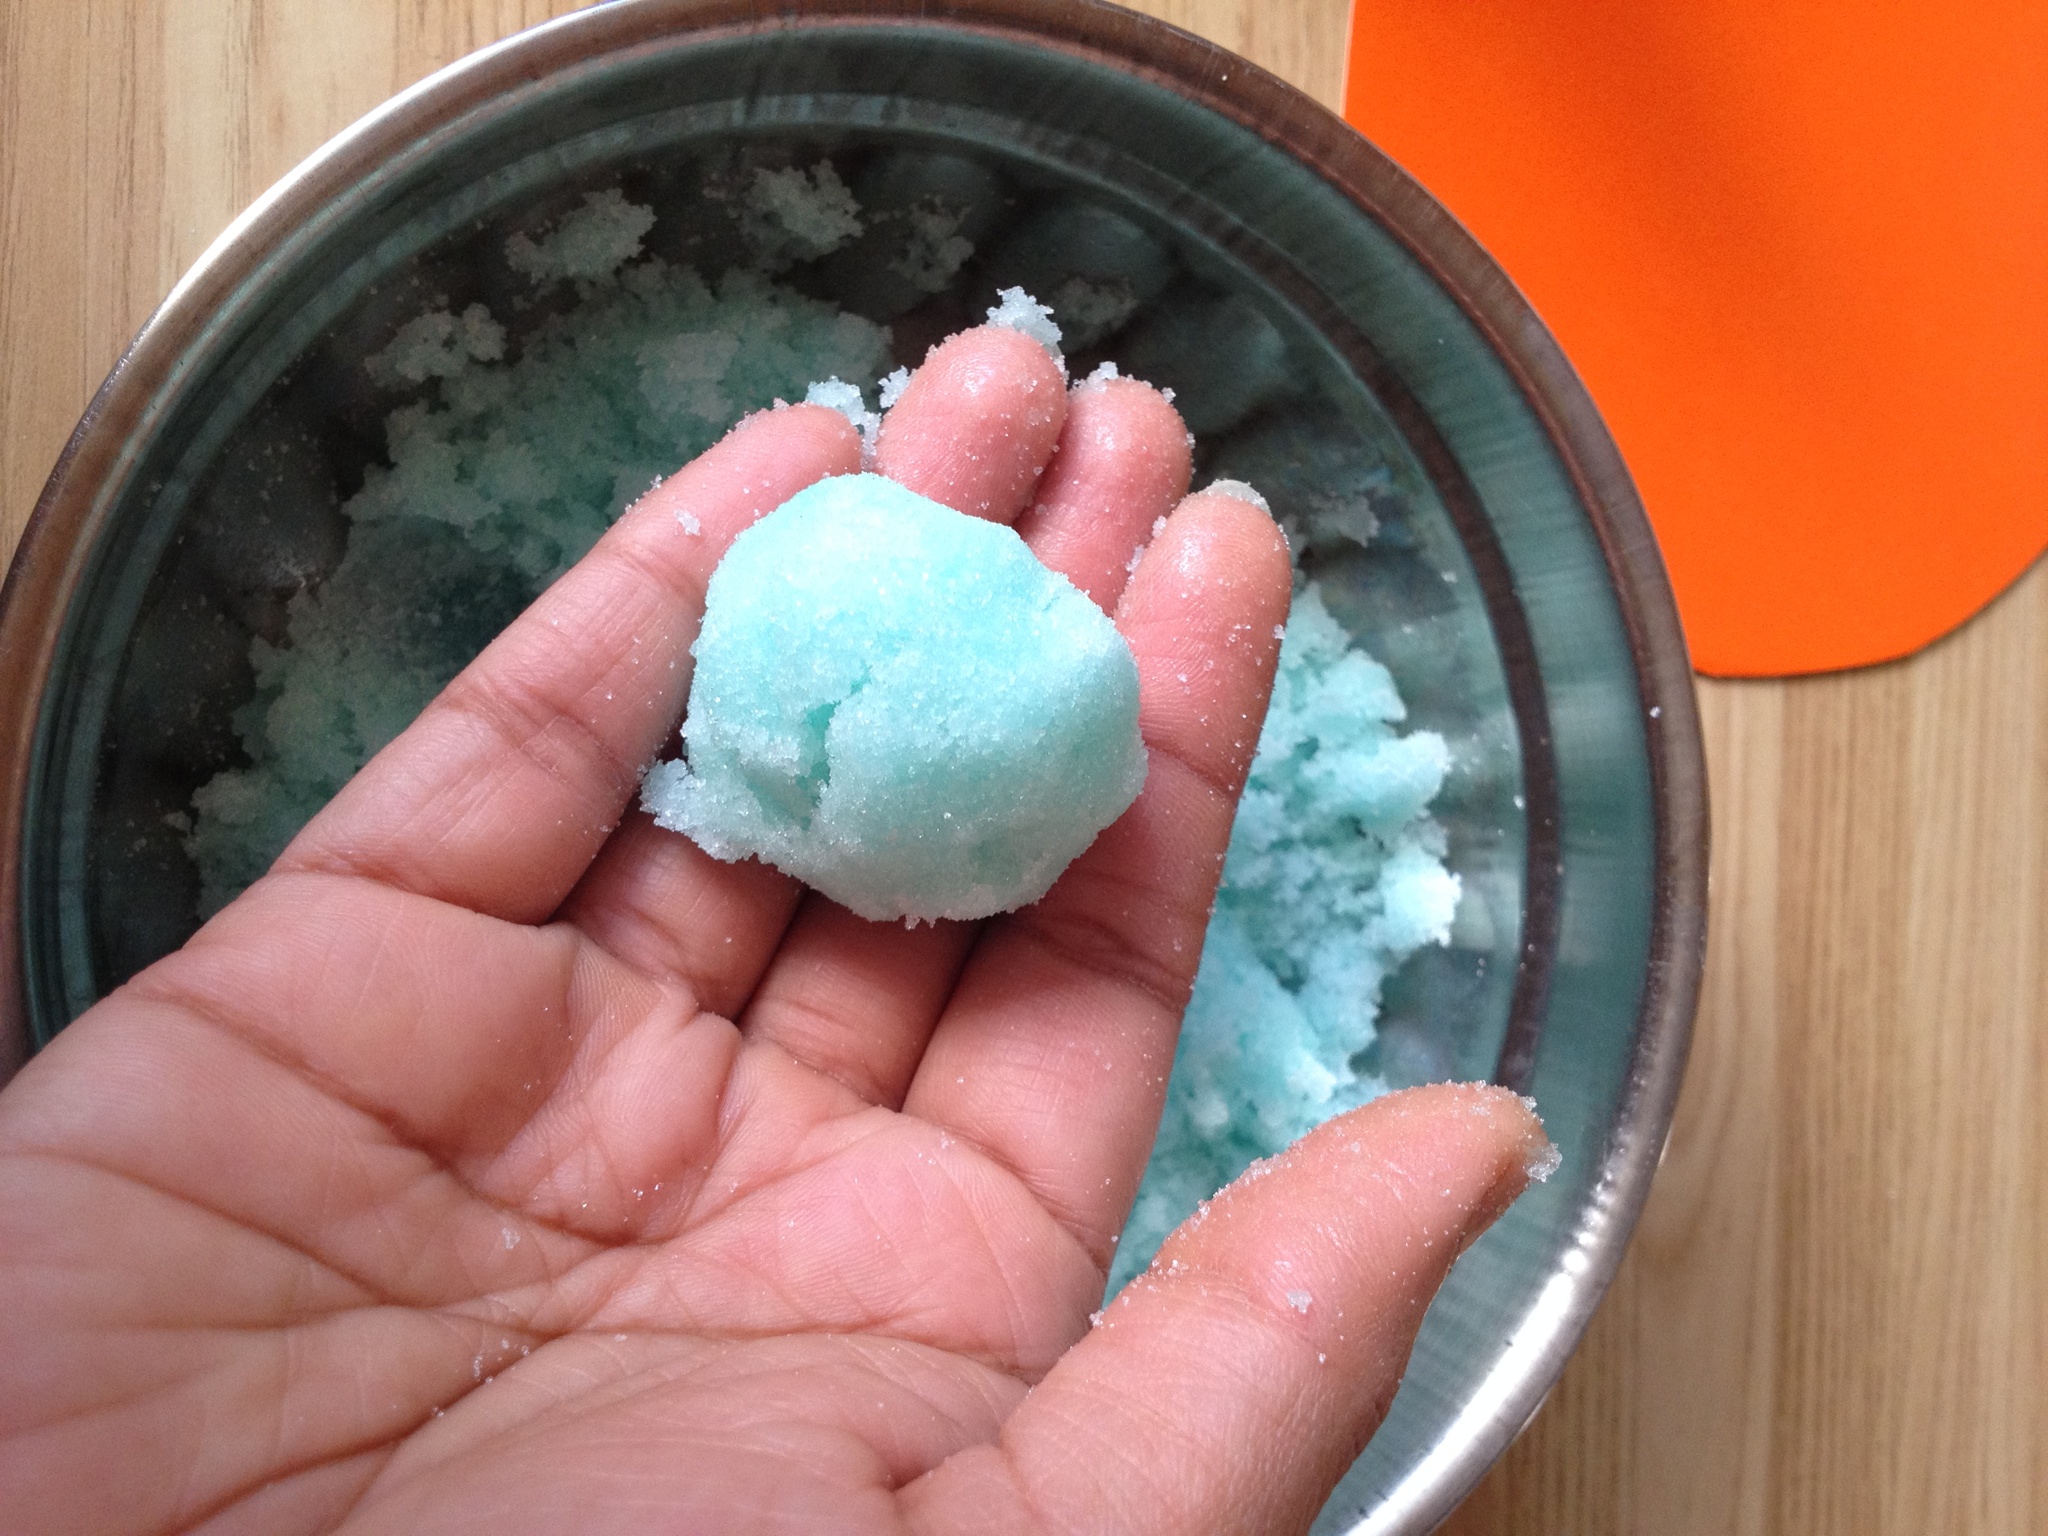
Step 2: Add a drop or two of food color in a  small cup of water

IMG_0781

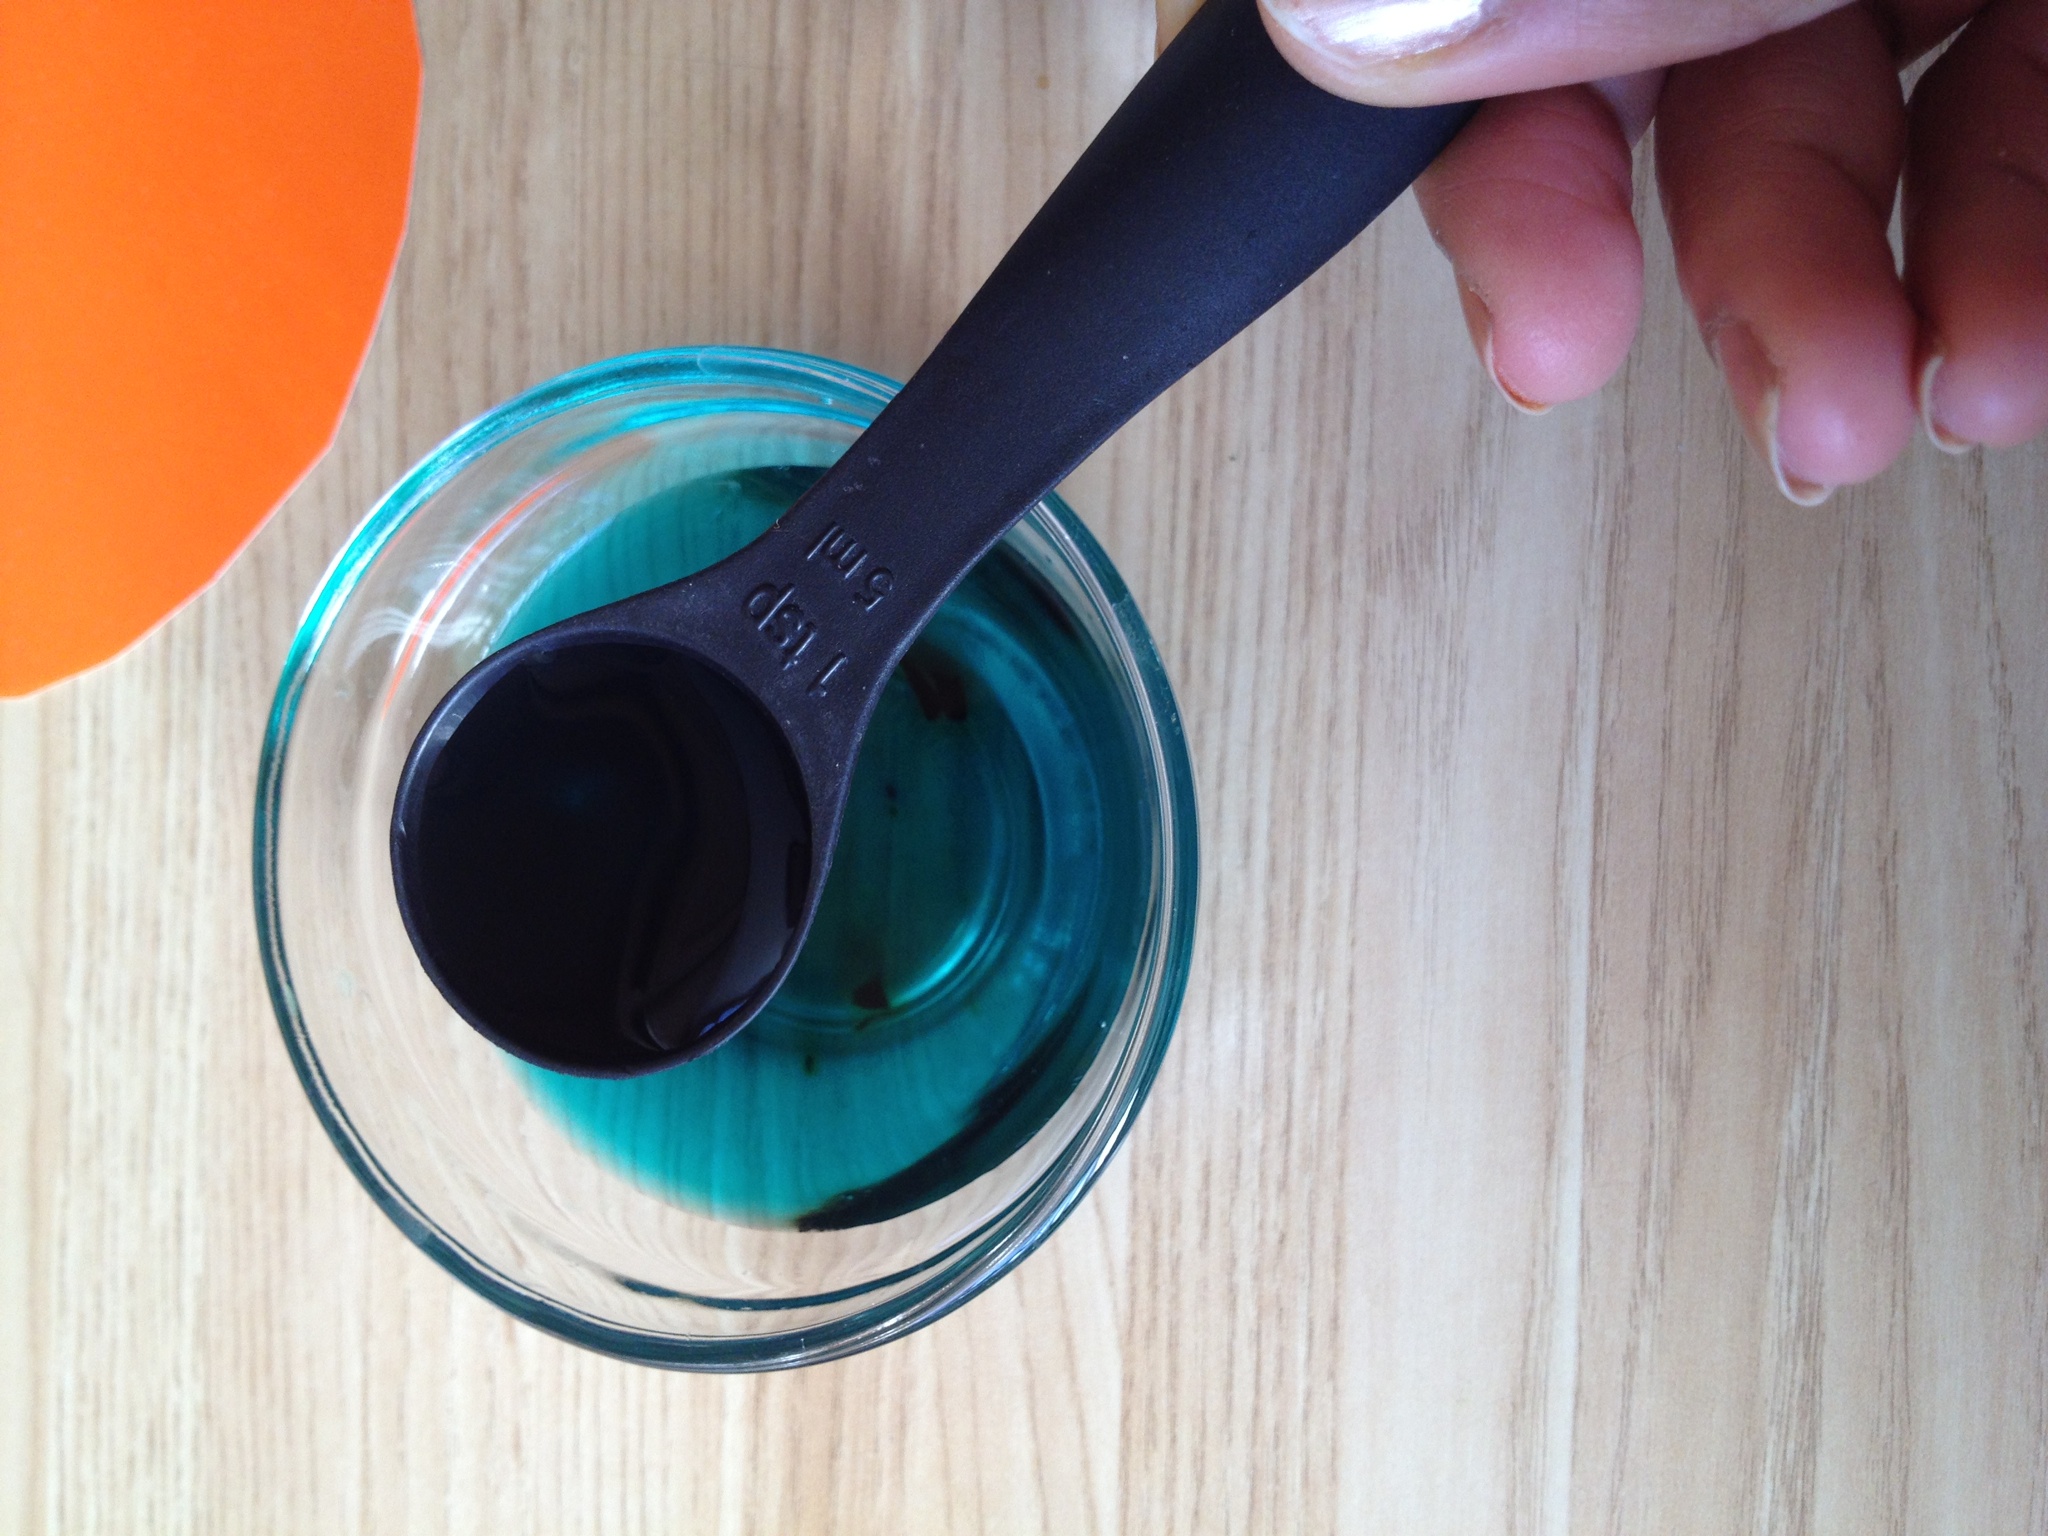
Step 3: For 1 cup of sugar you need 3 tsp of coloring water( do not add 3 tsp at once)

IMG_0782

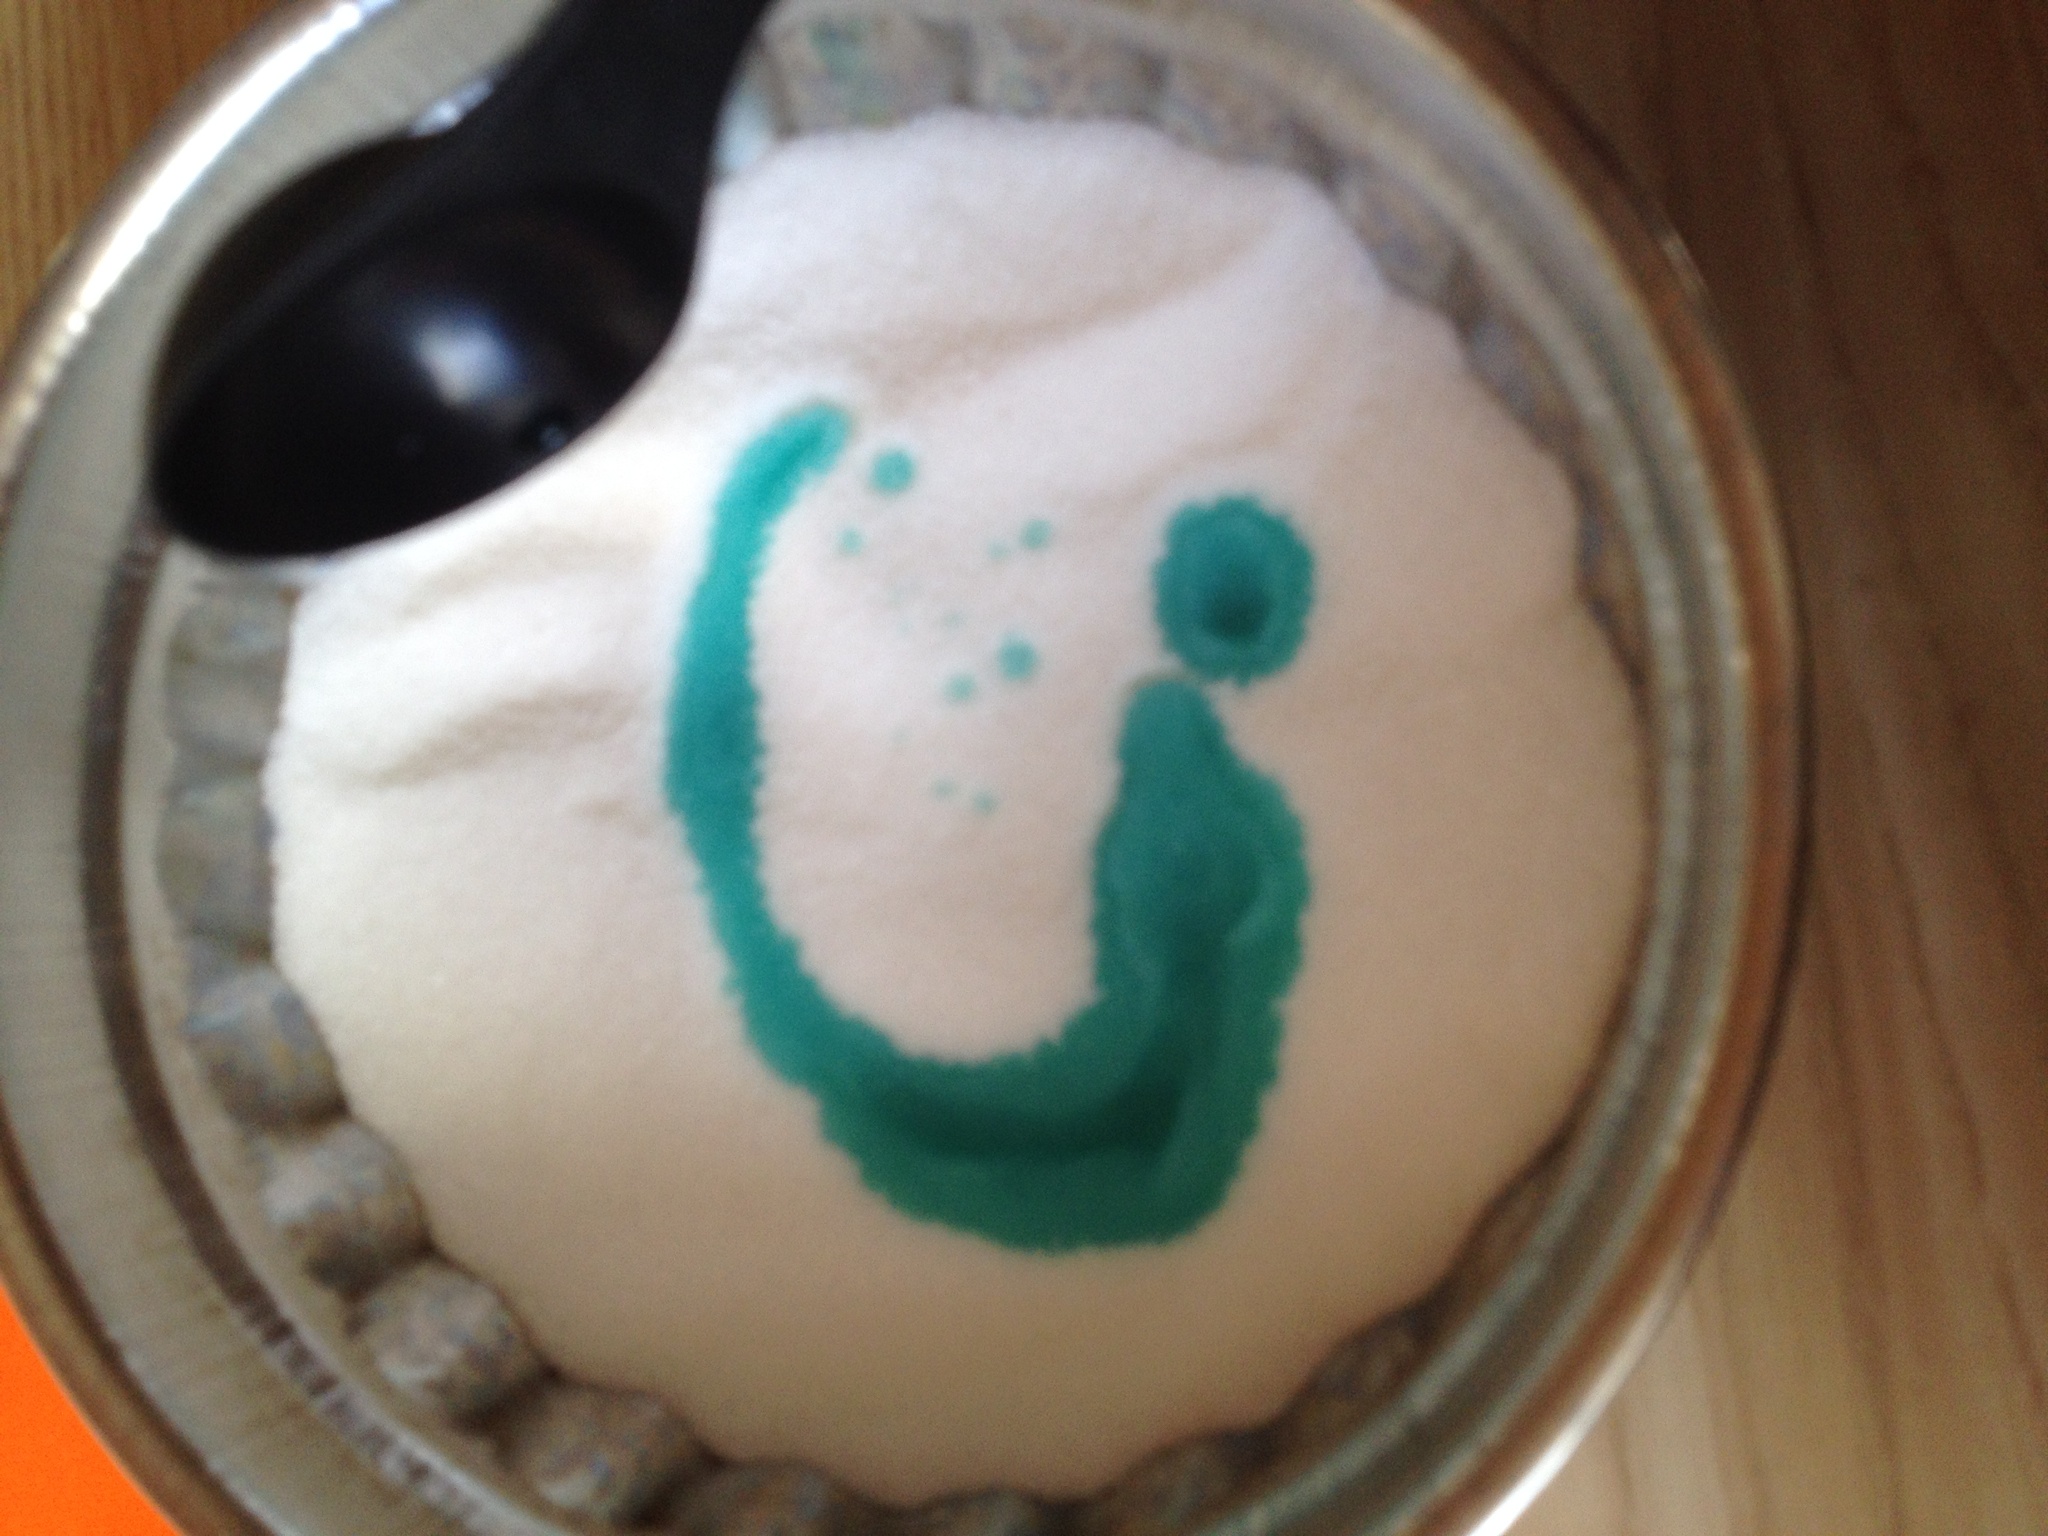
Step 4: Mix it well and stuff in the mold making sure you don’t leave any gaps. Since these molds are see through you can make out if they are not stuffed well.

IMG_0783 IMG_0784

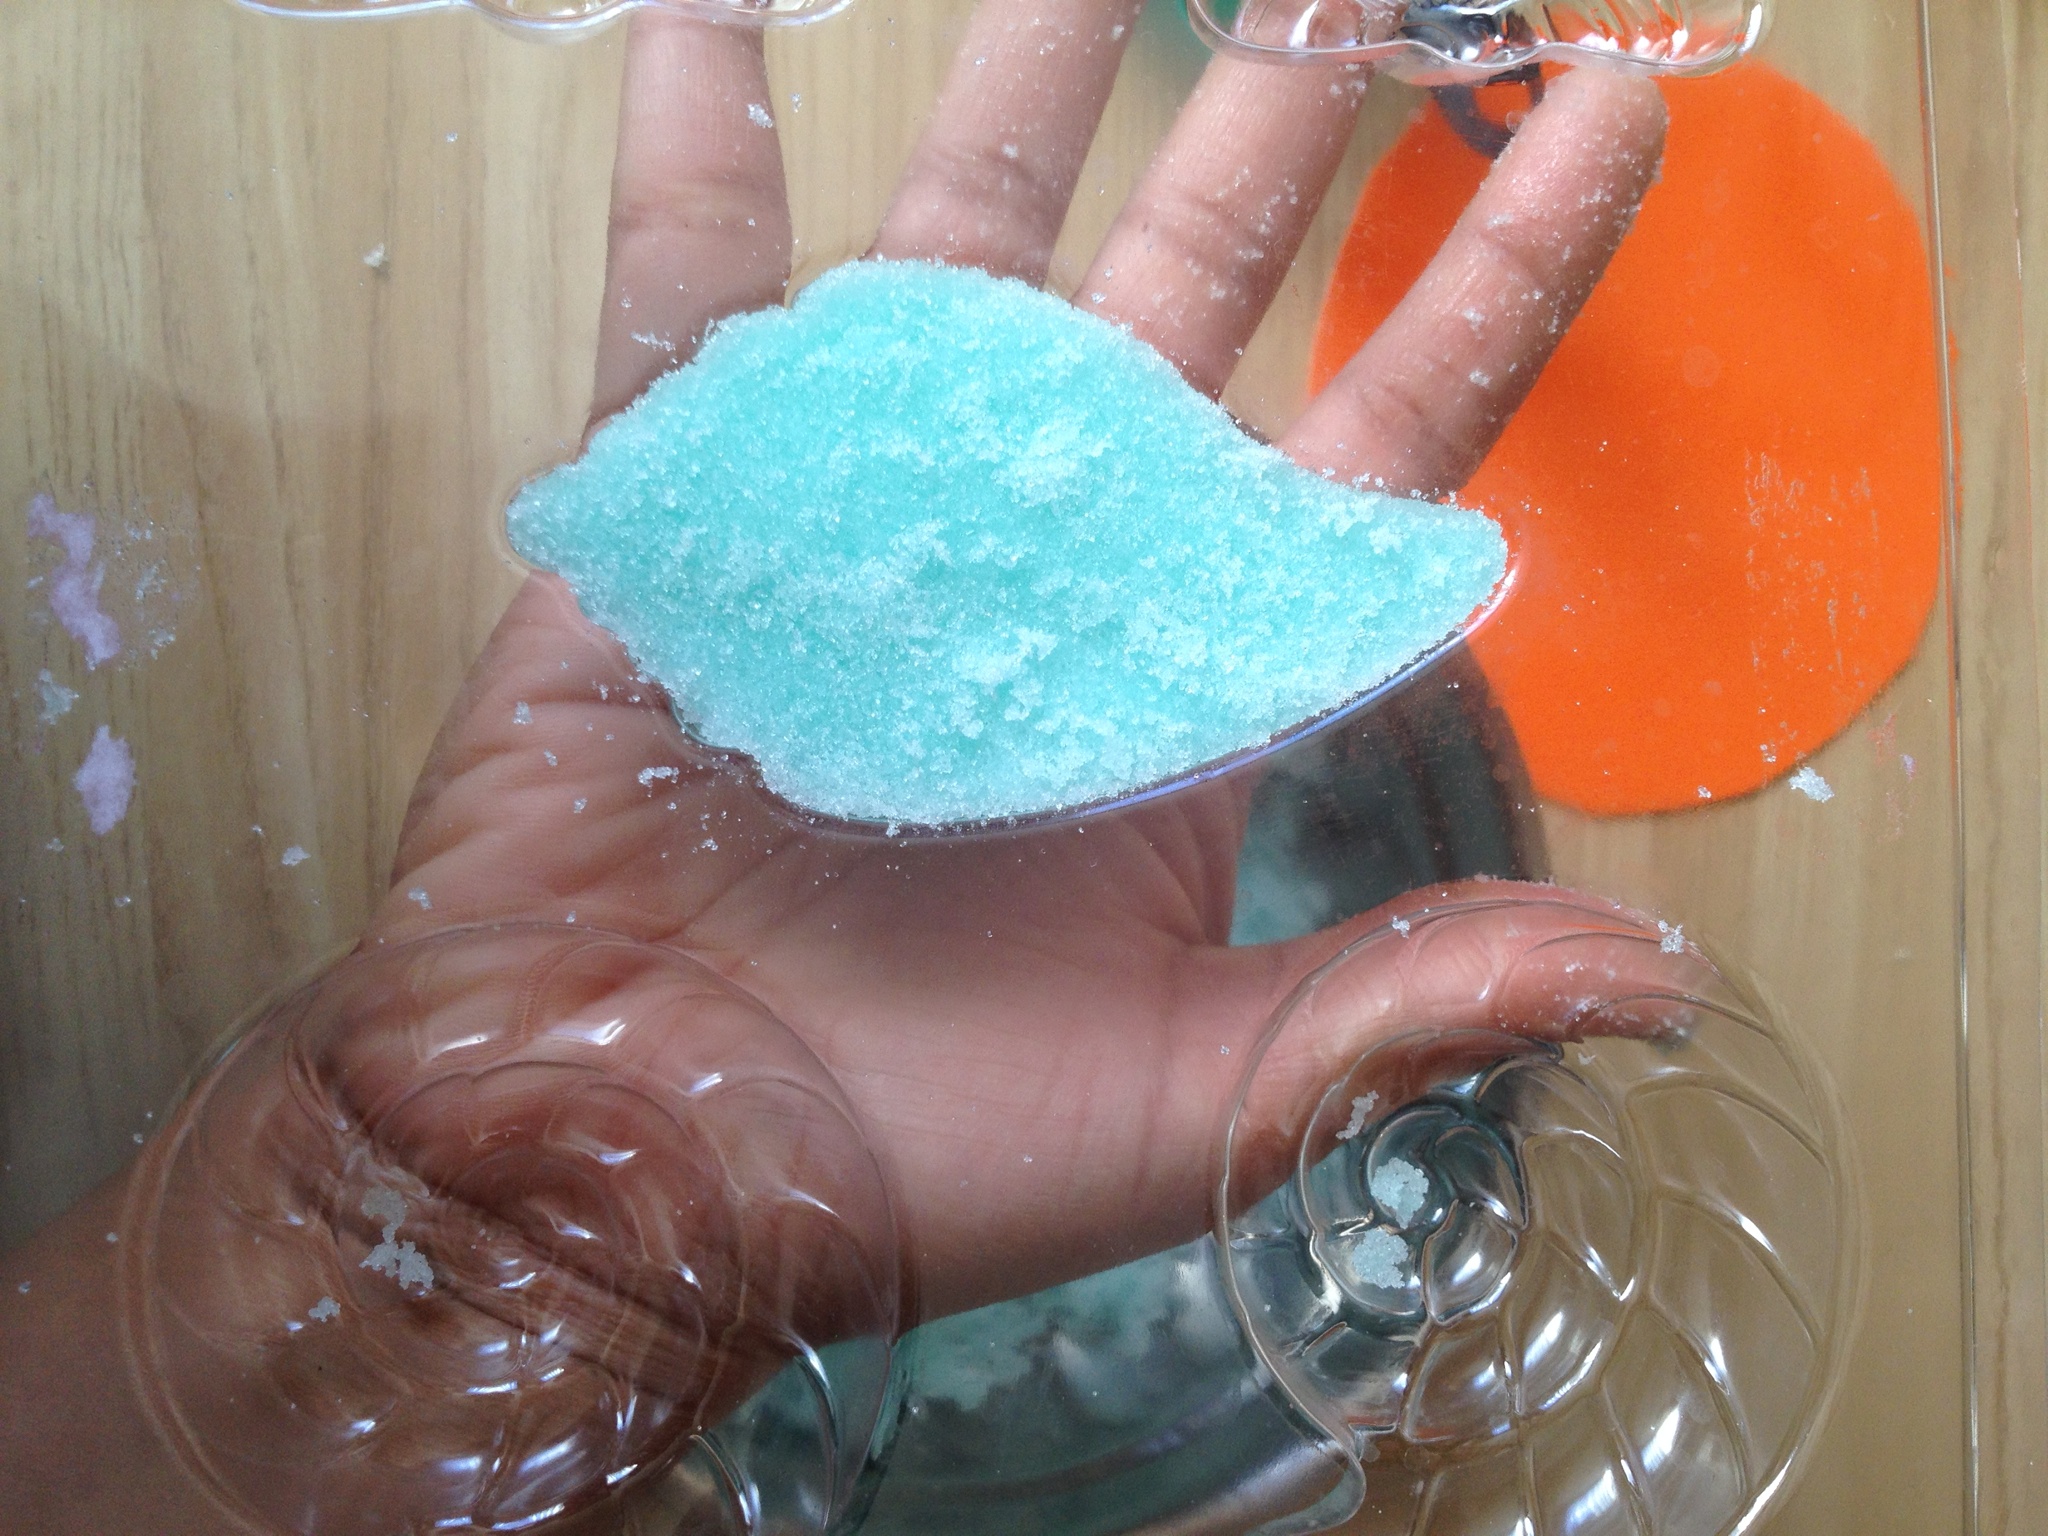
Step 5: Take the paper plate and turn the mold upside down. Leave it to dry(aprox 3 hours)

IMG_0785

Hope you enjoyed the tutorial.

Happy Monday!!

TIPS

Brown sugar with a little yellow food coloring gives a natural shell look.

To use as decorative pieces make it couple of days ahead.

A tiny bit of color is sufficient.

DIY Thoranam/Door Decorative

Thoranam or festoon of fresh mango leaves is an indispensable part in all Hindu festivals and weddings. As a kid, it was my responsibility for most of the festivals to change fresh mango leaves and adorn the front door. It wasn’t fun to string on a thread and hang on to the door frames 😉 Now, I really miss this part of festival preparations.

This is just not mere decoration but the tradition has a scientific reason that the leaf helps in absorbing carbon dioxide and generate fresh oxygen as large crowds gather during festival days.

Some places it is really hard to find mango trees and if you want to keep the tradition and pass on to your kids, here is a D.I.Y Thoranam/Door Decorative 🙂

FullSizeRender

Isn’t that fun project to make and decorate the front door welcoming happiness that the festival brings along 🙂

What you need:

12×18 Foam sheet- 2 mm thickness – Hobbylobby

Large and medium kids craft acrylic stones – Walmart

Puffy Paint – Walmart

Hole Punch

String or scrap yarn

Scissors, Paper and Pen

How you make:

Step 1: Gather your supplies

IMG_7667

Step 2: Draw an image of leaf of your choice on the plain paper as shown below and cut it to use as a template.

IMG_7669

Step 3: Transfer the template on to the foam sheet

IMG_7671

Step 4: Cut the stenciled foam leaves.

IMG_7672

Step 5: Punch a hole both the sides of the leaf like shown below

IMG_7673

Step 6: Drop some puffy paint and press the acrylic gemstone large/medium and let it dry for couple of  hours.

IMG_7674 IMG_7675

Step 7: Once dry string the leaves on to a scrap yarn or cotton string and they are ready to hang.

IMG_7507

Hope you enjoyed the tutorial and Happy Crafting!!

TIPS:

  • It can be fun to involve kids
  • The thinner the foam sheet, the easier it is to work with
  • You can use thick cardboard too

2014 in review

The WordPress.com stats helper monkeys prepared a 2014 annual report for this blog.

Here’s an excerpt:

The concert hall at the Sydney Opera House holds 2,700 people. This blog was viewed about 30,000 times in 2014. If it were a concert at Sydney Opera House, it would take about 11 sold-out performances for that many people to see it.

Click here to see the complete report.

D.I.Y. Wall Decals

Isn’t it cool to makeover a room or space without spending a lot of money?

Specially, moms looking to decorate nurseries and kids’ rooms 🙂 Well, paint is usually our best friend, but for renters like me, how about pretty wall stickers that are easy to create or change instantly.

Wall Decals can be fun and are definitely convenient! But then, sometimes it is hard to find the right thing  or they can be expensive too. So, why not do it yourself? 😉

I recently did for Sankranthi – Bommala Koluvu and it was fun to watch how beautiful they turned out and also easy to peel them off once you are done with the event.

IMG_0587

Awwww!! This is my favorite and when I first saw the picture, couldn’t wait to add to my doll display.

It is a 2 step process and with little supplies you can have your favorite image on the wall 🙂

You need:

Painters masking tape

A3/A4 size laser printout of image

Scissors (fine tip works best) 

Step 1 : Crop image borders neatly with a fine tip scissors.

Step 2 : Cut small strip of painters masking tape and fold like shown below. Folding this way acts as a double sided tape.

IMG_7513

And Tadahhh….. the D.I.Y wall decals are ready!

IMG_0774These work great for birthdays/special occasions or even to change the theme of your kids room.

I hope you enjoyed the tutorial and have a great weekend!!

TIPS:

  • Pick an image that has not many details.
  •  Use only painters masking tape to avoid sticky glue residue on the walls.

Kolu Display Stand

So, this Sankranthi was indeed special with our first Bommala Koluvu/Doll display. Friends throughly enjoyed visiting our home to view the dolls. Few were handmade, few store-bought and many of other dolls are something that I have been collecting from different places I visited.

As most of my toys were small and less in quantity,  it took a while to decide on the size of the display stand. Well, for my husband who is engineer by profession it was a cake walk.

Here is the Kolu stand he built. Top most -3 ft ; Middle – 2ft; last step – 1ft

IMG_0519

So all we did was walked into Lowes Home Improvement store and picked 2(comes in bunch of 4)- 3ft square Baluster and 1 – 24inch wide particleboard. The staff was incredibly helpful and had offered free wood cutting. We had one bunch(4) of 3ft square Baluster cut into 2ft each leaving 1ft piece from each of them and 24 inch board into 3 equal pieces.

So in total you need:

8 inch – 3 boards

3 ft – 4 legs

2 ft – 4 legs

1 ft – 4 legs

IMG_0771 IMG_0772

Tools required are:

IMG_0518

Make an inch markings on the board like shown below and drill holes.

IMG_0513

Drill hole to the legs too and screw them using wood nails.

IMG_0512

And here it is after displaying the dolls 😀

IMG_0594

Isn’t that fun, easy, quick and economical project. With tools on hand the total budget is $30.

Hope you enjoyed the tutorial and if you have the tradition of doll display for Dushera and need a display stand save it 😉

Have a great day!!

TIPS :

  • Before you build the stand, display your dolls on floor randomly  to get an estimate width of the steps.
  • Keep in mind the weight of the dolls you have, as it helps in deciding the material of the board.
  • Make sure you carry tape to the store.

D.I.Y Golu/Bommala Koluvu dolls

Bommai Kolu/Bommala Koluvu is a doll and figurine display festival celebrated during Navarathri/Pongal in Southern India.

On the first day of festival odd numbered Padi (3,5,7,9 or 11) are set up using wooden planks. It is covered with a fabric and then adorned with various deities, dolls and figurines. In the evening women in neighborhood invite each other to visit their homes to view doll displays, they exchange gifts and sweets. Some people take a doll/figurine along, to add it to the display.

So, a friend of mine invited during Navarathri(2014) to view her doll display and that was her first year in the US. She made a simple yet elegant 3 step Kolu and I was really impressed and inspired too.:-)

Since, we have the tradition during Pongal, I couldn’t wait to have one @ our home. I wasn’t actually prepared for it so didn’t have many traditional dolls that are usually displaced. However, after gathering some ideas from internet I was determined to D.I.Y 😉

So, if you are a crafter like me, here is a project that you can easily make for your next Kolu 🙂

IMG_9959

Miniature clay musical instruments!!

These cute looking pieces are pretty easy to make and all you need is some imagination and few supplies.These can be made of natural clay or polymer clay. Here are some pictures.

ImageIMG_6781

For natural clay, let the pieces dry for at least 48 hours, and  polymer clay, bake as per package instructions. Once dry paint the details with a sharpie marker or acrylic paint.

Isn’t that a fun project!! I hope you enjoyed my first post for 2015 😀

Wish you all a happy new year!!

Christmas Outdoor Decor!!

Holiday decorations create a festive atmosphere and make you think that it is holiday everywhere 😉

Well, the outdoor decorations are more fun, like you can add a wreath, some lights and my favorite is having an outdoor christmas tree that brightens the porch.

So, I have been looking for some quick, easy and less expensive ideas on outdoor tree and  found a project on PINTEREST, faux tree made from a tomato cage. Seriously. The cost is way less than average store bought tree!

Here is the video tutorial – https://www.youtube.com/watch?v=VZwKNSwx_WE

I couldn’t wait to get started and gathered tomato cage(already on hand), faux tree garlands(4) and zip ties from 99c store and it costed $5. With some tree ornaments, bow and tree topper on hand I finished setting up my outdoor christmas tree in jus 15 minutes.

IMG_0008

I love it!! However, I skipped using a planter and filled with some faux gifts. To make those, pick couple of gift wrap rolls from dollar tree, wrap empty cardboard boxes and place under the tree.

IMG_0728

And Tadahh!!! These faux gift boxes can be used for indoor or outdoor tree 🙂

IMG_0729Make this cute little christmas outdoor tree and greet your guests!!

Happy Holidays!!

DIY Cardboard Coaster Ornaments!

Is your christmas tree up??

It is and if you are still wondering on what more ornaments can be added to make it look full??

Well, in my christmas series I have an interesting and super quick way to make tree ornaments by yourself using IKEA cardboard coasters 😉

IMG_0706

Isn’t it fun and unique to write some festive messages on these coasters 🙂

So, all you need is 3 items and 3 simple steps 😀

IKEA cardboard coasters – 99c (pack of 10)

Metal Single-hole punch – 99c ( 99 cent store)

Black Marker – on hand

Step 1: Gather your supplies

IMG_7050

Step 2 : Punch a hole

IMG_7051

Step 3 : Write some fun messages

IMG_7052

Well if you are not really keen on DIY, don’t worry you have some cool Santa Claus Coasters @ IKEA that you can use as ornaments.

Happy Holidays!!

Hoot Owl Hoot!!

Call me silly but OWLS are adorable!

If you agree, then this cute project will keep your weekend busy ;-)I love everything that has an owl, so does my sister and few other friends. That will surely make quick and easy christmas gift.

So, I can’t wait to share my trendy owl pendant made of polymer clay. The inspiration is a metal pendant that has some cool colors and the best part is it matches most of my tops/tees.

IMG_0689

 So, lets get started.

Step 1 : Gather your supplies. You need a rolling pin, craft knife, silver and other color of your choice polymer clay, some round tip tools or pens/markers/toothpick and to add some glitter a cheap eyeshadow set.

IMG_6727

Step 2 : Take a piece of silver clay and roll it. Shape it like shown below to form the owl face. Use the marker to stamp eyes and a toothpick and knife to create some design that match the metal piece.

IMG_0690Step 3 : For body pick the color of your choice and roll it flat. Shape it to form the body in 3 pieces. You can do multi color or pick some specific colors to match a particular outfit 🙂 Using a toothpick punch a hole on the head part of the owl to add an eye pin. Also, punch some more to the body. It helps in joining the pieces with jump rings.

IMG_0691

Step 4 : Bake the pieces as per the temperature mentioned on the brand of polymer clay for 20 minutes. Once cool use glue to add the eye pin and join with jump rings. For extra glitter on eyes I used a self adhesive rhinestone available @ craft stores.

And a prettty pendant is ready. It can be a great christmas gift to someone who love jewelry and owl 😉

Enjoy 🙂

DIY Owl Christmas Ornament

Welcome to Christmas/holiday fun series-2 🙂

This year holiday spirits are high, it is just November and I am almost done on DIYing christmas gifts and can’t wait to finish christmas ornaments.

Well, in my search for DIY ornaments, I found really cool way of making owls @ Paging fun mums. It is super easy and using a few common supplies and some polymer clay/air dry clay you have cute little ornaments ready 😀

Do you love our cute little owl family 😉

IMG_0687

So, lets get started. I am sorry to post pics from original site.

There is some issue with my camera SD card and and I lost all the tutorial pics 😦

Owl-step-by-step 2 Owl-step-by-step 4 Owl-step-by-step 3 Owl-step-by-step 5 Owl-step-by-step 6

How you make it:

Step 1 : Simply roll a ball of polymer clay/air dry clay  and cut into a circle using a bowl/mason jar cap.

When I was rolling into circle I added small pieces of contrasting clay for pattern. For grey owl ornament, added white and for red ornament, I added yellow and further red on it and rolled it all together.

Step 2: Fold the sides of the circle to form “wings” and top to form “face” .

Step 3: Stamp eyes using the lid of the marker and some details using toothpick.

Step 4: Bake it for 20 minutes @ 270 F and let it cool.

Step 5: Use metallic markers or acrylic paint to highlight the details.

And HOOT  HOOT HOORAY!!!

IMG_0686

These are also fun to gift to friends and family 😀

Have a great day!!

Cooking Without Limits

Food Photography & Recipes

Travelling Krishnaite

Shekhar Srivastava's Blog

Live-😊-Life..

"It has everything in little as a HAPPY package!!"

DesiCrafts

A blog Dedicated to Indian handicrafts, Fabrics and Supplies

Fulgorine

My adventures with art and polymer clay

The Beaded Bazaar

Polymer clay creations

Learn Polymer Clay

Inspiring you to explore your creativity and get down to work! A great collection of Free Polymer Clay tutorials

Wear the Ducky Tie

A Sewing Blog

sewmanju

Make your own style

SEW KATIE DID

because thread is the best glue.

The Crafty Coup

Finally, you're here! Let's make something!

The Daily Post

The Art and Craft of Blogging

WordPress.com News

The latest news on WordPress.com and the WordPress community.